
Seeing bubbles on your plaster walls after painting can be a real bummer. It’s not just a cosmetic issue; it usually means there’s something else going on underneath. Often, it’s moisture causing the problem, and if you don’t fix that first, the bubbles will just keep coming back. This article will help you figure out why your paint is bubbling on plaster walls and how to sort it out for good.
Key Takeaways
Paint bubbling on plaster walls is typically a sign of moisture issues, not just a paint problem. Common causes include rising damp, leaks, or poor ventilation.
Before fixing the bubbles, you must find and address the source of the dampness. This might involve checking drainage, ventilation, or repairing leaks.
To repair, scrape away the damaged plaster and paint until you reach solid material. Clean the area thoroughly and let it dry completely.
Apply a primer to seal the surface, then fill and level the area with jointing compound or plaster. Sand smooth once dry.
Apply a second primer coat before repainting to prevent future issues, and maintain good ventilation and drainage to manage moisture long-term.
Understanding Paint Bubbling on Plaster Walls
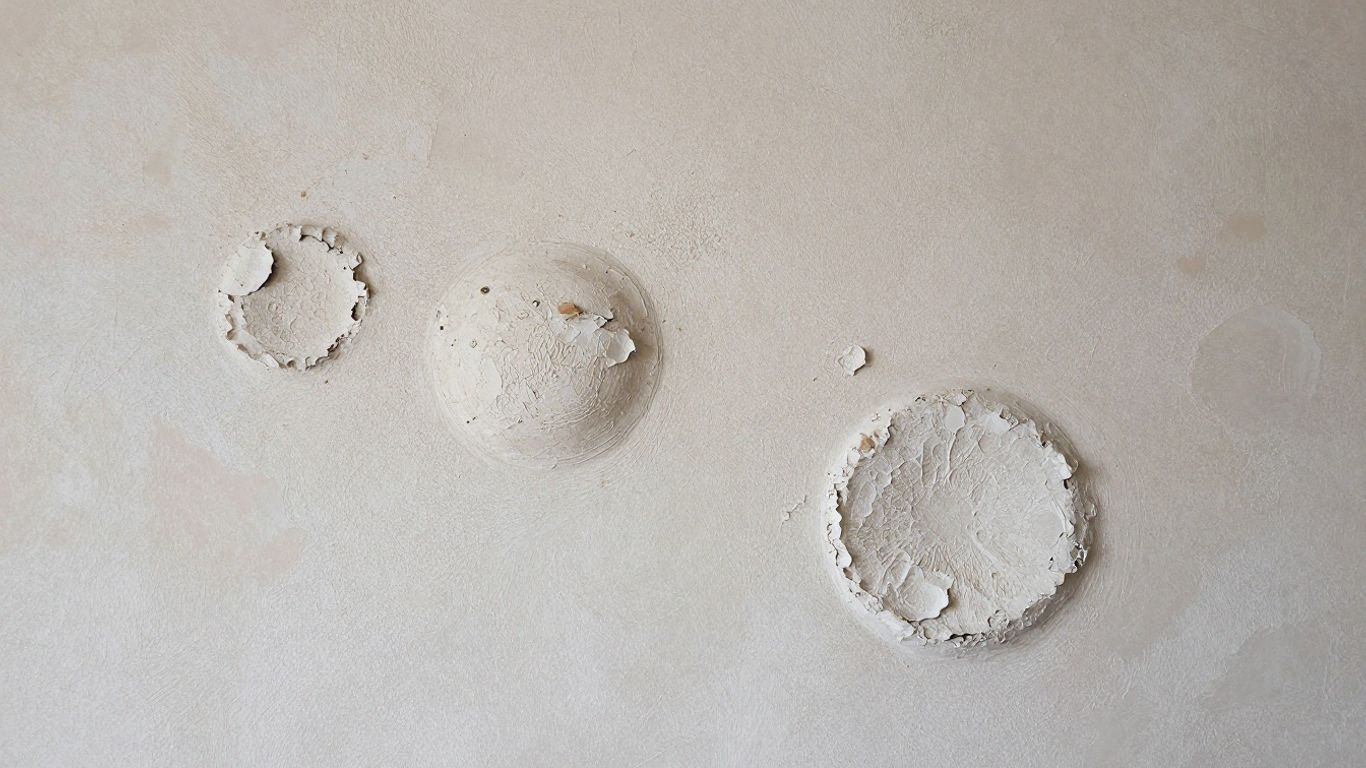
Seeing little bumps or blisters appear on your painted plaster walls can be pretty unsettling. It’s not just an eyesore; it often signals a deeper issue lurking beneath the surface. While it might look like just a paint problem, with plaster walls, it’s usually a sign that moisture is involved. The key difference between simple paint blistering and a plaster issue is the underlying cause.
Distinguishing Bubbling Plaster from Blistering Paint
It’s easy to mix up paint blistering with bubbling plaster, but they’re not quite the same. Blistering paint typically happens when the paint itself loses its grip on the surface it’s applied to. This could be due to painting over a dirty or greasy surface, using incompatible paint types (like oil and water-based paints next to each other), or even painting in humid conditions or direct sunlight, which makes the paint dry too fast. The problem here is usually with the paint layer itself, not the wall structure. You can often fix this by scraping away the loose paint and repainting after proper surface prep. You can find more on general paint blistering causes.
On the other hand, when plaster bubbles, it’s almost always a sign of moisture getting trapped behind the paint and pushing it outwards. This moisture can make the plaster feel soft or even crumbly underneath. If you poke at a bubbled plaster area and it feels spongy or starts to break apart, you’ve likely got a moisture problem that needs more than just a coat of paint.
The Role of Moisture in Plaster Issues
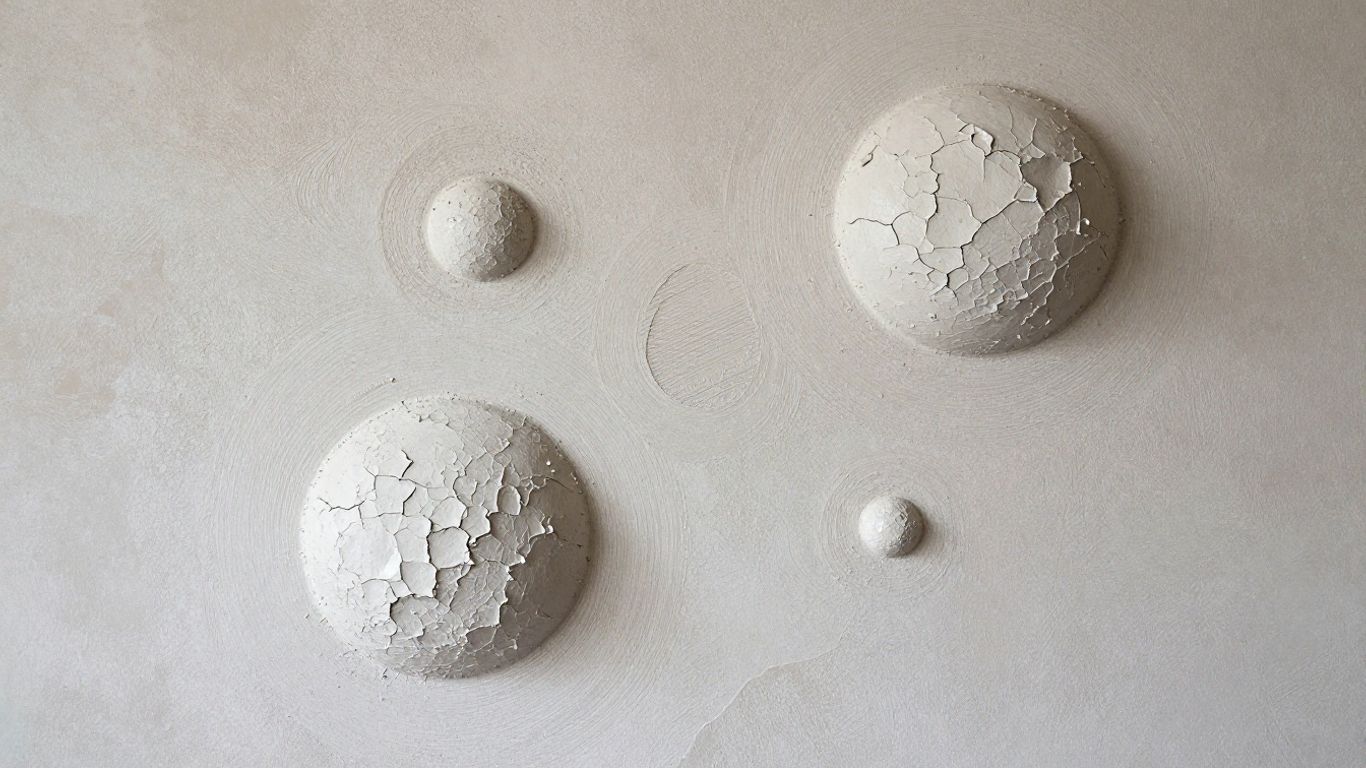
Moisture is the main culprit behind most bubbling plaster problems. Plaster, much like drywall, can absorb water. When this happens, the moisture gets trapped between the plaster and the paint layer. As the water tries to escape or expands, it pushes the paint away from the plaster, creating those tell-tale bubbles. This trapped moisture can come from various sources, and ignoring it means the problem will likely return, no matter how well you repair the surface. Paint bubbling on walls is almost always caused by moisture.
Common Causes of Interior Wall Bubbling
So, where does this moisture come from? Several things can lead to dampness in your plaster walls:
Rising Damp: Moisture from the ground can wick up through the base of your walls, especially in older homes without proper damp-proof courses.
Leaks: Plumbing leaks within walls, roof leaks, or even water seeping in from outside can saturate the plaster.
Condensation: Poor ventilation in areas like bathrooms or kitchens can lead to moisture buildup on walls.
External Water Ingress: Cracks in exterior walls, faulty gutters, or poor drainage around the foundation can allow water to penetrate.
Identifying the exact source of the moisture is the most important first step before you even think about fixing the bubbles. Without addressing the root cause, any repair work will be temporary.
Understanding these distinctions is key to knowing whether you’re dealing with a simple paint failure or a more serious structural issue related to dampness in your plaster walls.
Investigating the Root Causes of Dampness
So, you’ve noticed some bubbling paint on your plaster walls, and you’re wondering what’s going on. More often than not, this isn’t just a paint problem; it’s a sign that moisture is getting into your walls. Before you even think about patching things up, we need to figure out why the dampness is there in the first place. If you don’t fix the source, the bubbling will just come back, and it’ll be even more annoying.
Rising Damp and Moisture Wicking
One common culprit is what we call rising damp. This happens when moisture from the ground below your house starts to travel upwards through the tiny pores in your plaster and brickwork, kind of like water soaking into a sponge. It’s a slow process, but over time, it can definitely cause problems. You might notice it more at the bottom of your walls. Sometimes, it’s not just rising damp; it could be moisture wicking up from poorly drained soil right next to your foundation. Making sure the ground slopes away from your house is a simple but effective step.
Leaks and Water Ingress
Leaks are another big one. Think about your roof – are there any missing shingles or damaged flashing around chimneys or vents? Water can find its way in through tiny cracks. It’s also worth checking around windows and door frames, especially if they’re old. Plumbing leaks inside the walls, though less common for exterior bubbling, can also be a source of moisture. Sometimes, the exterior of the house itself is the issue, with damaged mortar or brick allowing rain to seep in. Addressing any external issues is key to a lasting fix.
Inadequate Ventilation and Drainage
Don’t underestimate the power of good airflow and drainage. If your home doesn’t have enough ventilation, moisture from everyday activities like cooking and showering can build up inside. This condensation can then settle on walls and cause issues. Similarly, poor drainage around your property means water can sit near your foundation, increasing the chances of it being absorbed into the walls. Checking that vents under floorboards are clear is also important, as this helps moisture evaporate from the soil beneath.
Identifying the exact source of moisture is the most important step. Without knowing what’s causing the damp, any repairs you make to the paint and plaster will only be temporary. It’s like putting a bandage on a broken bone – it doesn’t fix the underlying issue.
Here’s a quick rundown of things to look for:
Roof and Chimney: Check for damaged tiles, flashing, or deteriorating mortar.
Exterior Walls: Inspect brickwork and mortar for cracks or missing sections.
Windows and Doors: Look for gaps or sealant failure.
Ground Level: Ensure soil slopes away from the foundation and gutters are clear.
Interior Plumbing: Listen for any unusual sounds or check for visible leaks.
If you’re unsure about any of these checks, especially if you suspect issues with the exterior brick or mortar, it might be best to get a professional opinion. They can help pinpoint the exact cause of the dampness and recommend the right course of action.
Preparing Plaster Walls for Repair
Alright, so you’ve figured out why your plaster walls are acting up – probably some moisture issue that needs sorting first. Before we even think about patching things up, we’ve got to get the area prepped. This is a pretty important step, honestly. If you skip this, you’re just setting yourself up for more trouble down the road.
Removing Damaged Plaster and Paint
First things first, we need to get rid of all the loose, crumbly stuff. Grab a putty knife or a scraper. You want to gently chip away at the bubbled paint and any plaster that’s soft or coming away from the wall. Start in the middle of the bubbled spot and work your way out to the edges. Keep going until you hit solid, firm plaster. It might take a bit of patience, but you need a stable base to work with. Don’t go too crazy and dig into the solid plaster, though; just remove what’s clearly damaged. This is where you might need to carefully scrape away loose material.
Thoroughly Cleaning the Wall Surface
Once all the loose bits are gone, it’s time for a good clean. Use a stiff nylon brush to sweep away any dust and debris left from scraping. After that, get a damp sponge and some water – maybe a tiny bit of mild soap if it’s really grimy – and wipe down the area. You’re trying to get rid of any remaining dust or any chalky residue, especially if it’s lime plaster. You want a clean surface so whatever you put on next will stick properly. This step is key for good paint adhesion.
Ensuring the Wall is Completely Dry
This is a big one. You absolutely cannot move on to repairs if the wall is still damp. Moisture trapped behind new plaster or paint is a recipe for disaster, leading to more bubbling. Let the wall air dry completely. Depending on how damp it got and how humid it is in your house, this could take a day or even longer. You can speed things up a bit with a fan or a dehumidifier, but don’t rush it. A moisture meter can be super helpful here if you have one, just to be sure.
It’s tempting to just slap some filler on and get it painted, but seriously, wait until it’s bone dry. Trust me on this one.
Here’s a quick rundown of what to expect for drying times:
Air Drying: Can take 24-72 hours depending on conditions.
Fan Assistance: May reduce drying time by 25-50%.
Dehumidifier: Can significantly speed up the process, especially in humid environments.
Once you’re absolutely certain the wall is dry, you’re ready for the next stage: patching it up.
Repairing Bubbled Plaster Sections
Alright, so you’ve figured out why your plaster walls are acting up – probably some dampness issue that you’ve hopefully sorted out. Now comes the part where we actually fix those bubbled-up spots. It’s not super complicated, but it does take a bit of patience, especially if you want it to look good.
Removing Damaged Plaster and Paint
First things first, you gotta get rid of all the loose, crumbly stuff. Grab a putty knife – a stiff one works best. Start in the middle of the bubbled area and gently scrape away the paint and any plaster that’s not firmly attached. You want to keep going until you hit solid, undamaged plaster. Don’t go crazy and dig too deep; just focus on removing what’s loose. It might feel a bit messy, but this step is key to making sure your repair actually sticks.
Thoroughly Cleaning the Wall Surface
Once all the flaky bits are gone, it’s time to clean up. Use a stiff nylon brush to sweep away any dust and debris. Seriously, get it all off. Then, you can use a damp sponge with a little water to wipe down the area, especially if there are any chalky lime deposits. The goal here is a clean, smooth surface. It’s super important that the wall is completely dry before you move on to the next step. Any leftover moisture will just cause problems down the line.
Applying Primer to Seal the Surface
Now that your wall is clean and dry, it’s time to seal it up. Apply a good quality primer over the repaired area and a little bit onto the surrounding paint. This primer acts like a barrier, stopping any lingering moisture or stains from showing through your new paint job. It also gives your repair compound something solid to grip onto. Depending on the type of primer you use, it might take a few hours or even a full day to dry completely. Just let it do its thing.
Filling and Leveling with Jointing Compound or Plaster
This is where you actually fill in the holes and smooth things out. For smaller areas, a good jointing compound works great. If you’ve got a larger patch, you might want to use actual plaster. Apply it in thin layers, usually no more than a quarter-inch thick at a time. Make sure to feather the edges out so they blend nicely with the existing wall. You might need a couple of coats, letting each one dry before applying the next. Patience is your friend here.
Sanding for a Smooth Finish
After your jointing compound or plaster has dried completely, it’s time for some sanding. Use a fine-grit sandpaper to smooth out the repaired area. You want it to be perfectly level with the rest of the wall. Wipe away the dust when you’re done. This smooth surface is what you’ll need for the next steps.
Remember, plaster repair isn’t quite like drywall. It takes a bit more care and attention to get it right, especially if you’re dealing with older homes. Don’t rush the drying times between steps; it really makes a difference in the final outcome.
If you’re dealing with cracks in the plaster itself, you might want to look into using fiberglass mesh tape to reinforce the area before applying the joint compound. It adds a bit of extra strength.
Finishing and Preventing Future Bubbling
So, you’ve gone through the steps, fixed the bubbled plaster, and prepped the wall. Now comes the part where we make it look good again and, hopefully, stop this whole bubbling mess from happening again. It’s all about the finishing touches and a bit of ongoing care.
Applying a Second Primer Coat
After you’ve repaired the damaged areas and applied the first coat of primer, it’s a good idea to apply a second coat. This might seem like overkill, but it really helps seal everything in. The primer acts as a barrier, stopping any lingering moisture or contaminants from trying to escape through your new paint. It also gives you a nice, uniform surface for the paint to stick to. Make sure this coat dries completely according to the manufacturer’s instructions before moving on. Proper surface preparation, including priming, is key to a lasting finish.
Repainting for a Fresh Look
Once the second primer coat is dry, you’re ready for the main event: painting. Apply your chosen paint in thin, even coats. Thick layers can trap moisture, which is exactly what we’re trying to avoid. It’s better to do two or three thin coats than one thick one. Allow adequate drying time between each coat. This helps the paint adhere properly and prevents issues down the line. The goal is a smooth, even finish that blends seamlessly with the rest of your wall.
Ongoing Moisture Management Strategies
Preventing future bubbling isn’t just about the painting process itself; it’s also about managing the environment of your home. Here are a few things to keep in mind:
Ventilation is key: Especially in areas like bathrooms and kitchens, make sure you have good ventilation. Use exhaust fans when cooking or showering to pull moisture out of the air. Consider installing them if you don’t have them.
Check for leaks regularly: Keep an eye out for any signs of water leaks, whether it’s from plumbing, the roof, or even condensation. Addressing small leaks quickly can prevent major plaster problems later.
Control humidity levels: High humidity can be a real problem for plaster walls. Using a dehumidifier in damp areas can make a big difference. Aim for a humidity level between 30-50% if possible.
Dealing with plaster issues can be frustrating, but by taking the right steps during repair and being mindful of moisture control afterward, you can keep your walls looking great for years to come. It’s about being proactive and understanding what your walls need to stay healthy.
Remember, if you’re dealing with persistent moisture problems or extensive damage, it might be worth consulting a professional. They can help identify the root cause and offer more specialized solutions. For minor touch-ups and repainting, following these steps should give you a solid, long-lasting result. Applying primer before painting is a step you really don’t want to skip. It makes a world of difference in how well your paint adheres and lasts. And always remember to allow adequate drying time between coats – patience here pays off big time.
Wrapping It Up
So, bubbling paint on your plaster walls isn’t just a cosmetic issue; it’s usually a sign of something deeper going on, most often moisture. Tackling the root cause, like fixing leaks or improving ventilation, is the first and most important step. Once that’s sorted, you can get to work scraping away the bad stuff, cleaning up, sealing, and patching the wall. It might seem like a lot, but by addressing the problem head-on and doing the prep work right, you can get your walls looking smooth and fresh again. Just remember to keep an eye on things and maintain good airflow and drainage to stop this from happening again.
Frequently Asked Questions
What’s the main reason paint bubbles on my plaster walls?
Usually, it’s because there’s moisture trapped behind the paint. This dampness can come from leaks, water seeping up from the ground, or even not enough fresh air moving around. If you don’t fix the moisture problem first, the paint will keep bubbling up.
How can I tell if it’s just paint bubbling or a bigger plaster problem?
Paint bubbling is often just the top layer of paint peeling. But if the plaster underneath feels soft, crumbles, or is bulging, it’s a sign of dampness affecting the plaster itself. You’ll need to check the plaster by gently scraping away the paint.
What steps should I take before I start fixing the bubbles?
First, you absolutely must find out where the moisture is coming from and stop it. This could mean fixing leaky pipes, improving how water drains away from your house, or making sure your home has good airflow. Once the damp source is gone, you can then prepare the wall.
How do I prepare the wall after finding the moisture source?
You need to carefully scrape off all the loose, bubbled paint and plaster until you reach solid material. Then, clean the area really well with a brush and a damp sponge to get rid of any dust or leftover plaster bits. Make sure the wall is completely dry before moving on.
What do I use to fill in the damaged plaster areas?
For small spots, a jointing compound works well. If you have a larger area to fix, you’ll need to use plaster. Apply it in thin layers, letting each one dry, and smooth the edges so it blends in with the rest of the wall. Sand it down once it’s fully dry for a smooth surface.
How can I stop the paint from bubbling again in the future?
After repairing and sanding, apply a good quality primer, especially an oil-based one, to seal everything. Then repaint. The most important thing is to keep managing moisture in your home by ensuring good drainage, proper ventilation, and checking that your home’s damp-proofing is working correctly.