
Seeing cracks in your ceiling plaster can be a bit unsettling, right? Especially here in Bristol, where older homes often have unique quirks. You might notice these lines appearing and wonder what’s going on. Is it just a minor cosmetic issue, or is something more serious happening with your home? We’re going to break down the common reasons for ceiling cracking plastering Bristol homeowners face, helping you figure out if it’s time to worry or just grab some filler.
Key Takeaways
Settlement, moisture, and vibrations are common culprits behind ceiling cracks in Bristol homes.
Different crack types, from tiny hairline fractures to larger gaps, tell different stories about the plaster’s condition.
Mistakes during plastering, like poor surface prep or skipping reinforcement tape, can lead to future cracking.
Environmental factors such as heavy rain or nearby trees can also stress plasterwork.
Knowing when a crack is serious involves checking its size and pattern, and seeking professional advice when needed.
Understanding Common Causes of Ceiling Cracking Plastering in Bristol Homes
It can be a bit unsettling to see cracks appearing on your ceiling, right? Especially in a place like Bristol, where many homes have a bit of history, plaster issues can pop up. But don’t panic just yet. Most of the time, these cracks are just the plaster doing its thing, reacting to the world around it.
Settlement and Structural Movement
Think of your house as a living thing. Over time, especially with older properties or new extensions, the ground underneath can shift a little. This settling process, which can go on for a year or three, puts a bit of stress on the building’s structure. The plaster, being the outer skin, often shows these tiny movements as cracks. It’s like a faint map of the house’s subtle shifts.
Humidity and Temperature Changes
Bristol weather can be a bit unpredictable, can’t it? All those ups and downs in temperature and moisture levels mean your home’s plaster is constantly expanding and contracting. This natural movement, day in and day out, can eventually lead to fine cracks forming. It’s especially noticeable if you have periods of very dry air followed by dampness, or vice versa.
Vibration and Nearby Construction
Living in a city like Bristol means there’s always something going on. Heavy traffic on busy roads can send subtle vibrations through your home. Even more so if there’s any nearby construction work. These constant tremors, even if you can’t feel them directly, can put stress on plasterwork, leading to cracks, particularly around areas like window frames or where different materials meet.
Identifying Types of Plaster Cracks on Ceilings and Walls
So, you’ve spotted a crack in your ceiling or wall plaster. Don’t panic just yet! Not all cracks are created equal, and understanding what you’re looking at can save you a lot of worry and unnecessary expense. Let’s break down the common types you might find.
Hairline Versus Major Cracks
This is probably the most obvious distinction. Hairline cracks are super thin, almost like a strand of hair, and often run in straight or slightly jagged lines. They’re usually superficial and can pop up due to minor plaster shrinkage as it dries or slight temperature fluctuations. These are typically the easiest to fix. On the other hand, major cracks are wider, deeper, and can look more alarming. They might be jagged, stair-stepped, or even show a significant gap. These often point to more serious underlying issues.
Dry Shrinkage and De-Bonding Issues
Plaster, like many building materials, shrinks a bit as it dries. This is called dry shrinkage. If the plaster dries too quickly or wasn’t applied correctly, these small movements can create fine cracks. Sometimes, you’ll see cracks that look like they’re just sitting on the surface, not really going deep into the plaster. This can happen if the plaster didn’t bond properly to the surface underneath, maybe because the surface wasn’t prepared right or a bonding agent wasn’t used. This is often called de-bonding.
Grinning and Corner Stress
Ever seen cracks that seem to ‘grin’ at you, especially around openings like doors or windows? These are often caused by stress. The plaster might be pulling away from the edges of these openings. Corner cracks are another common headache. They can appear where two walls meet or where a wall meets a ceiling. These often happen because of movement or stress concentrated in these areas. Sometimes, they’re just a sign of the building settling, but they can also indicate bigger problems if they’re widening.
Plastering Preparation Mistakes That Lead to Ceiling Cracking
Sometimes, the cracks you see aren’t about the house settling or the weather. Often, they’re a direct result of how the plaster was put up in the first place. Getting the prep work wrong is a super common reason for cracks to show up later, especially in older homes here in Bristol where plasterwork might have been done a while ago.
Inadequate Surface Bonding
Think of bonding as the glue that holds the plaster to your ceiling. If the surface wasn’t properly prepared before plastering, the bond can be weak. This means the plaster might not stick as well as it should. Sometimes, a special primer, like a PVA or a similar bonding agent, is needed, especially on tricky surfaces. Skipping this step is a big mistake. Without a good bond, the plaster is basically just sitting there, waiting for any little movement or change to cause it to pull away and crack.
Skipping Scrim Tape on Joints
When you have different sections of plasterboard meeting, or where plaster meets other materials like wood, these are called joints. These areas are naturally weak points. To stop cracks from forming along these lines, plasterers use scrim tape – a kind of mesh tape. This tape gets embedded in the plaster, giving it strength and flexibility. If this tape is missed, or if the wrong kind is used, you’re almost guaranteed to see cracks appear along those joints as the building breathes and moves.
Incorrect Plaster Mixing or Application
Getting the plaster mix just right is an art. Too much water, and it’s weak and prone to shrinking too much. Too little water, and it’s hard to work with and might not cure properly. Even the way it’s applied matters. If it’s put on too thick in some spots and too thin in others, it’ll dry unevenly. This uneven drying is a major cause of stress within the plaster, leading to cracks. It’s not just about slapping it on; it’s about consistency and technique.
Here’s a quick look at what can go wrong:
Mixing Issues: Inconsistent texture, wrong water-to-plaster ratio.
Application Problems: Uneven thickness, applying too fast or too slow.
Drying Too Quickly: Drafts, high heat, or direct sun can cause rapid surface drying, leading to stress.
The plaster needs time to cure properly. Rushing the process or using the wrong techniques during application can set up the plaster for failure down the line. It’s like trying to build a strong wall with weak bricks – it’s just not going to last.
It’s easy to see how these preparation errors can lead to those annoying cracks appearing on your ceiling, sometimes even months after the work was done.
Environmental Factors Impacting Plaster Stability in Bristol
Even the best plaster job can run into trouble if the environment isn’t playing nice. Bristol’s climate and the way we heat our homes can really affect how plaster holds up over time. It’s not just about the plaster itself; it’s about how it interacts with its surroundings.
Rainfall and Moisture Exposure
Bristol gets its fair share of rain, and persistent dampness can be a real enemy to plaster. When walls and ceilings absorb too much moisture, they can swell. As they dry out, they shrink. This constant cycle of expansion and contraction puts stress on the plaster, leading to cracks. It’s especially a problem in older homes where the building materials might not be as forgiving. Proper ventilation and addressing any leaks promptly are key. For traditional buildings, using breathable plasters and lime mortars can be a smart move, as these materials are better equipped to handle moisture fluctuations. This approach is particularly relevant for older homes, with independent surveys conducted in areas like Bristol, Somerset, Cardiff, and Newport highlighting their effectiveness breathable plasters and lime mortars.
Room Heating and Rapid Drying
We all like a warm home, especially during those chilly Bristol winters, but cranking up the heating too high, too fast, can cause issues. Plaster needs time to dry and cure properly. If the heat is too intense or the room dries out too quickly, the surface can harden before the deeper layers have set. This uneven drying is a common culprit for new cracks appearing. It’s a bit like baking a cake – if the oven is too hot, the outside burns before the inside is cooked. Letting plaster dry naturally, or using gentle, consistent heating, is much better for its long-term stability.
Impact of Nearby Trees and Roots
Sometimes, the problem isn’t even inside your house. If you have large trees close to your property, their roots can sometimes cause subtle ground movement. This movement can transfer up through the building’s foundations and structure, eventually showing up as cracks in your plasterwork. It’s not always obvious, and it’s a slow process, but it’s something to consider, especially if you notice cracks appearing in lower sections of walls or near the foundation.
The constant battle between moisture and dryness, coupled with temperature swings, creates a challenging environment for plaster. It’s a material that needs stability to perform at its best. When these external factors are ignored, cracks are often the first sign of distress.
Here’s a quick look at how different environmental factors can contribute:
Moisture: Persistent damp, leaks, and high humidity weaken plaster.
Temperature: Rapid heating or cooling causes expansion and contraction.
Drying Speed: Plaster drying too fast is a major cause of surface cracking.
Structural Stress: Ground movement from external sources like tree roots can impact plaster.
How to Assess When Cracks Signal a Serious Problem
So, you’ve spotted a crack in your ceiling. Happens to the best of us, right? But when does a little line turn into a big worry? It’s not always easy to tell, but there are definitely some signs to look out for that suggest you need to call in the pros.
Measuring Crack Severity by Width and Pattern
First off, grab a tape measure. The width of a crack is a pretty good indicator of its seriousness. Hairline cracks, usually under 1mm, are often just cosmetic and can be patched up easily. Cracks between 1mm and 5mm might need a bit of filler, but they’re generally manageable. Things start getting more serious when cracks hit the 5mm to 15mm range. These might need professional attention.
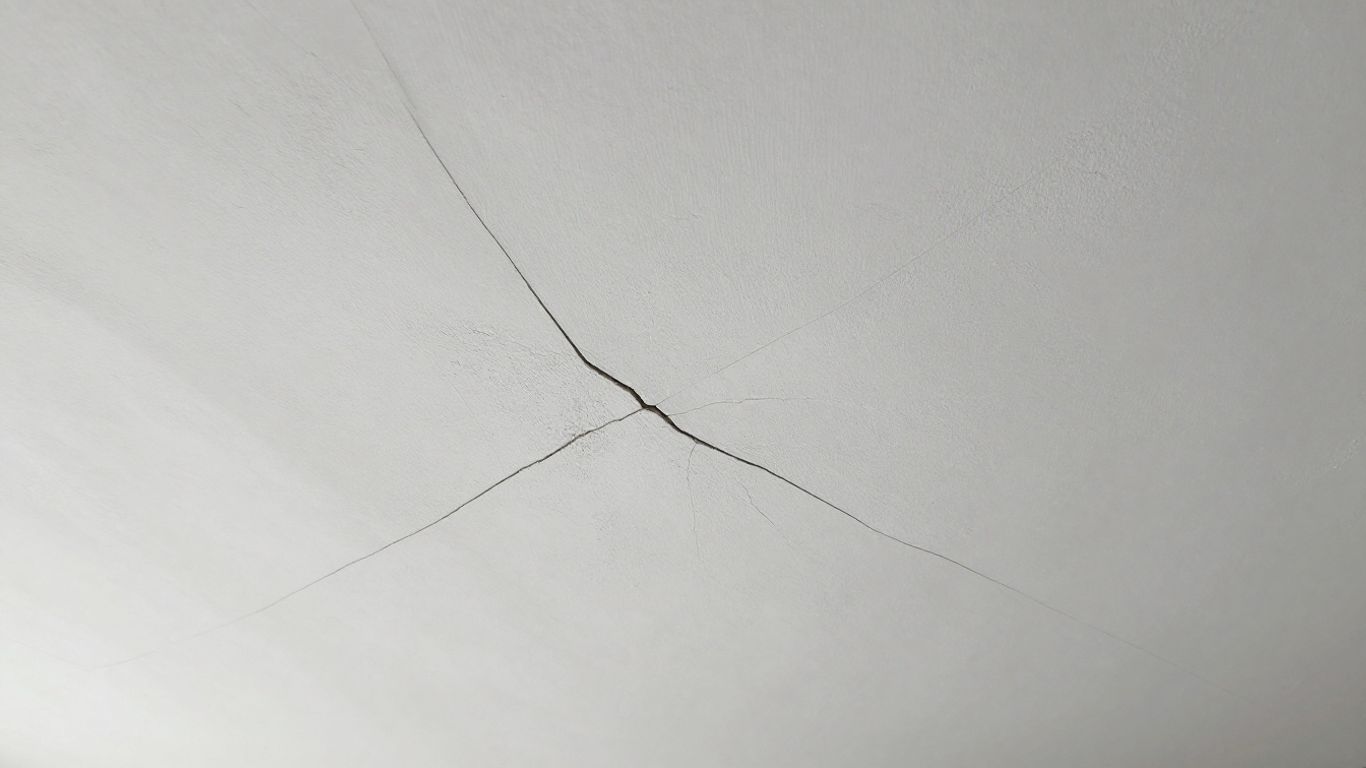
But it’s not just about width. The pattern matters too. Diagonal cracks, especially those that look like a staircase, are often a red flag for structural movement. Jagged cracks running along a wall or cracks that seem to be widening at the top are also concerning. Pay close attention to cracks around door and window frames, as these areas are particularly susceptible to stress.
Here’s a quick rundown based on common assessments:
Negligible: Under 1mm wide. Usually just a cosmetic issue.
Slight: 1-5mm wide. Can typically be fixed with filler or repointing.
Moderate: 5-15mm wide. May require professional building work.
Severe: 15-25mm wide. Often indicates structural damage, needs urgent inspection.
Very Severe: Over 25mm wide. Signifies major structural issues, potentially needing extensive repairs.
Identifying Signs of Subsidence
Subsidence is when your house starts to sink into the ground. It’s a big deal, and cracks are often the first sign. If you notice cracks that are wider at the top and get narrower as they go down, especially around openings like windows and doors, it could be a sign of subsidence. Also, look for any signs of sagging in the ceiling itself; if a ceiling crack is accompanied by sagging, it suggests a structural support issue, which is often a serious problem requiring professional attention.
Other things to watch out for include:
Doors and windows that no longer close properly.
Floors that feel uneven or sloped.
New cracks appearing in external brickwork.
Damp patches appearing where they shouldn’t be.
When to Seek Professional Advice
Honestly, if you’re ever in doubt, it’s always best to get a professional opinion. Don’t try to guess your way through a serious structural problem. If your cracks are wider than 15mm, appearing suddenly, or if you see any of the signs of subsidence mentioned above, it’s time to call in a surveyor or a structural engineer. They have the tools and the know-how to figure out what’s really going on and what needs to be done to fix it properly.
Don’t ignore cracks that are growing or changing. Even if they start small, monitoring their progression is key. If a crack is wide enough to fit a finger into, or if you can see daylight through it, that’s a definite sign to get expert advice sooner rather than later.
Remember, dealing with cracks early can save you a lot of hassle and expense down the line. It’s better to be safe than sorry when it comes to the stability of your home.
Effective Solutions for Repairing Cracked Ceiling Plaster
So, you’ve spotted some cracks in your ceiling plaster. Don’t panic just yet! Many of these are fixable, and knowing the right approach makes all the difference. We’ll look at suitable fillers, how to use reinforcement materials, and some techniques for making the repair last.
Suitable Fillers and Skimming
For smaller cracks, like hairline ones, a good quality filler is usually all you need. You can pick these up at most hardware stores. For slightly larger gaps, you might need a more robust filler, sometimes a sand and cement mix (think one part cement to four parts sand) can do the trick, especially if you’re dealing with older plaster. If the crack is more significant or you’re seeing a lot of surface damage, skimming might be the way to go. Skimming involves applying a thin layer of plaster over the existing surface to create a smooth, uniform finish. It’s a great way to cover up a multitude of sins, so to speak.
Proper Use of Reinforcement Materials
When cracks are a bit more stubborn or you’re worried about them coming back, reinforcement is key. Think of it like giving your plaster a little internal support system. For cracks that run along joints, like where two plasterboards meet, using scrim tape is a must. This is a mesh tape that gets embedded in the plaster. It bridges the gap and stops the crack from reappearing. For more serious cracks, especially those that might be linked to movement, you might see techniques like crack stitching used. This involves inserting metal bars into the plaster to hold it together. It sounds a bit technical, but it’s a solid way to add strength.
Best Techniques for Long-Term Durability
Making a repair last is the goal, right? First off, always prep the area properly. This means cleaning out the crack, removing any loose bits of plaster, and maybe even scoring the edges slightly so the new filler has something to grip onto. A good vacuuming afterwards gets rid of all the dust. When applying filler or plaster, aim for thin, even layers. Trying to fill a deep crack all in one go often leads to more cracking later. It’s better to build it up in stages, letting each layer dry. For those recurring cracks, it’s worth investigating why they keep showing up. Sometimes, it’s just the house settling, but if you suspect something more serious, like structural movement, it’s best to get a professional opinion before you start patching.
Always remember that the surface needs to be clean and sound before you apply any filler or new plaster. Any dust, grease, or loose material will prevent the new material from bonding properly, leading to future problems.
Here’s a quick rundown of what you might need:
Filler: Choose based on crack size (fine filler for hairline, stronger compound for larger gaps).
Scrim Tape: Essential for joints and wider cracks to bridge the gap.
Skimming Plaster: For a smooth, uniform finish over larger areas.
Tools: A filler knife, sandpaper, and a vacuum cleaner are your friends here.
Insurance and Maintenance Tips for Homeowners
So, you’ve found some cracks in your ceiling, and now you’re wondering about insurance and what you can do to keep things from getting worse. It’s a common worry, especially in older homes here in Bristol where plaster can be a bit temperamental.
What Insurance May Cover
First off, let’s talk insurance. Generally, your standard buildings insurance might cover cracks if they’re a result of something serious like subsidence or structural damage. Think of it this way: if the ground beneath your house is sinking and pulling on the foundations, that’s usually a covered event. However, most policies will have an excess fee you’ll need to pay. It’s also important to know that cracks caused by general wear and tear, like minor settlement in new builds or issues from temperature changes, typically aren’t covered. Always check your specific policy documents or give your provider a call to be sure. If you’re dealing with a serious issue, your insurer might even arrange for regular assessments of your property’s cracks, which can be helpful for emergency assistance.
Routine Inspection and Prevention
Prevention is definitely better than cure when it comes to plaster. Making a habit of looking over your ceilings and walls every few months can catch small issues before they become big headaches. Keep an eye out for:
New cracks: Note their size, width, and pattern.
Existing cracks: See if they’re getting wider or longer.
Signs of damp: Look for discolouration or peeling paint.
Changes in the house: Any new noises or noticeable shifts?
Controlling humidity is also key. Bristol can get damp, so good ventilation in bathrooms and kitchens is a must. Avoid rapid temperature swings if you can, as this can make plaster expand and contract. For instance, blasting the heating on full after a cold spell might not be the best for your plasterwork.
Choosing Qualified Plasterers in Bristol
When it comes to repairs, using the right person makes all the difference. Not all plasterers are created equal, and for plastering problems, you want someone who knows their stuff, especially with the older properties common in Bristol. Look for plasterers who are experienced with traditional plaster and lath if that’s what you have, or who are skilled in modern plastering techniques. Always ask for references or look for reviews. A good plasterer will be able to assess the cause of the crack and recommend the best repair method, whether it’s a simple skim or something more involved. Don’t be afraid to get a couple of quotes and ask questions about their process and materials. A professional assessment is always a good idea if you’re unsure about the severity of the crack. Remember, a crack over 5mm wide, or any diagonal cracks, often signal a need for professional attention.
It’s easy to think of plaster cracks as just a cosmetic issue, but sometimes they’re a sign of something more significant happening beneath the surface. Taking a proactive approach with regular checks and choosing skilled professionals for any necessary work can save you a lot of trouble and expense down the line.
So, What’s the Takeaway?
Alright, so we’ve gone over a bunch of reasons why those cracks might be showing up on your ceiling here in Bristol. Sometimes it’s just the house settling, especially if it’s a bit older or had some work done. Other times, it could be down to how the plaster was put up, maybe not enough prep or the wrong stuff used. And yeah, big changes in temperature or dampness can play a part too. Most of the time, it’s nothing to lose sleep over, and a bit of filler and paint can sort it. But if you’re seeing big cracks, or they seem to be getting worse, it’s probably best to get a professional to take a look. Better safe than sorry, right?
Frequently Asked Questions
Why do cracks sometimes show up on new plaster?
It’s pretty common for new plaster to get little cracks. This can happen because the plaster is drying out and shrinking a bit. Also, if the house is new or has had an extension, the foundations need time to settle, which can cause the plaster to move and crack. Sometimes, if the plaster wasn’t prepped right or a special tape wasn’t used on joints, it can lead to cracks too.
Are small cracks on my ceiling a big deal?
Most of the time, tiny cracks, like thin lines, are just a normal part of a house settling or plaster drying. They’re usually not a sign of a major problem and can often be fixed with some filler. However, if the cracks are getting wider or look like they’re spreading, it’s worth looking into more closely.
What’s the difference between a normal crack and a serious one?
Think about the size and shape. Hairline cracks or small ones that are easy to fill are usually okay. But if a crack is wider than about 5 millimeters (that’s about a quarter of an inch), or if it’s shaped like a jagged line or runs diagonally across a wall, it could mean something more serious is going on, like the building’s structure shifting.
Can weather or humidity cause plaster cracks?
Yes, they can! When the temperature or moisture levels change a lot, plaster can expand and shrink. This constant movement can cause it to crack over time. For example, very dry air from heating or dampness from rain can both play a role in plaster stability.
What should I do if I’m worried about cracks in my ceiling?
If you’re concerned, the best first step is to get a professional opinion. You can call a qualified plasterer or a structural engineer to check it out. They can tell you if it’s a simple fix or if there’s a bigger issue that needs attention, like problems with the house’s foundation.
Does home insurance cover plaster cracks?
It depends on why the crack happened. Insurance usually covers cracks caused by serious issues like subsidence (when the ground beneath the house sinks). However, cracks from normal wear and tear, like minor settlement or changes in temperature, typically aren’t covered. It’s always a good idea to check your specific policy or ask your insurance provider.