
Condensation on plastered walls is a headache for many UK homeowners. You spot damp patches, maybe some mold, and wonder if a fresh layer of plaster will sort it out. The truth is, plastering condensation problems isn’t so straightforward. Sometimes, a new coat of plaster just hides the real issue for a while. Before you reach for the trowel, it’s worth understanding what’s really going on with your walls and what plastering can (and can’t) do about it.
Key Takeaways
Plastering alone won’t fix condensation issues—addressing the root cause of moisture is a must.
Improving ventilation and heating is usually more effective for controlling condensation than just replastering.
Specialist plasters, like breathable or salt-resistant types, can help but only after the wall is dry and the source of moisture is sorted.
Replastering too soon, before the wall has dried out fully, can lead to more damp, peeling, and mold problems.
Regular checks and proper wall maintenance are key in preventing future plastering condensation headaches.
Understanding Plastering Condensation Issues in UK Homes
When people talk about damp problems in UK homes, condensation is one of the first things that comes up—especially if your walls are plastered. Plaster can look fine one week, and suddenly, there’s a patch of damp or even mold appearing out of nowhere. It’s more common than most think, especially in the winter when washing dries indoors and we barely open the windows.
Common Causes of Condensation on Plastered Walls
Condensation on plaster isn’t always about bad building work. The root problems are mostly about how we use our homes and how the building deals with moisture. Here are some typical causes:
Poor ventilation, like windows rarely being opened or extractor fans not being used in kitchens and bathrooms.
Uneven heating, which creates cold spots where moist air turns into water droplets.
High moisture activities (cooking, showers, drying laundry inside) without enough airflow.
Blocked air bricks, faulty vents, or modern insulation trapping too much moisture inside.
If condensation is always showing up in the same rooms, it usually points to a lack of air movement or a cold surface problem—not necessarily a leaking pipe or outside moisture.
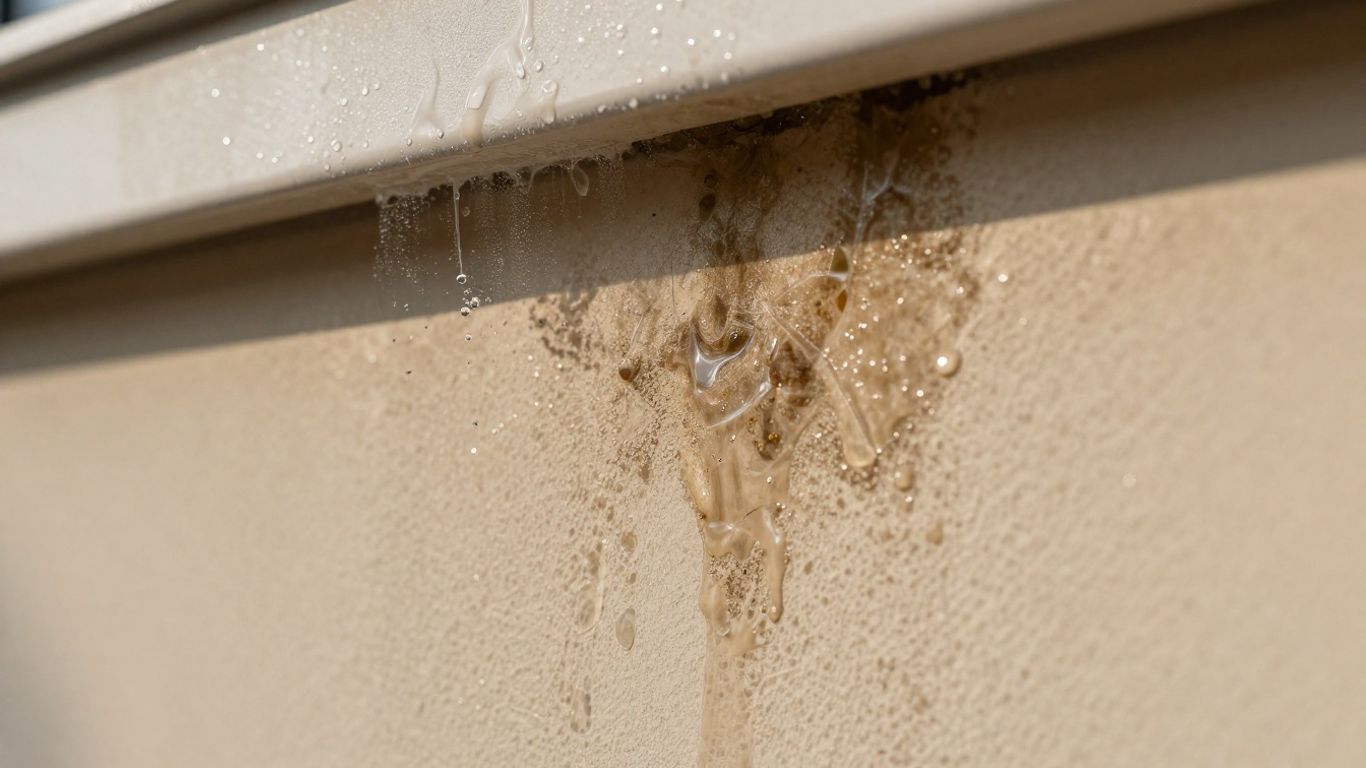
The Effects of Moisture on Plaster Surfaces
When plaster gets damp from condensation, the problems don’t stop at just looking a bit ugly. Here’s what can happen:
Blistering, bubbling, or flaking of paint and plaster.
Growth of black mold, especially around windows and in corners.
Long-term softening and crumbling of the plaster surface.
White powdery marks from salts being drawn out of the wall.
If it’s left untreated, plaster can end up breaking down faster than you’d think, needing a full replacement far sooner.
Key Signs of Condensation Versus Other Damp Types
There are different types of damp, and knowing which one you’re dealing with helps choose the right fix. Here’s a quick comparison:
Feature | Condensation | Rising Damp | Penetrating Damp |
|---|---|---|---|
Location on Wall | Coldest surfaces/high up | Starts at the base | Anywhere (often patchy) |
Appearance | Water droplets, black mold | Tide marks, salts | Wet patches, spreading |
Season Most Noticeable | Winter/early spring | Any time | After rain |
Common Causes | Poor ventilation | Ground moisture | Leaks/internal spills |
Condensation damp usually affects cold surfaces and spots with little air.
Rising damp sticks to lower walls and comes from under the floor.
Penetrating damp is often from leaks or rain getting through walls.
Knowing these clues can mean the difference between a quick fix and a recurring headache. If you’re noticing problems on plastered walls, it’s worth thinking about the bigger picture—and not just patching things up with new plaster straight away.
How Damp Impacts Plastering Projects and Home Health
Dampness is a real headache for any plastering job, and honestly, it’s not just about how the walls look. When moisture hangs around, it really messes with the plaster itself and can even make your home feel a bit unhealthy. It’s like trying to build something on soggy ground – it just doesn’t hold up well.
Damage to Plaster from Persistent Moisture
If plaster gets too wet, too often, it starts to break down. Think of it getting soft and crumbly, losing its strength. This means the plaster might not stick properly to the wall anymore, leading to peeling or even sections falling off. It’s a mess. Plus, moisture can carry salts from the bricks or mortar to the surface. You’ll see these white, powdery marks, called efflorescence. They look bad and can actually damage the plaster over time, making it blister or flake.
Mold, Fungal Growth, and Health Risks
This is where things get serious. Damp walls are basically a buffet for mold and fungi. They love that moist environment. You might see black or green fuzzy patches, and it doesn’t just look gross; it can smell musty too. Breathing in mold spores isn’t good for anyone, especially if you have allergies or breathing problems. It can lead to all sorts of health issues, from itchy eyes and skin to more serious respiratory problems. Keeping your home dry is really about keeping your family healthy.
Efflorescence and Salt Contamination Explained
Efflorescence is that white, powdery stuff you sometimes see on brickwork or plaster. It happens when water inside the wall dissolves salts. As the water evaporates from the surface, it leaves these salts behind. While it might seem like just a cosmetic issue, these salts can actually draw moisture from the air, making the problem worse. They can also weaken the plaster and paint over time, causing them to bubble or peel. It’s a sign that moisture is moving through your walls, and it needs to be dealt with before it causes more damage.
Does Plastering Solve Condensation Problems?
Dealing with condensation in your home is a headache, so a lot of people wonder if replastering will finally fix the problem. Here’s what you actually need to know before you grab your trowel and bag of plaster.
Limitations of Plastering for Condensation Control
Plastering alone will not eliminate condensation issues in a property. If the root causes—poor ventilation, lack of heating, or high internal moisture from cooking and showers—are still there, new plaster won’t make a difference in the long run.
Plaster is not a waterproof barrier. It absorbs excess moisture from the air, often making the symptoms look worse.
Covering up the problem only hides the visible damage, and the real issue will return quickly.
Over time, repeated painting or skimming can trap even more moisture, leading to crumbling plaster or mold.
Moisture management, not just a fresh wall finish, is the real solution.
When Replastering Is Necessary After Damp
There are cases where you can’t avoid stripping back and replastering part or all of a wall:
When existing plaster is contaminated with salts, which keep attracting moisture and causing flaking.
If mold growth is present and keeps coming back after surface cleaning.
Where plaster is soft, powdery, or detached from the wall.
Here’s a quick table to help decide:
Situation | Is Replastering Needed? |
|---|---|
Peeling/discolored paint | Sometimes |
Salty, crumbly surface | Yes |
Persistent musty odor after cleaning | Likely |
Intact plaster, minor moisture spots | Usually No |
If salt or mold keeps returning, it’s pretty much impossible for standard plaster to stand up to repeated moisture attacks—replacement is the only real answer.
Why Underlying Moisture Must Be Addressed
Plaster can only ever look as good as the wall behind it. If you just skim over problems:
Damp will eventually push through, ruining new finishes.
Moisture trapped behind plaster can cause paint to bubble and odd stains to appear.
Health risks from recurring mold increase.
Always check for lingering damp, repair the source (like leaks or bad window seals), and let the space dry out fully before you even consider plastering.
In short: Fresh plaster alone is not a fix for condensation. Address the core problem, or the symptoms will just keep coming back—and possibly get worse after each attempt.
Choosing the Right Plaster for Damp and Condensation
So, you’ve dealt with the damp or condensation issue, and now it’s time to think about the plaster. This is a really important step, and honestly, it’s where a lot of people go wrong. Just slapping on any old plaster won’t cut it, especially if you want to avoid the problem coming back.
Waterproof Renders and Damp-Resistant Plaster
When you’re dealing with walls that have had damp problems, you can’t just use standard gypsum plaster. It’s not designed for moisture and can actually trap what little damp is left, making things worse. Instead, you need to look at specialist products. Waterproof renders are a good option for the base coat, creating a solid barrier. Over that, you might use a damp-resistant plaster. These are formulated to handle residual moisture and prevent salts from migrating to the surface, which causes those nasty white powdery stains, known as efflorescence.
Breathable Plaster Systems for Older Properties
Older homes, in particular, often have solid walls that need to breathe. Modern buildings might have cavity walls and vapour barriers, but older ones rely on the walls themselves to let moisture escape. Using a plaster that’s too impermeable can trap moisture within the wall structure, leading to bigger problems down the line. This is where lime plaster really shines. It’s naturally breathable, allowing moisture vapour to pass through without damaging the wall or the plaster finish. If you’re working on a heritage property, this is often the best way to go. You can find modern formulations of lime plaster that are easier to apply than traditional mixes but still offer that crucial breathability.
Salt Retardant and Vapour-Permeable Finishes
Regardless of whether you’re in an old house or a newer one that’s suffered from damp, the key is to allow the walls to dry out properly. This means using materials that don’t seal moisture in. Vapour-permeable plasters are designed for this exact purpose. They let moisture escape as vapour, preventing it from building up behind the plaster. Many of these systems are also salt retardant, which is vital if rising damp was the culprit. These salts can be very damaging to plaster, so a good salt-retardant plaster is a smart investment.
Here’s a quick rundown of what to look for:
Breathability: Can moisture vapour pass through?
Salt Resistance: Will it stop salts from causing damage?
Compatibility: Does it work with your damp-proofing treatment?
Durability: How long will it last?
Choosing the right plaster isn’t just about aesthetics; it’s about the long-term health of your walls. Using the wrong type can undo all the work you’ve done to fix the damp problem, leading to recurring issues and more expense. Always consult with a damp specialist or a knowledgeable plasterer about the best products for your specific situation.
When you’re choosing a plaster system after dealing with damp, think about what’s happening inside the wall. You need a plaster that works with the wall’s natural drying process, not against it. This often means looking beyond the standard DIY store options and opting for specialist renovation plasters or breathable lime-based systems.
Best Practices for Plastering After Damp or Condensation Treatment
So, you’ve dealt with damp or condensation issues, and now it’s time to think about replastering. It’s tempting to just get it done quickly, but honestly, rushing this part can cause more headaches down the line. It’s all about making sure the walls are truly ready.
Proper Drying and Moisture Measurement Before Plastering
This is probably the most important step, and it’s where people often slip up. Just because the wall looks dry on the outside doesn’t mean it’s ready for new plaster. Moisture can be hiding deep within the wall, and if you cover it up too soon, it’s going to cause problems. You really need to let the walls dry out properly. For rising damp, this might take anywhere from 4 to 8 weeks, sometimes even longer, depending on how thick the wall is and what the weather’s like. Penetrating damp, once fixed, usually dries faster, maybe 2 to 4 weeks. Condensation issues, if you’ve sorted out the ventilation, can sometimes be ready in just a week or two. Your damp specialist should be using tools, like a moisture meter, to check the readings. They’re looking for a stable, low moisture level, not just a dry surface. Don’t skip this part; it’s key to a lasting finish.
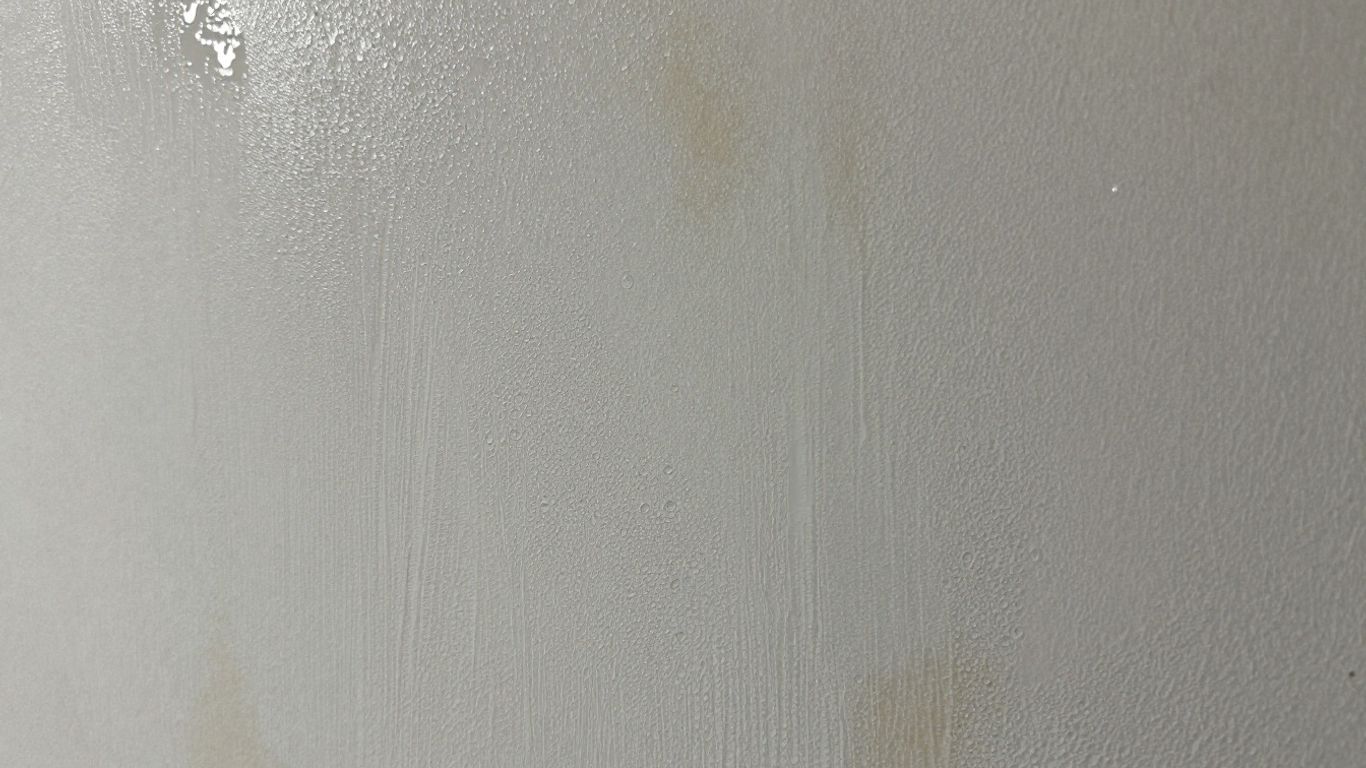
Checking for Salt Damage and Residual Damp
Before you even think about applying new plaster, you’ve got to check for two main things: residual damp and salt contamination. Salts, often left behind by rising damp, can be a real nuisance. You might see them as brown stains or white powdery deposits on the surface. If these salts are still in the wall, they’ll happily migrate into your new plaster, causing staining and bubbling. You’ll need a special salt-retardant plaster in these cases. As for damp, remember what I said about drying times? It’s crucial to get those moisture readings down. If the readings are still high, you’ve got to wait longer. Trying to plaster over a wall that’s still wet is just asking for trouble. It can lead to mould growth and make your damp-proofing treatment less effective.
Risks of Replastering Too Soon
Honestly, replastering before the wall is completely dry is a recipe for disaster. You’re essentially trapping moisture, which is the exact opposite of what you want. This can lead to:
Staining or salt migration appearing on your fresh plaster.
Paint peeling and plaster bubbling up.
Those dreaded damp patches making a comeback.
Mould growth, which is bad for your health and your home.
The damp-proofing treatment you just paid for not working as well as it should.
If these issues pop up, you’ll likely have to remove the new plaster and start all over again. That’s a waste of time and money. It’s much better to be patient and do it right the first time. Remember, the goal is a dry, stable wall that will last. For more general advice on when walls need replastering, you might find general plastering guidance helpful.
Patience is a virtue, especially when dealing with damp walls. Allowing adequate drying time and performing thorough checks before replastering is not just a recommendation; it’s a necessity for a long-term, healthy finish. Rushing this stage can undo all the hard work and expense of the initial damp treatment.
Preventing Future Condensation and Damp in Plastered Walls
So, you’ve dealt with the damp and condensation, and the plaster looks great. That’s fantastic! But the job isn’t quite done yet, is it? We need to make sure this doesn’t become a recurring nightmare. It’s all about keeping things dry and airy.
Improving Ventilation and Heating for Moisture Control
This is probably the biggest one. Think about where moisture comes from in your home: cooking, showering, even just breathing. All that water vapour needs somewhere to go. If it can’t escape, it’s going to find a cold surface – usually your walls – and turn into condensation. Good ventilation is your best friend here.
Extractor Fans: Make sure you have working extractor fans in your kitchen and bathroom. Use them every time you cook or shower, and leave them running for a bit afterward. It really makes a difference.
Opening Windows: Even just cracking a window open for 10-15 minutes a day, especially in rooms prone to damp, can help exchange stale, moist air for fresh, drier air.
Heating: Keeping your home at a consistent, moderate temperature helps a lot. Big temperature swings mean cold surfaces where condensation can form. Try to avoid drastic drops in heat, especially overnight. Keeping furniture a little away from walls also helps air circulate.
The goal is to manage the moisture produced inside your home so it doesn’t build up and find its way onto your walls. It’s a constant battle, but a manageable one with the right habits.
Using Dehumidifiers and Extractor Fans
Sometimes, just opening windows isn’t enough, especially in certain rooms or during colder months. That’s where a dehumidifier can be a lifesaver. These machines pull moisture right out of the air. You can place them in problem areas, and they’ll collect water in a tank that you just need to empty periodically. It’s a really effective way to lower the overall humidity in your home. Combine this with those extractor fans we talked about, and you’ve got a solid defence against condensation. For more on managing humidity, check out home humidity control.
Importance of Routine Wall Inspections
Don’t just plaster it and forget it. You need to keep an eye on things. Regularly check your walls, especially in those usual problem spots like corners, behind furniture, and around windows. Look for any signs of moisture, like small water droplets, discolouration, or the beginnings of mould. Catching these issues early, when they’re just a tiny spot, is so much easier to deal with than waiting until you have a big problem on your hands. A quick visual check every few months can save you a lot of hassle and expense down the line.
Special Considerations for Plastering in Older and Newer UK Buildings
When it comes to plastering, not all UK houses are made equal. Older and newer buildings react very differently to moisture, and what works for one may make things worse for the other. Getting the plastering right starts with knowing the features and needs of your specific property.
Breathability Needs in Heritage Properties
A lot of older homes—think anything built before the 1940s—were designed with solid walls that breathe. They absorb and release moisture naturally because the materials (like lime-based plasters and porous bricks) allow air to move in and out. Using modern, non-breathable plasters on these walls can trap moisture, leading to:
Flaking and bubbling plaster
Efflorescence (salts showing up at the surface)
Accelerated decay of original wall materials
If your house is listed, or just plain old, stick with breathable plasters, usually lime-based, to avoid sealing in moisture. These plasters act kind of like a safety valve for naturally damp walls.
Challenges of Mixing Modern and Traditional Materials
Sometimes, repairs or extensions mix new materials with old ones. That can cause headaches:
Standard gypsum plasters often don’t play nicely with traditional walls
Moisture might get blocked at the junction where materials change
Salts from rising damp can eat through modern finishes, even after you’ve paid for expensive damp-proofing treatments
A good way to sidestep issues is by matching plaster types to the underlying wall:
Wall or Repair Type | Recommended Plaster |
|---|---|
Solid (pre-1940s) brick/stone | Lime-based/breathable |
Modern block or insulated | Gypsum/skimming |
Hybrid/mixed wall | Multi-coat breathable system |
Protecting Weaker Walls from Trapped Moisture
Old walls, especially those already weakened by previous damp, need extra care. Instead of just patching up with whatever’s cheap or quick:
Check the wall’s condition and previous materials
Test for residual moisture and salts
Use breathable, salt-resistant plasters if needed
Allow for plenty of drying time before painting or decorating
Heritage homes have survived centuries, but the wrong plaster can undo years of building history. Take your time when deciding on plaster repairs, especially if your walls show signs of ongoing damp.
For modern houses, the big focus is on making everything air and water-tight. That’s great for energy bills—but in older homes, it just seals in problems. Always match your approach to the property’s age and wall type to avoid trouble in the long run.
So, Does Plastering Help with Condensation?
Alright, let’s wrap this up. When it comes to condensation, just slapping on a new coat of plaster isn’t going to magically fix things. Think of it like putting a band-aid on a leaky pipe – it might look better for a bit, but the real problem is still there. The key takeaway here is that plaster itself doesn’t stop condensation. What does help is figuring out why the condensation is happening in the first place. Usually, it comes down to moisture and airflow. If your walls are already damp or damaged from condensation, you’ll likely need to let them dry out properly and then use a special kind of plaster that lets the wall breathe. Just replastering over damp walls can actually make things worse, trapping moisture and leading to more issues down the line. So, while plaster is part of the solution, it’s not the whole story. You’ve got to tackle the root cause of the dampness first, and then choose the right materials for the job.
Frequently Asked Questions
Can plastering fix condensation problems on its own?
Not really. Plastering alone usually won’t solve condensation issues. Condensation happens when warm, moist air hits cold walls. While a new plaster finish might look nice, it doesn’t stop the moisture from forming. You need to tackle the root cause, like improving air flow or heating, to truly fix condensation.
What’s the difference between condensation and other types of damp?
Condensation typically shows up as small water droplets on surfaces, especially in colder areas like windows or corners. Other damp issues, like rising damp (from the ground) or penetrating damp (from leaks), often cause larger, more defined patches, staining, or even crumbling plaster.
Why is it bad to plaster over damp walls too soon?
If you plaster a wall that’s still wet, you trap the moisture inside. This can cause the new plaster to bubble, peel, or get stained with salts from the old damp. Worse, it can lead to mold growth and make the damp problem come back, sometimes even worse than before. It’s like putting a band-aid on a wound that needs to heal completely first.
What kind of plaster should I use after treating damp?
After dealing with damp, it’s best to use a special type of plaster. Look for ‘breathable’ or ‘vapour-permeable’ plasters. These let any remaining moisture escape naturally without damaging the wall or the plaster. Some might also be salt-resistant to handle any salts left behind by damp.
How do I know if my walls are dry enough to plaster?
Just touching the wall or looking at it isn’t enough. A professional uses special tools called moisture meters to check the dampness deep inside the wall. They need to see readings below a certain level before it’s safe to plaster. Your damp specialist will tell you when it’s ready.
Can I treat damp without removing the old plaster?
Sometimes, yes. For minor issues, special paints or damp-proofing creams can help. However, if the plaster is badly damaged or has a lot of salt in it, taking it off is usually the best way to make sure the problem is fixed for good and won’t return.