
Thinking about getting your walls plastered in Bristol? It’s a big job, and getting it right from the start makes all the difference. Whether you’re a DIY enthusiast or planning to hire a pro, knowing how to prepare walls for plastering Bristol is key. This guide will walk you through what you need to think about, from checking your walls to making sure the job goes smoothly, so you end up with a finish you’ll love.
Key Takeaways
Before you even think about plastering, take a good look at your walls. Are they damp, cracked, or crumbling? Knowing the condition helps you figure out what needs to be done before the plaster goes on.
When hiring a plasterer in Bristol, don’t just go for the cheapest quote. Look for someone with good reviews, a solid portfolio, and clear communication. Ask about their insurance and guarantees too.
Get your home ready. Move furniture, cover up anything you don’t want dusty, and make sure the plasterer has easy access to the work area. Good prep means less mess later.
Talk to your plasterer about the project details. Discuss the timeline, materials they plan to use, and any potential issues. A clear plan prevents surprises.
Understand that plaster needs time to dry properly. Rushing the decorating process can lead to problems down the line, so be patient and follow the plasterer’s advice for aftercare.
Understanding Your Plastering Project in Bristol
Getting ready to plaster your walls in Bristol? It’s a big step, and knowing what you’re getting into makes all the difference. Think of it like planning a big dinner party – you wouldn’t just start cooking without checking your pantry or knowing who’s coming, right? Your plastering project is similar. It’s not just about slapping some new material on the wall; it’s about understanding the job from the ground up.
Assessing Your Wall’s Condition
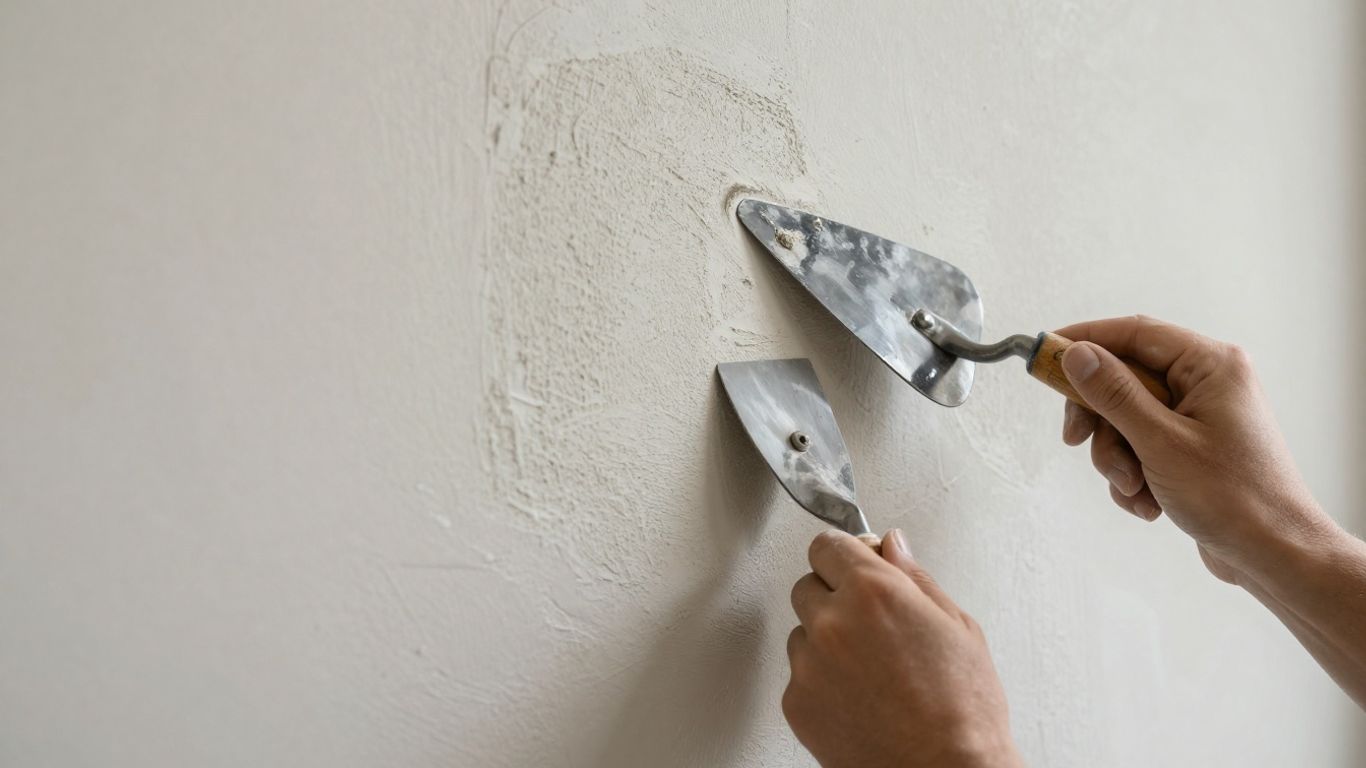
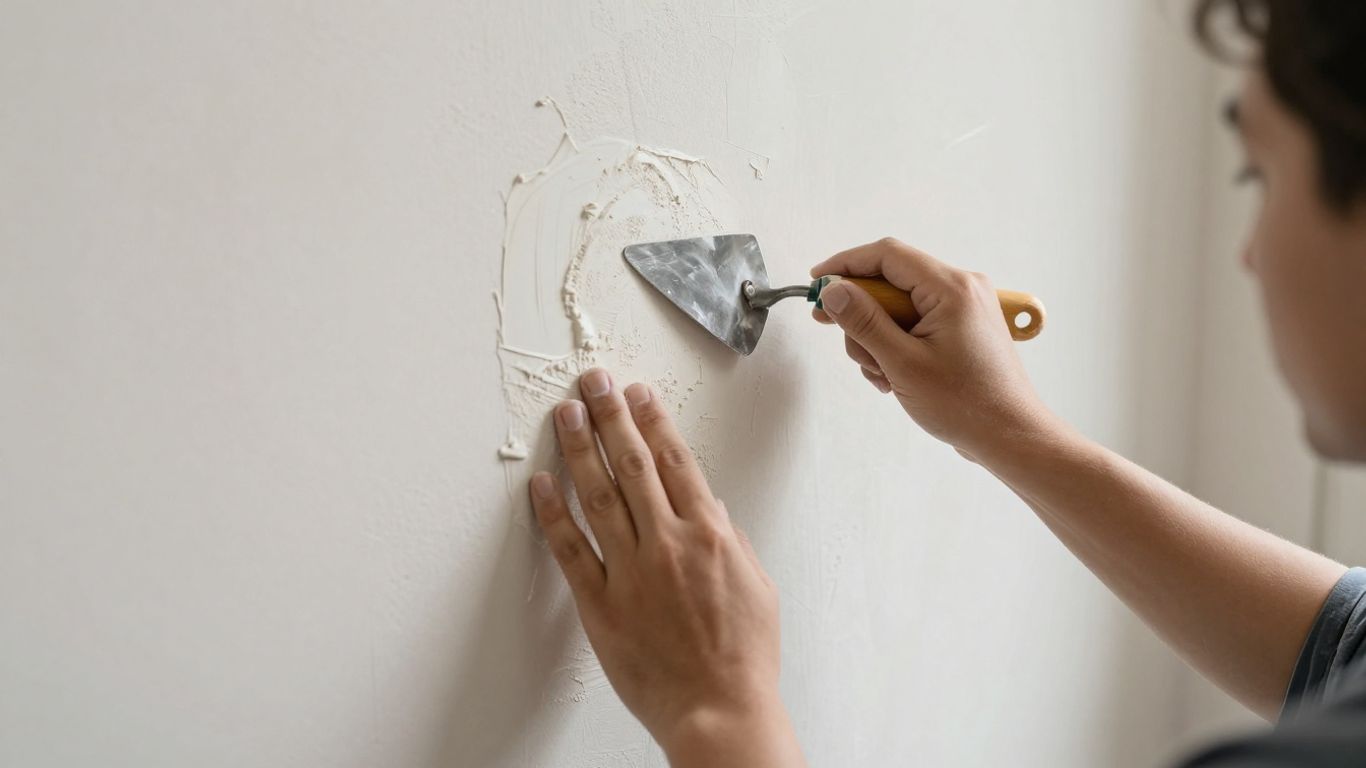
First things first, take a good, hard look at your walls. Are they just a bit tired, or is there something more serious going on? You might see cracks, maybe some damp patches, or perhaps the old plaster is just crumbling away. Identifying the exact state of your walls is the most important first step. This isn’t just about aesthetics; it can point to underlying issues like water leaks or structural problems that need fixing before any plastering can even begin. Sometimes, a simple skim coat is all that’s needed, but other times, you might be looking at a full strip-back and replaster. It’s worth noting any areas that feel soft or hollow when tapped, as this often means the plaster has lost its bond with the wall behind it.
Identifying Plastering Service Needs
Once you know what you’re dealing with, you can figure out what kind of plastering service you actually need. Are you looking for a full room re-plaster, or just a small repair job after, say, removing an old fixture? Maybe you’re renovating and need new plasterboard installed and then skimmed. Here’s a quick rundown of common services:
Skimming: Applying a thin layer of plaster over existing surfaces for a smooth, paint-ready finish.
Repair Work: Fixing cracks, holes, or damaged sections.
Re-plastering: Removing old, damaged plaster and applying a fresh coat.
Boarding and Skimming: Installing plasterboard and then skimming it.
Artex Removal: Getting rid of textured ceilings or walls before a smooth finish.
Knowing these terms helps you communicate better with plasterers and get the right quote for the job.
Considering Period Property Requirements
Bristol has a lot of beautiful older homes, and if yours is one of them, you’ve got a special consideration. Period properties often have unique features and construction methods. The plaster used in Victorian or Georgian homes, for example, might be different from modern plaster. It might be lime-based, which needs different handling and drying times compared to gypsum plaster. Using the wrong materials or techniques on an old wall can cause problems down the line, like trapping moisture or causing the new plaster to crack prematurely. It’s always a good idea to ask if a plasterer has experience with period properties specifically. They’ll know how to respect the original character of your home while bringing it up to date.
Understanding the specific needs of your walls, whether they’re in a modern flat or a centuries-old terrace, is key to a successful plastering project. Don’t skip this initial assessment; it saves time, money, and a whole lot of hassle later on.
Choosing the Right Plasterer in Bristol
Finding a good plasterer in Bristol isn’t just about getting smooth walls; it’s about trust and getting the job done right the first time. You wouldn’t hire a chef to fix your plumbing, right? The same goes for plastering. It’s a skill that takes time to develop, and not all tradespeople are created equal. Let’s break down how to find someone who knows their stuff.
Evaluating Local Reputation and Reviews
Word of mouth is still king, even in the digital age. Start by asking friends, family, or neighbours in Bristol if they’ve had any plastering work done recently and who they’d recommend. Online reviews are also a good starting point, but take them with a pinch of salt. Look for patterns – are multiple people mentioning the same positive (or negative) points? A plasterer with a solid local reputation often means they’ve been around for a while and care about their standing in the community. Check platforms like Google Reviews, Trustpilot, or even local Facebook groups.
Requesting and Reviewing Portfolios
A picture really is worth a thousand words, especially when it comes to plastering. A good plasterer will have a portfolio of their past work. This could be a physical album, a section on their website, or even a shared online album. Look for:
Variety of work: Have they done similar jobs to yours? (e.g., full room plastering, patching, ceiling work, period property restoration).
Quality of finish: Do the walls look smooth and even? Are the corners sharp? Is the texture consistent?
Cleanliness: Does the surrounding area in the photos look tidy, or is it a mess?
Before and after shots: These are particularly helpful for understanding the transformation.
If possible, ask if you can see a recent job in person, or at least speak to a previous client. This gives you a real feel for their professionalism.
Understanding Qualifications and Experience
While formal qualifications aren’t always mandatory, they can be a good indicator of a plasterer’s commitment to their trade. Look for certifications like NVQ Level 2 or 3 in Plastering. More importantly, ask about their years of experience. Have they worked on projects similar in scale and complexity to yours? Do they have specific experience with older Bristol properties, which often have unique challenges like lath and plaster or uneven brickwork? A plasterer who can clearly explain their methods and has a history of successful projects is usually a safe bet.
Don’t be afraid to ask direct questions about their experience. A professional will be happy to share details about their background and how they approach different types of plastering jobs. It shows they’re confident in their abilities and transparent with clients.
Preparing Your Home for Plastering
Alright, so you’ve got the plasterer booked and the date is set. Now comes the part where you get your place ready. It might seem like a hassle, but trust me, a little prep work goes a long way in making the whole process smoother for everyone, especially you.
Protecting Furniture and Valuables
Plastering is a messy business, even with the best plasterers. Dust and fine particles can get everywhere. The first thing you’ll want to do is move any furniture, especially smaller items, out of the room where the work is happening. If you can’t move larger pieces, like sofas or wardrobes, cover them up really well. Think heavy-duty dust sheets or plastic sheeting. Don’t forget about things on shelves or in display cabinets – take them down or cover them too. Even things like light fittings and radiators can get splattered, so consider covering those as well.
Cover all floors with dust sheets or protective coverings, taping them down at the edges to prevent plaster dust from seeping underneath.
Remove or cover all wall hangings, pictures, mirrors, and electronics.
Empty shelves and cabinets or cover them securely.
Seal off doorways with plastic sheeting and tape if the plastering is in one area and you want to keep dust from spreading to other parts of the house.
Ensuring Adequate Ventilation and Access
Good airflow is actually pretty important during and after plastering. It helps the plaster dry properly and can help clear out some of the dust. Make sure there are ways for air to move through the space, but also be mindful of keeping dust contained. The plasterer will need clear access to the walls and ceiling they’re working on, so don’t block pathways with clutter. They’ll be carrying tools and materials, so make sure they have a clear route from their vehicle to the work area.
Clearing the Work Area
This is pretty straightforward: the less stuff in the room, the easier and faster the job will be. Take down curtains, remove any loose items from the walls, and generally try to get the space as bare as possible. This isn’t just about making it easier for the plasterer; it’s also about protecting your belongings from accidental damage. A clear space means fewer things to worry about getting knocked or covered in plaster.
Think of it this way: the plasterer is coming in to do a specific job. The more they have to work around, the more likely something is to get in the way, or worse, get damaged. A clean slate makes for a clean job.
Here’s a quick rundown of what to expect:
Item | Action Required |
|---|---|
Furniture | Move to another room or cover thoroughly. |
Flooring | Cover with heavy-duty dust sheets or plastic. |
Wall Decor | Remove all pictures, mirrors, and shelves. |
Electronics | Cover or remove from the work area. |
Light Fixtures | Cover to protect from dust and splashes. |
Doors/Windows | Ensure they can open and close freely. |
Pathways | Keep clear for easy access with tools and materials. |
Getting these bits sorted before the plasterer arrives means you can relax a bit more when they turn up, knowing the groundwork is done. It really does make a difference.
The Pre-Plastering Site Visit
Before the plaster hits the walls, there’s a really important step that sometimes gets overlooked, especially if you’re doing a DIY job or even just coordinating with a pro: the pre-plastering site visit. Think of it as a final check-up before the big transformation. It’s your chance to really get a feel for the space and make sure everything is set for the plasterer to do their best work.
Discussing Project Scope and Timeline
This is where you and your plasterer (or you, if you’re doing it yourself and have a clear plan) nail down exactly what’s going to happen. It’s not just about saying ‘plaster this room.’ You need to talk specifics. What kind of finish are you aiming for? Smooth, textured? Are there any tricky areas, like around windows or doorways, that need special attention? This conversation sets the stage for a smooth process.
Scope: Clearly define which walls or ceilings are being plastered. Are you doing a whole room, or just one wall?
Finish: Discuss the desired texture and smoothness. Different finishes require different techniques.
Details: Point out any existing features like electrical outlets, light switches, or pipes that need to be worked around.
Timeline: Get a realistic idea of how long the job will take. This helps you plan your own schedule and know when to expect the work to be done.
Confirming Material Choices
Plaster isn’t just plaster. There are different types, and the choice can affect the look, durability, and even the drying time. This is the time to confirm what materials will be used. If you have specific preferences or concerns about materials, like allergies or environmental impact, now is the time to bring them up.
Type of Plaster: Will it be gypsum, lime, or cement-based? Each has its pros and cons.
Admixtures: Are any additives being used for faster drying or improved strength?
Primer/Undercoat: What will be applied before the final coat, if anything?
Addressing Potential Issues
Every project has its potential hiccups. A good site visit is also about anticipating problems before they arise. This could be anything from damp patches on the wall that need addressing first, to ensuring there’s enough space for the plasterer to work comfortably. If you’ve noticed any cracks or damage that weren’t obvious before, point them out now. It’s better to catch these things early.
This visit is your opportunity to ask all those nagging questions you might have. Don’t be shy! A good plasterer will be happy to explain their process and address any concerns you have. It builds trust and makes sure you’re both on the same page.
Existing Damage: Discuss any cracks, holes, or water stains on the current walls.
Structural Concerns: If you suspect any underlying issues, mention them.
Access & Space: Confirm that the work area is clear and accessible for the plasterer and their equipment.
Essential Questions for Your Bristol Plasterer
Before you hand over the keys and the chequebook, it’s smart to have a good chat with your chosen plasterer. Asking the right questions upfront can save you a lot of headaches down the line. It’s not about being difficult; it’s about making sure you and the tradesperson are on the same page and that they’re the right fit for your home.
Inquiring About Insurance and Guarantees
This is a big one. You need to know that if something goes wrong – say, accidental damage to your pipes or a bit of plaster dust gets on your prized antique armchair – there’s cover. Always ask for proof of public liability insurance. It’s not just a formality; it’s your safety net. Also, ask about guarantees. A good plasterer will stand by their work. Some offer guarantees on their workmanship, and sometimes even on materials, for a specific period. This shows they’re confident in their skills and want you to be happy long-term.
Clarifying the Quotation and Payment Schedule
Get everything in writing. A proper quote should be itemised, detailing the work involved, materials, and labour costs. Be wary of vague estimates or quotes that seem too good to be true – they often hide extra costs later on. Discuss the payment schedule too. While a small deposit to secure your booking is normal, paying the full amount upfront is usually a red flag. Understand when payments are due and what they cover.
Understanding the Drying and Curing Process
Plaster needs time to dry. This isn’t a quick process, and it’s heavily influenced by your home’s temperature and humidity. A plasterer should be able to give you a realistic timeline for drying before you can paint or wallpaper. Rushing this stage can lead to problems like cracking or bubbling later on. Ask them about the expected drying time and what conditions are best for it. They might even offer advice on how to help the drying process along, like ensuring good ventilation.
Materials and Sustainability in Plastering
When you’re getting ready for plastering, thinking about the materials used is a big part of the puzzle. It’s not just about what looks good right now, but also about how it holds up over time and what impact it has on the environment. Bristol has a mix of old and new buildings, so the plaster choice can really matter.
Exploring Modern Plastering Options
Today’s plaster isn’t just the old lime and hair mix your grandparents might have used. There are all sorts of modern plasters available. You’ve got lightweight options that are easier to handle and apply, especially for DIYers. Then there are plasters designed for specific jobs, like those that offer better fire resistance, which is a nice bit of added safety for your home. Skimming is a popular technique for getting a really smooth, paint-ready surface over existing plaster or plasterboard. It’s all about achieving that perfect finish.
Considering Eco-Friendly Material Choices
More and more people are thinking about the planet when they renovate. For plastering, this means looking at materials that are kinder to the environment. Traditional lime plasters, often used in older properties, are generally considered more sustainable because they’re made from natural materials and are breathable. Some manufacturers are also developing plasters with recycled content or lower volatile organic compound (VOC) emissions. It’s worth asking your plasterer if they have experience with these greener options. Choosing sustainable materials can make a real difference.
Discussing Material Durability
Durability is a key factor. You want plaster that’s going to last, resisting cracks and damage for years to come. Different plaster types have different strengths. Gypsum-based plasters are common and offer a good balance of strength and workability. Lime plasters, while great for older buildings and breathability, can sometimes be a bit softer. The way the plaster is applied and the condition of the underlying wall also play a huge role in how durable the final finish will be. A well-prepared wall and a skilled application mean a much longer-lasting job.
Here’s a quick look at some common plaster types:
Gypsum Plaster: Widely used, good for smooth finishes, relatively quick drying.
Lime Plaster: Traditional, breathable, flexible, ideal for historic buildings.
Cement Render: More durable and water-resistant, often used externally or in wet areas.
Clay Plaster: Natural, breathable, and can have a unique aesthetic.
When discussing materials with your plasterer, don’t be afraid to ask about the pros and cons of each for your specific project. A good tradesperson will be happy to explain the differences and help you make an informed choice based on your home’s needs and your budget.
Post-Plastering Care and Maintenance
So, the plasterer has packed up, and your walls look smooth and ready for their final makeover. That’s great, but the job isn’t quite done yet. There are a few things you need to do to make sure that new plaster job lasts and looks its best. It’s not complicated, but it does require a bit of patience.
Adhering to Drying Times Before Decorating
This is probably the most important thing to get right. Plaster needs time to dry properly before you even think about painting or wallpapering. Trying to rush this step is a recipe for disaster. You might end up with peeling paint, bubbling wallpaper, or even mould if the moisture gets trapped. The drying time can vary a lot depending on the thickness of the plaster, the temperature, and how much ventilation you have. It can take anywhere from a week to a month, sometimes even longer in damp conditions. You’ll notice the plaster change colour as it dries, going from a dark, damp pink to a lighter, more uniform shade. Don’t guess; ask your plasterer for their best estimate for your specific job.
Managing Hairline Cracks and Settling
It’s pretty common to see a few hairline cracks appear in new plaster as it settles. Think of it like a new building finding its feet. These tiny cracks usually aren’t a sign of a major problem. Most of the time, they can be easily filled with a bit of filler and then painted over. If you notice any larger cracks or anything that looks worrying, it’s always best to get in touch with your plasterer. They can come and take a look, figure out what’s going on, and sort it out for you. It’s good to know that reputable plasterers often offer a guarantee on their work, so don’t hesitate to use it if you’re concerned.
Seeking Advice on Surface Care
Different plaster finishes might need slightly different care. For instance, if you’ve opted for a more traditional lime plaster, it might have specific cleaning requirements compared to a standard gypsum plaster. Your plasterer is the best person to ask about this. They can tell you what cleaning products are safe to use and what to avoid. Generally, a soft cloth and mild soapy water are fine for most surfaces, but it’s always worth double-checking. For exterior plaster, you’ll want to use low-pressure water and a soft brush to avoid any damage. Avoid harsh chemicals and stick to gentle cleaning methods.
Patience is key after plastering. Rushing the drying process or worrying too much about minor settling cracks can lead to bigger issues down the line. Trust the process, follow your plasterer’s advice, and your walls will be looking great for years to come.
Wrapping It Up
So, we’ve gone over how to get your walls ready for plastering, whether you’re tackling it yourself or bringing in the pros here in Bristol. It’s not just about slapping on some filler, is it? There’s a fair bit to think about, from making sure the surface is clean and sound to knowing what questions to ask if you hire someone. Remember, a bit of prep work upfront can save you a lot of headaches later on. And if you do decide to hire someone, don’t be afraid to ask for quotes, check their past work, and make sure they clean up properly. A good plaster job starts with good preparation, and that’s true whether you’re a DIYer or a seasoned pro.
Frequently Asked Questions
What’s the most important thing to do before plastering starts?
The biggest thing is to get your home ready. This means moving furniture and anything valuable out of the way, or at least covering it up really well. You also need to make sure the plasterer can easily get to the walls and has good air flow in the room. Think of it like clearing the stage for a play so the actors (the plasterers) can do their best work without tripping over anything.
How long does plaster take to dry?
Plaster doesn’t dry super fast, especially when it’s cold or damp outside. It can take several days, sometimes even longer, before it’s ready for paint. A good plasterer will tell you how long to wait. Trying to paint too soon can cause problems later, like weird spots or peeling paint. Patience is key here!
What should I ask a plasterer before hiring them?
You should ask if they have insurance, just in case something goes wrong. It’s also smart to ask if they guarantee their work and for how long. Get a written quote that explains exactly what they’ll do and how much it will cost. Asking about their experience, especially with homes like yours, is also a good idea.
Are there different kinds of plaster, and does it matter which one is used?
Yes, there are! Some plasters are better for older homes, like lime plaster, while others are great for modern looks. Some are lighter or even eco-friendly. It’s important to ask your plasterer what they plan to use and why. Using the wrong kind or cheap materials can lead to cracks or a surface that doesn’t last.
What if I see tiny cracks after the plastering is done?
It’s pretty normal to see a few small cracks, often called hairline cracks, as the plaster settles and dries completely. It’s usually not a big deal. If you’re worried, or if the cracks seem large, it’s best to ask your plasterer about it. They can tell you if it’s normal or if it needs a quick fix.
How clean are plasterers usually?
A really good plasterer takes pride in their cleanup. They should bag up all their waste, vacuum the area, and wipe down surfaces to remove any dust or splatters. You shouldn’t have to do a big cleanup after they leave. If they leave a mess, it’s a sign they might not be the most professional.