
Thinking about getting some plastering done in Bristol? You’re probably wondering about the timeline. It’s not as simple as just picking a date and having it done. There are a bunch of things that can affect how long it all takes, from the type of plastering to how long it needs to dry. Let’s break down what you can realistically expect when you’re asking, ‘how long does plastering take Bristol?’ and what goes into it.
Key Takeaways
A standard room plastering job, like re-skimming, usually takes 1-3 days, but a full re-plaster can take longer, especially with drying times included.
Factors like room size, complexity of the job, and any necessary repairs significantly influence the total plastering duration.
Drying periods are critical; gypsum plaster needs at least 5-10 days, while lime plaster requires 2-3 weeks before decorating.
Thorough preparation, including protecting your home and addressing substrate issues, is vital for a good finish and can add to the initial timeline.
Hiring experienced, local Bristol plasterers often leads to more efficient work, better problem-solving, and a higher quality finish.
Understanding Plastering Timelines In Bristol
So, you’re wondering how long plastering actually takes, especially here in Bristol? It’s a question we get asked a lot, and honestly, there’s no single answer. It really depends on a few things. We’re going to break down the typical timeframes you can expect, what can speed things up or slow them down, and what to consider for bigger jobs.
For a typical room, like a standard bedroom or living room, you’re usually looking at the plasterers being on-site for about 1 to 3 days. This covers the actual application of the plaster. This timeframe can vary, of course. A small bathroom might be quicker, while a room with lots of awkward corners or features could take a bit longer. It’s not just about slapping plaster on; it’s about getting it smooth and ready for the next stage.
Factors Influencing Project Length
Several things can affect how long your plastering job takes:
Room Size and Complexity: Larger rooms naturally take more time. Rooms with lots of angles, alcoves, or features like bay windows will also increase the duration.
Type of Plastering: Are we talking about a full re-plaster or just a skim coat over existing plaster? Skimming is generally faster.
Condition of the Walls: If the walls are in rough shape, requiring significant repair or preparation before plastering, this adds extra time.
Number of Coats: Some jobs might need multiple coats of plaster, especially if it’s a new build or a major renovation.
Plasterer’s Experience: A seasoned professional will often work more efficiently than someone less experienced.
Timelines For Multiple Room Projects
If you’re looking to plaster multiple rooms, the timeline expands. It’s not always as simple as multiplying the time for one room by the number of rooms. Sometimes, a plasterer can work on different rooms concurrently, or move between them as drying times dictate. For a whole house, you might be looking at anywhere from a week to several weeks, depending on the scale of the work. It’s always best to get a detailed schedule from your chosen plasterer for larger projects.
It’s important to remember that the time the plasterers are actively working is only part of the story. The drying time afterwards is just as significant, and we’ll cover that in detail next.
The Crucial Drying Periods For Plaster
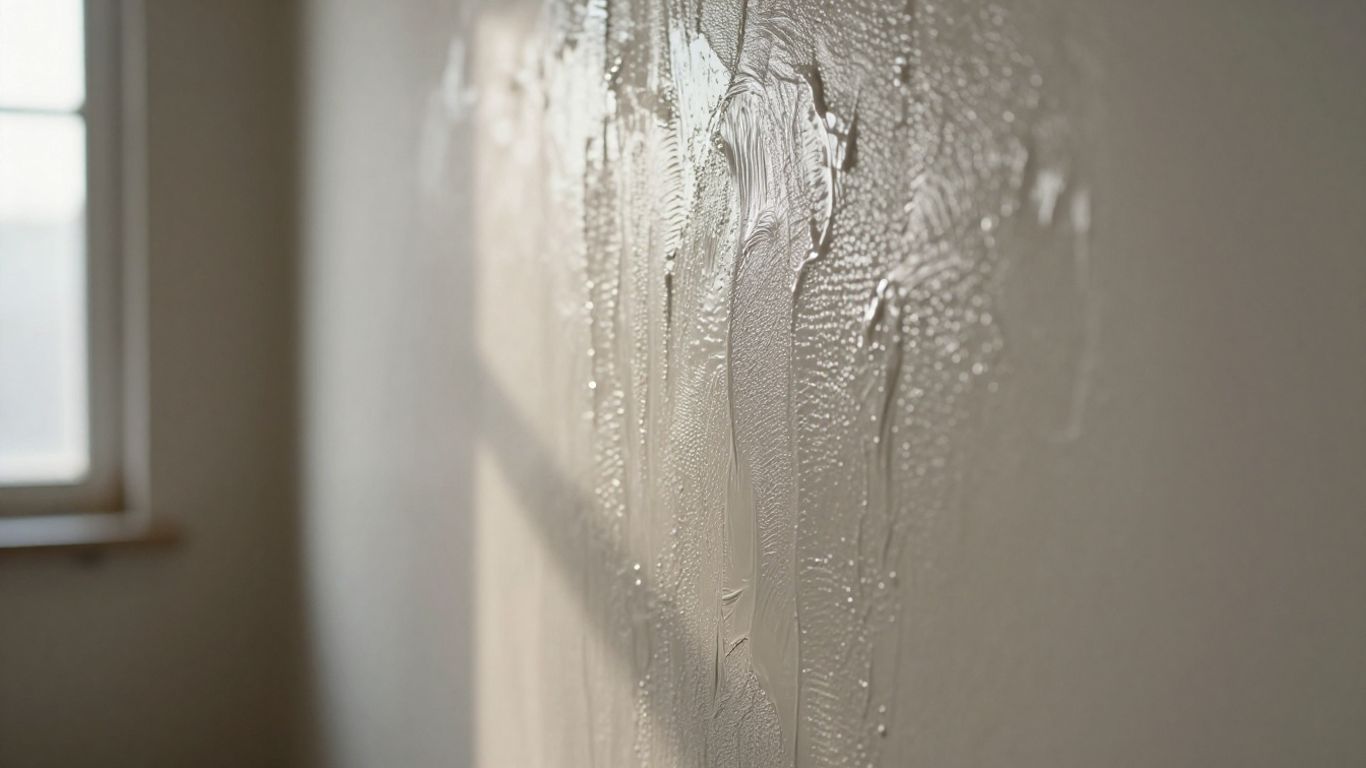
So, you’ve had your walls plastered, and they look fantastic! But hold on, don’t rush to grab the paint or wallpaper just yet. The drying time for plaster is a really big deal, and skipping this step can lead to all sorts of headaches down the line.
Gypsum Plaster Drying Requirements
Gypsum-based plasters, the most common type you’ll find used by plasterers today, need a good amount of time to dry out properly. For a standard skim coat applied over plasterboard, you’re generally looking at about 3 to 5 days. If it’s a thicker application, like on brick or blockwork, that time can stretch to 7 to 14 days. This drying period is absolutely vital for the plaster to achieve its full strength and stability. Trying to rush it by cranking up the heat is a bad idea; it can actually cause cracking and adhesion problems. Gentle, consistent warmth and good airflow are your friends here.
Extended Curing For Lime Plaster
If you’ve opted for a more traditional lime plaster finish, you’ll need to be even more patient. Lime plaster cures differently and takes significantly longer. We’re talking about a minimum of 2 to 4 weeks for it to fully dry and harden. This extended period is part of what gives lime plaster its unique, breathable qualities, but it means a longer wait before you can even think about decorating. It’s a different ballgame compared to modern gypsum plasters.
Impact Of Environmental Conditions On Drying
What’s the weather like in Bristol? It matters more than you might think! The temperature and humidity in your home play a huge role in how quickly plaster dries. Cold, damp conditions will slow things down considerably, potentially doubling the drying time. Conversely, very hot, dry air can cause the plaster to dry too quickly on the surface, leading to shrinkage and cracking before the deeper layers have set. Ideally, you want a consistent, moderate temperature (around 10-20°C) with decent ventilation. Using a dehumidifier can help speed things up safely, but avoid extreme temperature swings. It’s all about creating the right environment for the plaster to cure evenly and without issues. Patience really is a virtue when it comes to plaster drying, and it’s the key to a long-lasting, beautiful finish. Remember, painting too soon can trap moisture, leading to bubbling paint and potential mold growth, so give it the time it needs. You can check out drying times for plaster for more specific details.
The drying process isn’t just about the surface looking dry; it’s about the moisture content throughout the entire thickness of the plaster reducing to a suitable level for decoration. This internal drying takes time and is influenced by many factors beyond just the visible surface.
Preparation And Its Impact On Plastering Time
Before any plaster even hits the wall, there’s a whole lot of prep work that needs doing. Honestly, this part can sometimes take longer than the actual plastering, especially if the room’s a bit of a mess to start with. Skipping or rushing this stage is a recipe for disaster down the line, leading to cracks, poor adhesion, and a finish that just doesn’t last. It’s all about creating the right foundation.
Essential Steps Before Plastering Begins
Proper preparation is key to a good plaster job. It’s not just about slapping on some plaster; it’s about making sure the surface is ready to receive it. Here’s what usually happens:
Clearing the space: Furniture needs to be moved out or, more likely, covered up really well. Anything that can’t be moved gets a good going-over with dust sheets.
Protecting surfaces: Floors are covered with heavy-duty plastic or old carpet remnants. This stops plaster splashes from ruining your flooring.
Assessing the walls: Loose plaster is tapped and removed. Any cracks are filled, and holes are patched up. If there’s damp, that needs sorting out first.
Cleaning: Dust and dirt are wiped away. A PVA solution might be applied to seal porous surfaces, stopping the plaster from drying out too fast.
Adding corner beads: Metal or plastic beads are fixed to external corners and around openings like doors and windows. This helps create nice, straight lines.
Protecting Your Home During Preparation
Think of this stage as your plasterer’s way of showing respect for your home. They’ll use dust sheets, plastic sheeting, and tape to cover everything that isn’t being plastered. This includes:
Furniture (even if it’s been moved to the centre of the room)
Flooring
Windows and door frames
Light fittings and sockets
The goal is to minimize mess and protect your belongings from plaster dust and splashes. It might look like a lot of covering, but it makes the cleanup process much easier later on.
Addressing Substrate Issues For Longevity
Sometimes, walls aren’t in great shape. You might have old wallpaper that’s hard to remove, crumbling plaster, or even signs of damp. These issues need to be dealt with before plastering can even begin. Trying to plaster over a problem is like building a house on sand – it won’t end well.
Damp: If there’s damp, the source needs to be found and fixed. This might involve external wall repairs or improving ventilation. Plastering over damp will just cause the problem to reappear.
Cracks and holes: Small cracks are filled, but larger ones might need a specific repair technique. Deep holes need to be filled with a suitable backing plaster first.
Old finishes: Multiple layers of old paint or wallpaper might need to be stripped back to get a good key for the new plaster.
Dealing with these substrate issues properly adds time upfront, but it’s absolutely vital for a durable and attractive finish that lasts for years. It’s the difference between a quick fix and a proper job.
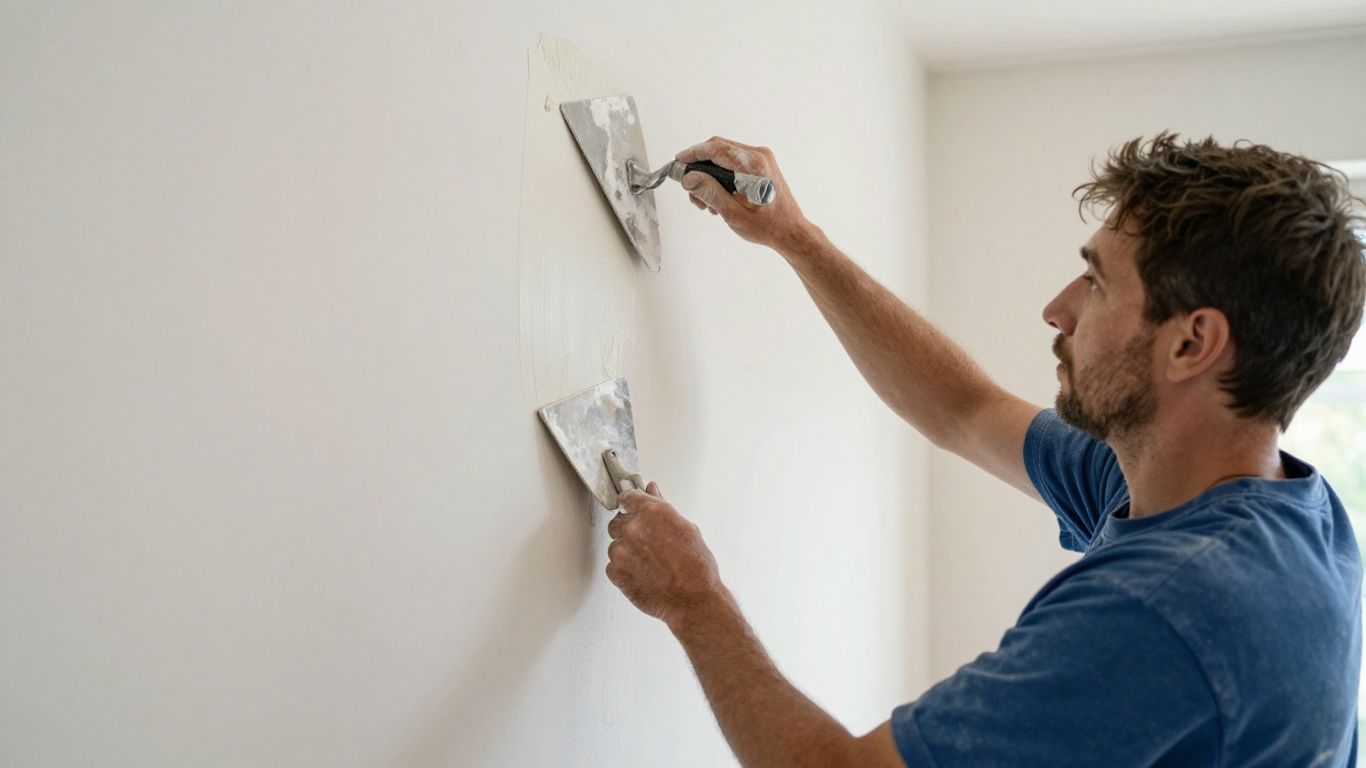
Professional Plasterer Efficiency In Bristol
Efficient plasterers in Bristol often make the work look effortless, but there’s a lot going on behind the scenes. Great tradespeople blend old-fashioned know-how with new tools, keeping projects on track without cutting corners. They find ways to move from room to room quickly and minimize mess, so your home feels less like a construction site and more like, well, home.
How Long Does Re-Skimming Take?
Re-skimming is a popular way to refresh a tired wall or ceiling. Here’s what you can expect from a seasoned Bristol plasterer:
Average-sized bedroom: usually completed in 1–2 days
Living rooms or larger areas: may take 2–3 days
Small patch repairs: often just a few hours
The type of plaster, condition of existing surfaces, and household activity can all nudge the schedule. Most homeowners are surprised how swiftly a pro can finish a seemingly big job—especially when the plasterer uses modern dustless sanders and plastic smoothers for a flawless finish.
Skimming can be surprisingly quick if surfaces are already well-prepared, so always ask about the prep steps needed for your specific job.
Timelines For Complete Re-Plastering
Full re-plastering means stripping back to brick or block, adding new bonding coats, then finishing with a fresh skim. That’s more involved, so expect it to take longer than re-skimming alone.
Area Type | Typical Duration |
|---|---|
Standard bedroom | 3–4 days |
Large lounge | 4–6 days |
Whole house (3-bed) | 2–3 weeks |
Factors like high ceilings, intricate corners, or complex moldings can extend these times. Reliable plasterers like Plasterwise Solutions coordinate closely with homeowners and builders to keep all parts of a renovation moving smoothly, which helps keep those timelines realistic.
Efficiency In Handling Complications
No two Bristol homes have exactly the same quirks, so real professionals must adapt fast. The best plasterers know how to tackle surprises like:
Hidden damp patches or cracks
Unstable old substrates (loose render or blown plaster)
Odd-shaped rooms or historic features
Jobs that suddenly expand due to unseen damage
Here’s what sets true pros apart:
Quick troubleshooting—they’ll explain the problem and propose a fix straight away.
Minimal disruption—they might seal off dusty areas and move furniture to protect your stuff.
Realistic time adjustments—they’ll keep you up to date if anything changes so there’s no nasty surprise when you get home from work.
If you hire someone who’s efficient and keeps the lines of communication open, you’ll avoid the frustration of endless overruns and half-finished rooms.
Post-Plastering Considerations
So, you’ve got that fresh, smooth plaster look in your Bristol home. It’s tempting to jump right back into decorating or hanging things, but hold on a sec. New plaster needs a bit of TLC to really settle in and last.
What To Avoid With New Plaster
This is where patience really pays off. Don’t rush the drying and curing process. It might look dry on the surface, but there’s still moisture trapped inside, especially with thicker applications or in cooler Bristol weather. Painting too soon is a common mistake; it can trap that moisture, leading to peeling paint, bubbling, and even damage to the plaster itself. You’ll want to wait at least two to three weeks, sometimes longer, before you even think about applying a mist coat, let alone your topcoats.
Also, try to avoid any heavy impacts or drilling into the walls during this initial period. You don’t want to accidentally crack or dent your newly plastered surfaces. Keep the area well-ventilated but avoid extreme temperature changes – no blasting the heating to speed things up, as rapid drying can cause cracking. And definitely keep water away; no washing down the walls or letting splashes hit them.
The Importance Of Aftercare Advice
Your plasterer will likely give you some specific advice tailored to the type of plaster used and the conditions in your home. It’s really worth listening to this! They know their stuff and can tell you exactly what to look out for.
Drying times: They’ll give you a realistic timeframe for when it’s safe to decorate.
Ventilation: Tips on how to best air out the room without causing issues.
First coat: Guidance on applying a mist coat, which is usually a thinned-down version of your paint.
Problem signs: What to watch out for, like unusual cracking or discolouration.
Customer Responsibilities For Cleanup
While professional plasterers will tidy up their work area, removing their tools, mixing buckets, and major debris, the final, deep clean is usually down to you. Think of it like this: they’ve done the plastering, but you’re living in the space afterwards.
This means you’ll likely need to:
Vacuum up fine plaster dust that settles everywhere.
Wipe down surfaces, skirting boards, and window sills where dust has landed.
Clean any minor plaster splashes that might have occurred.
Dispose of any dust sheets or protective coverings they may have left.
It’s always a good idea to clarify the scope of cleanup with your plasterer before they start. This way, there are no surprises, and you know exactly what to expect when the job is done. A little bit of extra cleaning on your part goes a long way to making your newly plastered rooms look their absolute best.
Finding The Right Plasterer For Your Bristol Project
So, you’ve got your timelines sorted, you know how long the plaster needs to dry, and you’re ready to bring in the pros. But how do you actually pick the right person for the job in Bristol? It’s not just about finding the cheapest quote, believe me. I’ve seen too many DIY disasters and shoddy plaster jobs to know that. It’s about finding someone who’s skilled, reliable, and respects your home.
Assessing Experience and Specialisms
When you’re looking for a plasterer, think about what you actually need. Are you just getting a quick skim over some tired old walls, or do you have intricate Victorian coving that needs a bit of TLC? Some plasterers are brilliant at the quick skim jobs, while others really shine when it comes to decorative plasterwork or restoring period features. Don’t be afraid to ask about their experience with similar projects. A good plasterer will be happy to talk about their background and what kind of work they enjoy most.
Ask about their experience with specific types of plaster (e.g., gypsum, lime, monocouche).
Inquire about their familiarity with different building styles common in Bristol.
Request to see a portfolio of their previous work, especially if it matches your project type.
The Value Of Local Bristol Tradesmen
There’s a real advantage to hiring someone who knows Bristol. Local plasterers understand the common issues with houses in the area, whether it’s dealing with older properties or specific environmental factors. They’ve likely worked on streets near you and have built a reputation within the community. This local knowledge can save you time and potential headaches. Plus, supporting local businesses just feels good, doesn’t it?
Local tradesmen often have a better understanding of the specific building materials and common issues found in Bristol’s diverse housing stock. This familiarity can lead to more efficient problem-solving and a better final result.
Questions To Ask Potential Plasterers
Before you commit, have a good chat with a few different plasterers. It’s your chance to gauge their professionalism and see if you click. Here are some questions that I always find helpful:
Can you provide a written quote detailing all costs?
What is your typical availability and estimated start date?
Do you offer a guarantee or warranty on your work?
How do you handle dust and protect surrounding areas during the job?
Can you provide references from recent clients?
What are your payment terms?
Remember, a good plasterer will be happy to answer these questions and will likely have their own questions for you about the project. You can find a good range of plastering companies in Bristol to get started with your inquiries.
So, How Long Does Plastering Really Take in Bristol?
Alright, so we’ve talked about how plastering jobs in Bristol can really vary. A simple re-skim might only take a day or two, but if you’re looking at a full re-plaster or dealing with older homes, you’re probably looking at longer. Remember those drying times too – they’re not just suggestions, they’re super important for a good finish. It’s not just about the plasterer’s speed, but also about the conditions and the type of plaster used. Always chat with your chosen pro about their timeline, get it in writing, and factor in a bit of wiggle room for unexpected stuff. Patience really is key here, and a good plasterer will guide you through it all.
Frequently Asked Questions
How long does it usually take to plaster a room in Bristol?
For a standard room, plastering often takes about 1 to 3 days. A quick re-skim might only need 1 to 2 days, while a full re-plastering job, including a base coat and drying time, could take 2 to 3 days. If you have multiple rooms, the total time will add up, with three bedrooms possibly taking 4 to 6 days if done one after the other. Remember, this doesn’t include the crucial drying time before you can paint!
What kind of prep work is needed before plastering starts?
Before plastering, a good tradesperson will protect your furniture and floors with dust sheets. They’ll also remove any loose plaster, fix cracks, and make sure the wall is clean and ready for the new plaster. Sometimes, they’ll apply a special sealer to help the plaster stick better and dry just right. This careful prep work is key to making sure the plaster job lasts and looks great.
How long does plaster need to dry before I can paint it?
This is super important! For regular gypsum plaster, you should wait at least 5 to 10 days before you even think about painting. If you’re using lime plaster, which is more traditional, it needs even longer – often 2 to 3 weeks. Painting too soon can trap moisture, leading to problems like cracking or peeling paint later on.
What should I avoid doing to newly plastered walls?
With fresh plaster, you need to be gentle. Avoid painting it too soon, as it needs time to dry out completely. Also, try not to expose it to extreme heat or cold, or get it wet. Don’t hang heavy pictures or shelves right away, as this can damage the plaster while it’s still curing. Basically, give it plenty of time and space to do its thing.
Do plasterers clean up after they finish the job?
Most professional plasterers will clean up the main mess, like removing their tools, buckets, and large debris. However, the really detailed cleaning, like wiping down every surface for fine dust, is usually up to you. It’s always best to ask your plasterer exactly what their cleanup includes before they start so there are no surprises.
How can I find a reliable plasterer in Bristol?
Look for local plasterers who have good reviews and references you can check. Asking friends or neighbors for recommendations is a great start. A good plasterer will be happy to show you examples of their past work, provide a clear written quote, and explain their process. Don’t be afraid to ask questions about their experience, insurance, and what guarantees they offer.