
So, you’re thinking about updating your walls and wondering if you can just plaster over the old wallpaper. It’s a common question for homeowners in Bristol looking for a quicker way to get a fresh look. While it might seem like a shortcut, there are definitely things to consider before you grab that plaster. We’ll break down what you need to know to make sure you get a good finish and don’t end up with bigger problems down the line. Let’s figure out if plastering over wallpaper in Bristol is the right move for your home.
Key Takeaways
Plastering directly over wallpaper is sometimes possible, but only if the wallpaper is well-adhered and the wall is dry and free from damage. It’s not always the best option.
Before you plaster, check the wall construction. Older homes in Bristol, like Victorian or Georgian properties, might need different materials (like lime plaster) than modern builds.
Damp or moldy walls are a big no-no for plastering. You must fix any moisture issues and remove mold completely before plastering to avoid health problems and future damage.
Proper preparation is key. This includes cleaning the wallpaper, possibly applying a primer or sizing, and making sure the wall is sound.
For the best results and to avoid issues, especially in a place like Bristol with varied property types, it’s often wise to consult with local plastering professionals who know the area and common building challenges.
Assessing Your Walls For Plastering Over Wallpaper
Before you even think about slapping on a new layer of plaster over old wallpaper, you really need to take a good look at what you’re dealing with. It’s not always as simple as just covering it up. Getting this step wrong can lead to a whole heap of problems down the line.
Understanding Wall Construction Types
Not all walls are built the same, and this matters a lot when you’re thinking about plastering. In Bristol, you’ve got a mix of older properties and newer ones, and they behave differently.
Solid Walls: These are common in older homes, like many Victorian and Georgian properties you see around Bristol. They’re typically made of brick or stone with no gap. The key thing here is that they need to ‘breathe’. This means using breathable plasters, like lime plaster, is often best. Trying to cover wallpaper on a solid wall with modern, non-breathable plaster can trap moisture, leading to damp issues.
Cavity Walls: Most homes built after the 1920s have cavity walls, which have a gap between the inner and outer brickwork. These are generally more forgiving and can usually handle standard gypsum plaster. The cavity helps manage moisture, so you’re less likely to run into the same breathability issues.
Knowing your wall type is the first step to making sure your plaster job lasts.
Identifying Potential Issues Before Plastering
So, you’ve figured out your wall type. Now, let’s get down to the nitty-gritty of the wallpaper itself and the wall behind it. You don’t want any nasty surprises popping up later.
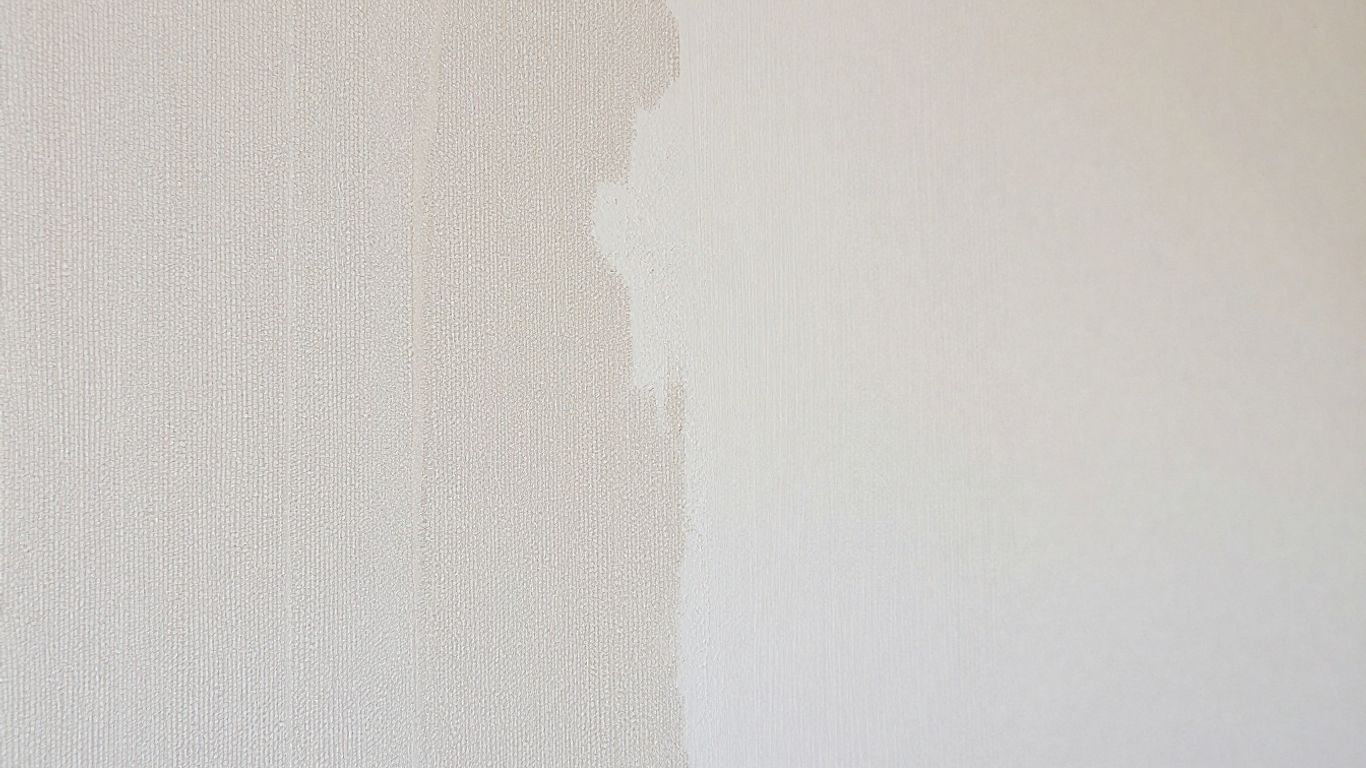
Wallpaper Condition: Is the wallpaper peeling, bubbling, or ripped in places? If it’s loose, plaster won’t have a solid surface to grip onto. You might need to strip it back in those areas, or even entirely.
Wall Surface: Give the wall a good feel. Is it damp? Does it feel soft or crumbly? This could indicate underlying moisture problems that plastering over won’t fix – it’ll just hide them temporarily.
Adhesion: Try to gently lift a corner of the wallpaper somewhere inconspicuous. Does it come away easily, or is it stuck fast? If it’s really stuck, it might be okay, but if it’s loose, it’s a red flag.
You’re essentially creating a new surface, and that new surface needs something solid and dry to stick to. If the existing wallpaper is failing, or the wall behind it is compromised, your new plaster job is built on shaky ground.
Dealing With Existing Mold Concerns
Mold is a big no-no. If you see any signs of mold on the wallpaper or suspect it’s lurking behind it, you absolutely cannot just plaster over it. Mold needs to be dealt with properly.
Identify the Source: Mold usually means there’s a moisture problem. Is it condensation, a leak, or rising damp? You need to fix the root cause first.
Treat the Mold: You’ll need to kill off the mold spores. Use a dedicated mold cleaner, following the product instructions carefully. Wear protective gear like gloves and a mask.
Remove Affected Material: If the mold is extensive or has damaged the wallpaper and plaster underneath, it’s often best to remove the affected wallpaper and any damaged plaster. You might need to let the wall dry out thoroughly before you can even think about replastering. For serious mold issues, it’s worth getting professional advice on wall preparation before proceeding.
Plastering over mold is not only ineffective but can also be a health hazard, as the mold can continue to grow and spread behind the new plaster.
The Plastering Process For Existing Wallpaper
So, you’ve decided to plaster over your existing wallpaper. It sounds like a shortcut, right? Well, it can be, but there’s a process to it, and you can’t just slap plaster on and expect magic. Getting this right means your walls will look smooth and be ready for paint or new wallpaper down the line. Mess it up, and you’ll have bigger problems than you started with.
Preparing Walls for a Smooth Finish
First things first, you need to get the walls ready. This isn’t just a quick wipe-down. You’ve got to make sure the wallpaper is stuck down properly. Any loose bits, peeling edges, or bubbles need to be dealt with. You can try to glue down loose sections, but honestly, if it’s really peeling badly, you might be better off stripping it. It’s a bit of a gamble, but a solid base is key. Think of it like building a house – you wouldn’t build on shaky foundations, would you?
Check for loose wallpaper: Press down any areas that feel like they might lift. Use wallpaper paste or a strong PVA glue if needed.
Smooth out bubbles: If there are bubbles, you might need to carefully cut them open, smooth the paper down, and then glue it back.
Clean the surface: Give the walls a good clean to remove any dust, grease, or grime. This helps the plaster stick.
Consider a primer: A good quality primer or sealer can help the plaster adhere better and prevent the wallpaper pattern from showing through later. This is especially important for patterned or dark wallpapers.
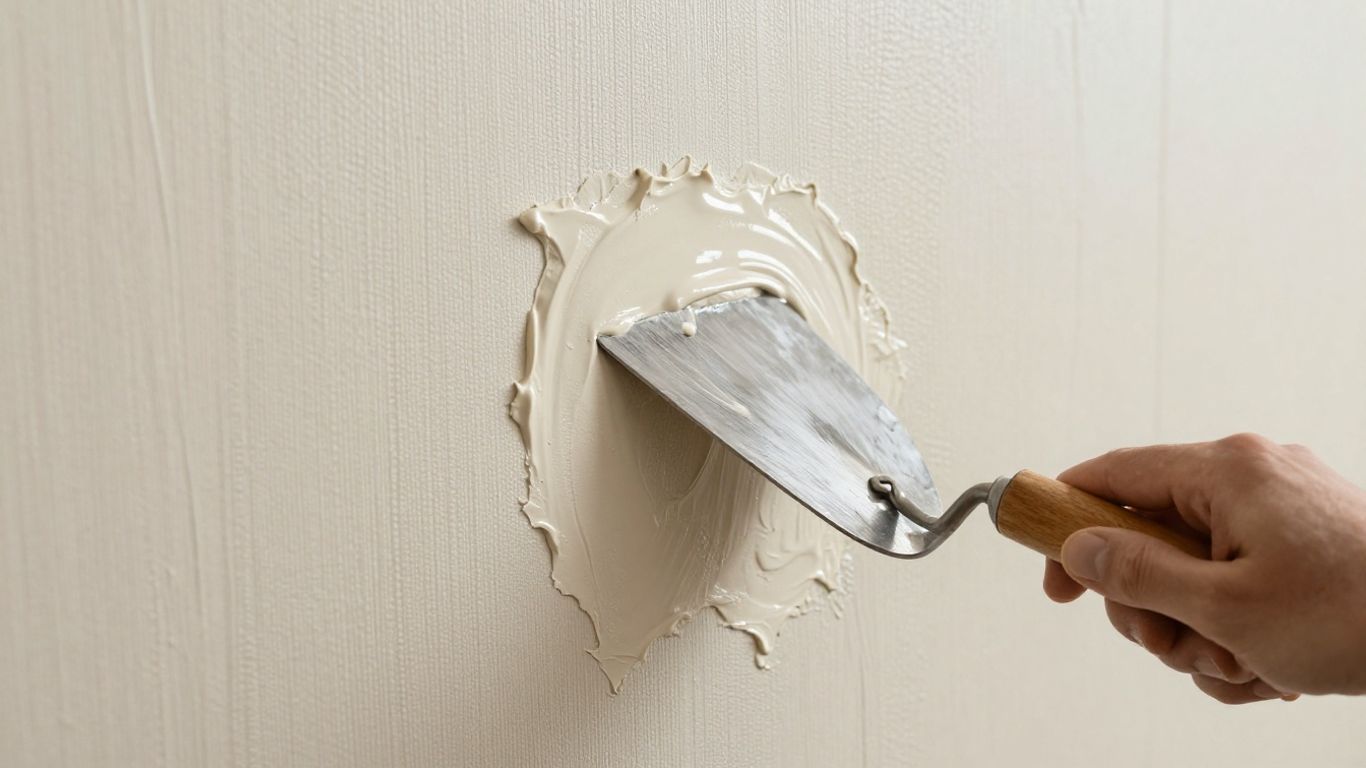
Choosing the Right Plastering Materials
For plastering over wallpaper, you’re usually looking at a skim coat. This is a thin layer of plaster applied over the existing surface. You don’t want anything too heavy. A standard gypsum-based plaster is often the go-to. Make sure you mix it according to the manufacturer’s instructions. Too much water, and it’ll be weak; too little, and it’ll be hard to work with. You’ll need a plastering trowel, a hawk (a flat board with a handle to hold plaster), and possibly some sandpaper for later.
Ensuring Proper Drying Times
This is where a lot of people go wrong. New plaster needs to dry properly before you do anything else with it. If you try to paint or wallpaper too soon, you’ll trap moisture. This can lead to bubbling, peeling, and even mold. For gypsum plaster, you’re generally looking at a minimum of 5 to 10 days of drying time in good conditions. If it’s cold or damp, this can stretch to several weeks. You can get a moisture meter to check if the walls are dry enough, or just be patient. Rushing this step will only cause headaches and extra costs down the road. Once it’s dry, you’ll need to apply a mist coat, which is a watered-down coat of paint, before applying your final coats. This seals the plaster and stops the topcoat from being absorbed unevenly. You can find more about preparing surfaces for decoration at local painter and decorator.
Patience is really the name of the game here. It might feel like forever, but letting the plaster cure correctly is the most important step for a lasting finish. Trying to speed things up with heat guns or fans can actually cause more problems, like cracking, because the plaster dries too quickly on the surface while staying wet underneath.
Specific Property Types in Bristol
Bristol’s got a real mix of buildings, and how you approach plastering over wallpaper can change depending on what you’re dealing with. It’s not a one-size-fits-all situation, that’s for sure.
Plastering Victorian and Georgian Homes
These older homes, common in areas like Clifton and Redland, have their own quirks. They often have solid walls, not the stud walls you see in newer places. This means they need a plaster that can ‘breathe’. Think lime plaster. Using modern gypsum plaster on these old walls can trap moisture, leading to damp issues down the line. It’s like putting a plastic bag over a damp sponge – not ideal.
Plus, these houses usually have lovely original features – think fancy cornices, picture rails, and ceiling roses. You’ve got to be super careful not to damage them when you’re prepping or plastering. It often means more time spent masking and protecting things, which can add to the cost. Also, the high ceilings mean you might need scaffolding or a tower, which isn’t exactly cheap.
Solid Wall Construction: Requires breathable plasters like lime.
Original Features: Need careful protection and handling.
Access: High ceilings often mean extra equipment.
If you’re in a listed Victorian or Georgian property, you might even need to get permission from the conservation officer before you start, especially regarding the materials you use. It’s all about keeping the building’s integrity.
Addressing New Builds and Modern Properties
On the flip side, newer homes built from the 1980s onwards are usually different. They typically use plasterboard fixed to timber or metal studs. This makes things a bit more straightforward. You’re less likely to run into the same moisture issues as with solid walls. The surfaces are generally flatter and more uniform, which makes preparation a bit quicker.
However, even with new builds, you still need to check the condition of the wallpaper and the plasterboard underneath. Is it peeling? Is there any damage? You’ll want a smooth, stable surface before you even think about plastering. The main thing here is getting a good key for the plaster to adhere to, especially if the wallpaper is a bit shiny or has a vinyl coating.
Considerations for Flats and Apartments
Plastering in flats, whether they’re in a Victorian conversion or a modern block, comes with its own set of challenges. Access can be a big one. Think narrow stairwells, small lifts, and limited parking. Getting plaster, tools, and equipment up to the right floor can be a real logistical puzzle.
Noise is another factor. Flats usually have stricter rules about when you can make noise. So, you might not be able to work early mornings or late evenings, which can slow things down. You also need to be mindful of neighbours – plastering can be a messy job, and you don’t want to cause damage to communal areas like hallways or landings. Sometimes, you even need permission from the building management before you start any work.
Access: Material delivery and transport can be tricky.
Noise: Work hours might be restricted.
Communal Areas: Need careful protection from dust and damage.
Regulations: Building management approval may be required.
When to Avoid Plastering Over Wallpaper
Okay, so you’re thinking about plastering over that old wallpaper. It sounds like a quick fix, right? Sometimes it is, but there are definitely times when you should just step away from the plaster bucket and consider other options. Trying to plaster over a wall that’s not ready is like trying to build a house on sand – it’s just not going to end well.
Risks of Plastering Over Damp Surfaces
First off, if your walls are even a little bit damp, forget about it. Plaster needs a dry surface to stick to properly. If you plaster over damp wallpaper, that moisture gets trapped. It’s going to cause all sorts of headaches down the line. You might see the wallpaper start to bubble or peel away from the wall, and the new plaster could start to flake off too. It’s a mess, and you’ll end up having to strip everything back anyway, which is way more work than just dealing with the damp properly in the first place. Think of it like trying to dry your clothes in a steamy bathroom – they just get wetter.
The Dangers of Plastering Over Mold
This one’s a biggie. If you see any signs of mold or mildew on your wallpaper, do not plaster over it. Seriously. Mold isn’t just unsightly; it can be bad for your health, especially if you have respiratory issues. Plastering over mold just hides the problem temporarily. That mold will keep growing behind the plaster, and it can even spread. Plus, plaster doesn’t stick well to moldy surfaces. You’re basically creating a perfect, hidden environment for the mold to thrive in. It’s way better to tackle the mold issue head-on, get rid of it completely, and make sure the underlying cause of the dampness is fixed before you even think about plastering.
Avoiding Damage to New Plaster
Even after you’ve plastered, you need to be patient. New plaster needs time to cure properly. It’s not just about it looking dry on the surface; there’s a chemical process happening inside. Trying to rush things can cause problems. For example, painting too soon traps moisture, leading to bubbling paint and potential plaster cracks. Hanging heavy pictures or shelves on plaster that hasn’t fully hardened can cause dents or cracks. It’s best to let the plaster settle and cure for at least a few weeks, sometimes longer depending on the conditions, before you start decorating or fixing things to the wall. It might feel like you’re waiting forever, but it saves you a lot of hassle in the long run.
Finding Local Plastering Expertise
So, you’ve decided to plaster over your wallpaper, which is a pretty common move for homeowners looking for a fresh look. But who do you actually get to do the job? Finding the right person, especially here in Bristol, is key to making sure it all turns out well. It’s not just about finding someone who can slap plaster on a wall; you need someone who knows what they’re doing, especially with older properties that can have their own quirks.
Connecting With Bristol Tradespeople
When you’re looking for a plasterer in Bristol, the first thing you’ll want to do is ask around. Word-of-mouth is still a big deal, you know? Chat with neighbours, friends, or even local builders you might know. They might have someone they’ve used before and can recommend. If you’re going online, look for local directories or trade sites that focus on the Bristol area. Always check reviews and testimonials – see what other homeowners in Bristol have said about their experience. It’s like checking out a restaurant before you book a table; you want to know if others had a good meal, or in this case, a good plaster job.
When you’re talking to potential plasterers, don’t be shy about asking questions. It’s your home, after all. Here are a few things to consider:
Experience: How long have they been plastering professionally? Do they have experience with the type of walls in your Bristol home (Victorian, Georgian, modern)?
Qualifications & Insurance: While not always mandatory, formal qualifications like NVQ Level 2 or City & Guilds show a level of training. More importantly, make sure they have public liability insurance. This protects you if anything goes wrong.
Portfolio & References: Ask to see photos of their previous work, especially jobs similar to yours. And definitely ask for references from past clients. Actually calling those references can tell you a lot about their reliability and the quality of their work.
Quotation: Get a detailed quote in writing. It should outline exactly what’s included – materials, labour, preparation, and cleanup. Don’t just go for the cheapest option; it often means corners are being cut.
Specialist Plastering Services
Sometimes, plastering over wallpaper can be a bit more involved, especially if your walls have issues like damp or uneven surfaces. This is where specialist services might come in handy. Some plasterers focus on specific types of work, like traditional lime plastering for older homes, or maybe they have a knack for dealing with tricky surfaces. If you’re in a conservation area or have a listed building, finding someone with that specific experience is really important. They’ll know the best materials and techniques to use that won’t damage the character of your property. Don’t hesitate to ask if they have experience with your specific property type or any particular challenges your walls might present. It’s better to find out upfront if they’re the right fit for the job.
So, Can You Plaster Over Wallpaper?
Alright, so we’ve talked a lot about plaster and wallpaper, and the big question is, can you just slap plaster right over old wallpaper? The short answer is, it’s usually not the best idea. While it might seem like a quick fix, plaster needs a solid, dry surface to stick to. Wallpaper, especially if it’s old or has any dampness, just doesn’t provide that. You’re more likely to end up with cracks, peeling, or worse, mold down the line. It’s almost always better to take the time to strip the old paper and prep the wall properly. Trust me, your walls (and your sanity) will thank you for it in the long run. Patience here really pays off.
Frequently Asked Questions
Can I really plaster right over my old wallpaper?
Generally, it’s not the best idea. While it might seem like a shortcut, plastering directly over wallpaper can lead to problems down the line. The wallpaper might not stick well to the plaster, or moisture could get trapped behind it, causing issues like mold or peeling. It’s usually much better to remove the wallpaper first for a smooth, lasting finish.
What if my walls have mold or damp spots?
You absolutely should not plaster over mold or damp areas. Mold is a sign of moisture problems that need to be fixed first. Plastering over it will just hide the problem temporarily and can make it worse, plus it’s unhealthy. You need to find the source of the damp, get rid of the mold, and let the wall dry completely before even thinking about plastering.
How long does new plaster need to dry before I can paint or wallpaper?
Patience is key here! New plaster holds a lot of moisture. It typically needs to dry for at least a month, sometimes longer, depending on the weather and the type of plaster. Painting or wallpapering too soon traps moisture, which can cause the paint to bubble or the wallpaper to fail, and can even lead to mold. It’s best to wait until the plaster is fully dry.
Are older homes in Bristol, like Victorian ones, different to plaster?
Yes, older homes, especially Victorian and Georgian ones, often need a different approach. They usually have solid walls that need breathable plaster, like lime plaster, to let moisture escape. Using modern plaster on these old walls can trap moisture and cause damage. Plus, older homes might have special features like decorative moldings that need careful handling.
What about plastering in apartments or flats?
Plastering in flats can be a bit trickier due to things like limited access for materials, stricter rules about noise, and shared walls. You might need to get permission from building management, and the timing of the work can be more restricted. The actual plastering might be the same, but the logistics can add complexity and sometimes cost.
When is it definitely a bad idea to plaster over wallpaper?
It’s a really bad idea if the wallpaper is peeling, damaged, or if there’s any sign of damp or mold behind it. Also, if the wallpaper is very old, thick, or has a plastic coating, it might not provide a good surface for plaster. Trying to plaster over a bad foundation will only lead to problems later on, costing more to fix.