
Your walls might be trying to tell you something. Cracks appearing out of nowhere, damp patches that won’t go away, or that hollow sound when you knock on the wall – these are all signs that your plaster could be on its way out. But how do you know when it’s time to call in a professional? And when can you get away with a simple patch repair instead of a full replaster? In this guide, we’ll walk you through the common warning signs that your walls need attention. We’ll also help you understand when a quick fix will do the job and when it’s worth investing in a complete replaster. These signs of failing plaster are important to spot early.
Key Takeaways
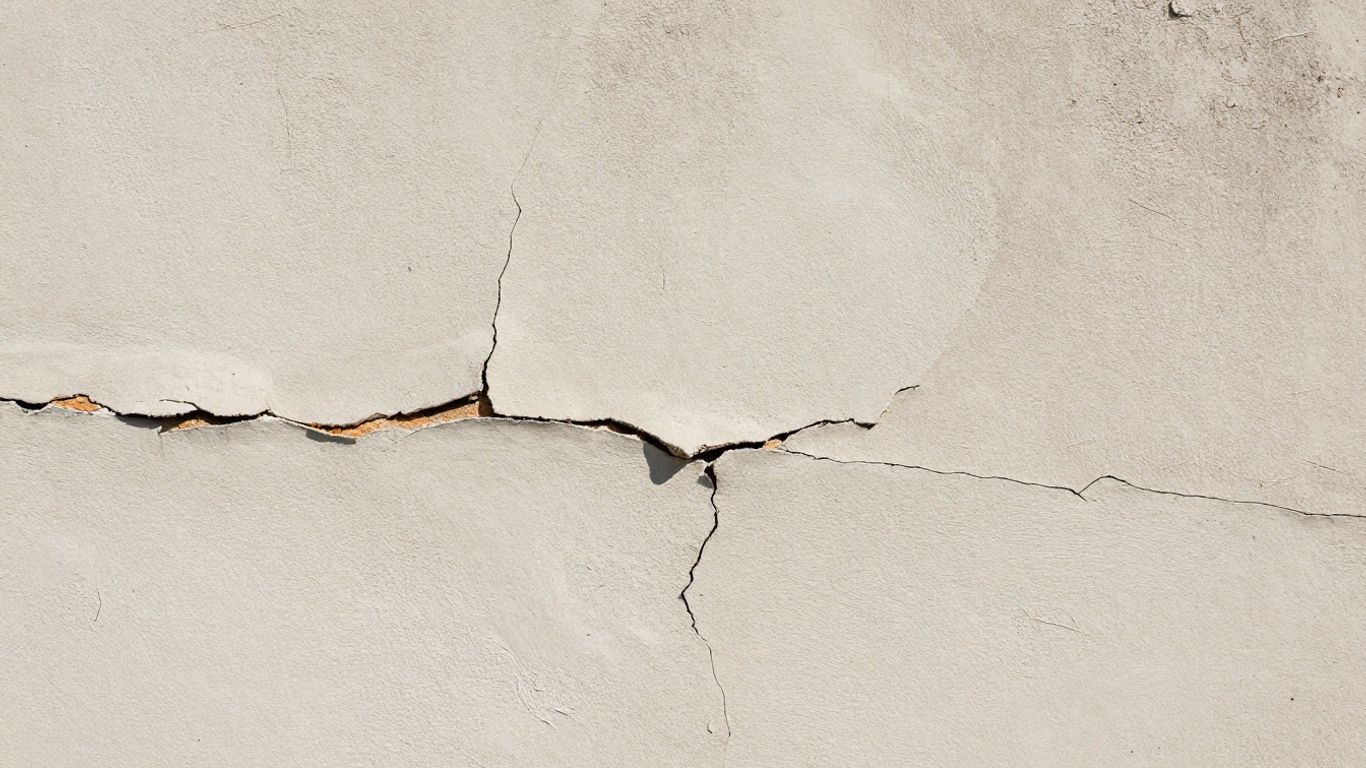
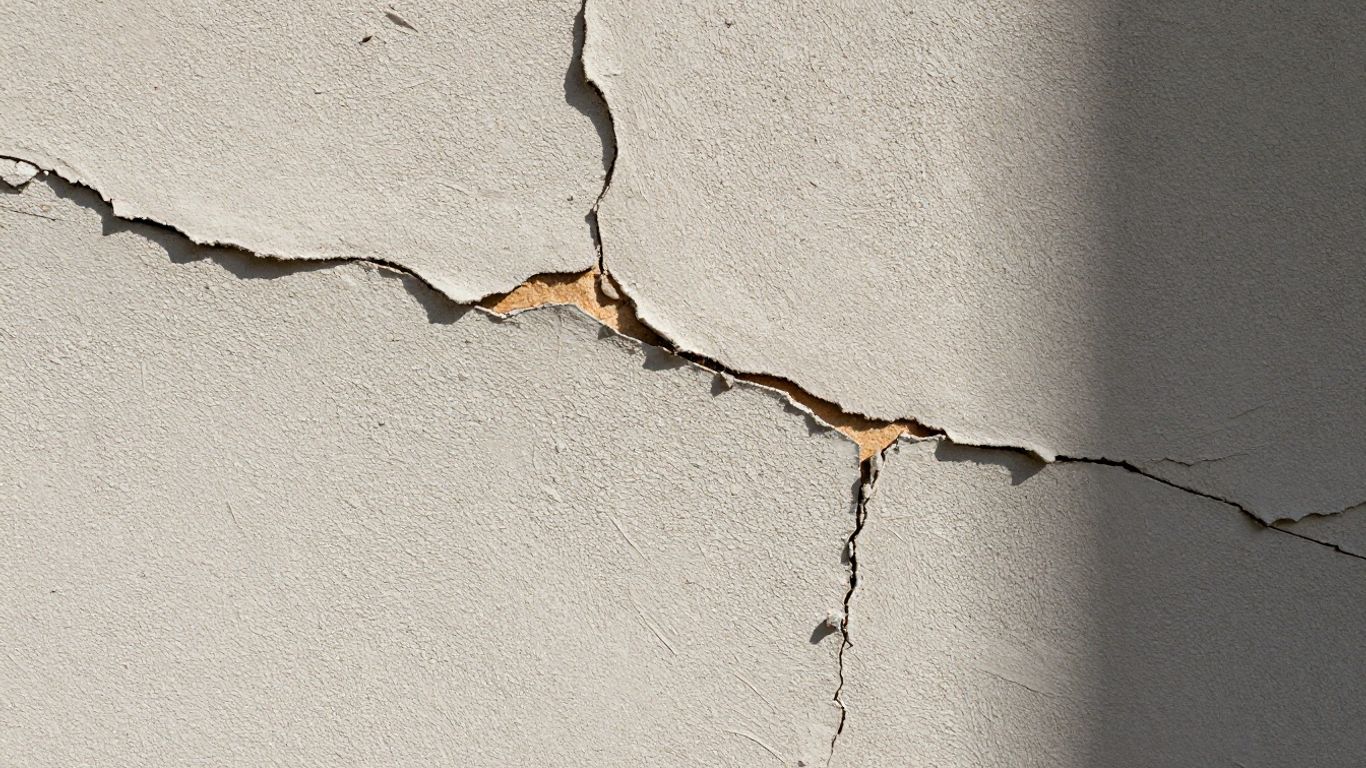
Small hairline cracks are normal, but cracks that spread from corners or reappear after filling can indicate serious issues with blown failing plaster.
A hollow sound when tapping your walls means the plaster has detached from the underlying surface and will likely fail.
Damp patches that keep returning, along with discolored stains or bubbling paint, point to moisture problems that degrade plaster.
A crumbling, flaking, or powdery texture on your walls suggests the plaster is weak, has lost its bond, or is breaking down.
Bulging or uneven plaster surfaces are visual cues that something is wrong behind the wall, often due to moisture or structural movement.
Recognizing Signs of Blown Failing Plaster
Sometimes, plaster walls just start to act up. It’s not always obvious at first, but there are definitely clues you can look for. You don’t need to be a plastering pro to spot these issues; a little attention to detail goes a long way. The most common reason plaster fails is moisture, but other factors can play a role too.
The Tap Test for Detached Plaster
This is probably the easiest way to check if your plaster is still holding tight. Grab a wooden spoon or even just your knuckles and gently tap the wall. If the plaster is still well-bonded to the surface underneath – like brick, blockwork, or even old plasterboard – it’ll sound solid and dull. But if you hear a hollow or drum-like sound, that’s a big red flag. It means there’s a gap behind the plaster, and it’s likely loose. This hollow-sounding plaster is what we call ‘blown’ plaster, and it’s not going to stay put forever. You’ll want to check various spots, especially around edges and corners, as these areas can sometimes fail first. If you notice any areas that sound different from the rest, mark them for a closer look. It’s a simple check, but it can tell you a lot about the health of your walls. If you’re seeing loose plaster or significant movement, it’s a good idea to get a professional opinion about plaster walls.
Visual Cues: Bulges, Bubbles, and Ripples
Beyond the sound test, your eyes can also pick up on failing plaster. Look for any areas that seem to bulge outwards or have a slightly uneven surface. These aren’t just cosmetic issues; they’re often signs that the plaster is lifting away from the wall behind it. You might also see small bubbles or ripples, which can indicate trapped air or moisture. Sometimes, these visual cues are subtle, like a slight distortion in the wall’s flatness. Paint or wallpaper might also start to bubble or peel in these areas, even after you’ve tried to fix it. Discolored patches, especially if they look like tide marks or have a yellowish or brownish tint, are another visual warning. These stains can be linked to moisture or even minerals from the underlying wall leaching through. They’re not just an eyesore; they’re a sign that the material is compromised and needs attention.
Flaking Finishes and Powdery Surfaces
Another tell-tale sign is how the surface feels and looks when it starts to break down. If you run your hand over the wall and it feels gritty, or if small bits crumble off, that’s not good. This usually means the plaster is old, has lost its strength, or wasn’t mixed or applied correctly in the first place. You might find a fine dust or powdery residue collecting at the base of the wall, especially after you’ve touched it. This powdery texture is a clear indicator that the plaster is weak and has lost its bond. Sometimes, even the paint or wallpaper on the surface will start to flake or peel away in strips, particularly if the plaster underneath is unstable. This flaking isn’t just about the finish; it points to a deeper problem with the plaster itself.
Understanding Moisture’s Role in Plaster Failure
Moisture is probably the biggest culprit when it comes to plaster deciding it’s had enough. It’s not just about a bit of dampness; water can actually break down the bond between your plaster and the wall it’s stuck to. When that connection weakens, the plaster starts to lift, bulge, and eventually fail. It’s a common reason why plaster can blow, and it’s something you really need to get a handle on before you even think about patching it up.
How Water Weakens Plaster Bonds
When water gets into the wall structure, it can seep into the tiny spaces between the plaster and the substrate (like brick or lath). This constant presence of moisture can dissolve the natural glues and binders in the plaster mix over time. Think of it like a slow-motion erosion. The repeated wetting and drying cycles are particularly damaging, causing expansion and contraction that stresses the bond until it gives way. This is why even small leaks, if left unaddressed, can lead to significant plaster problems down the line. It’s not always a dramatic flood; slow, persistent damp is often more insidious.
Common Moisture Intrusion Routes
So, where does this water come from? It’s usually one of a few main culprits:
Rising Damp: This happens when groundwater travels up through porous building materials from the ground. You often see it as damp patches or tide marks low down on walls, especially on the ground floor. Over time, salts from the soil can be drawn up into the plaster, which then attracts more moisture from the air, causing finishes to fail.
Penetrating Damp: This is when rainwater finds its way in through defects in the building’s exterior. Think cracked render, missing roof tiles, or poorly maintained pointing around windows and doors. These issues can lead to damp patches appearing higher up on walls or even on ceilings.
Condensation: In our increasingly well-sealed homes, condensation can be a big issue. Warm, moist air from everyday activities like cooking and showering hits cold surfaces (like walls and windows) and turns into water droplets. If ventilation isn’t great, this moisture can build up and start to affect the plaster, especially in bathrooms, kitchens, and bedrooms.
Salt Contamination and Repeat Damp Issues
One of the trickiest aspects of damp-related plaster failure is salt contamination. Many types of salts found in building materials are hygroscopic, meaning they actively draw moisture from the surrounding air. Even if you manage to fix the original source of the damp, these salts can remain trapped within the plaster and the wall. They’ll continue to attract moisture, leading to new blistering, powdering, or staining – making it seem like the problem has returned. This is why simply skimming over a damp patch often doesn’t work; the contaminated plaster needs to be removed and replaced with a suitable system to prevent repeat breakdown.
Dealing with damp is a bit like playing whack-a-mole if you don’t address the root cause. You might fix one spot, only for another to appear because the underlying moisture issue hasn’t been sorted. It’s always best to identify the source of the water before you start any plaster repairs, otherwise, you might find yourself doing the same job more than once. This is a common problem that homeowners face, and understanding the different types of damp is the first step to a lasting solution.
Investigating Other Causes of Blown Plaster
While moisture is a frequent culprit behind plaster problems, it’s not the only reason your plaster might start to fail. Sometimes, the issue boils down to how the plaster was put up in the first place, or simply the age of the building itself. It’s like baking a cake – if you mess up the ingredients or the oven temperature, the whole thing can go wrong, no matter how good the recipe is.
Impact of Poor Surface Preparation
Plaster needs a good foundation to stick to. If the surface underneath isn’t prepped right, the plaster just won’t hold. Think about trying to glue something to a dusty or greasy surface – it’s not going to last. This means the wall needs to be clean, free of dust, old paint, or anything that might stop the plaster from bonding properly. If there are holes or cracks, they need to be filled first. A wet background can also stop plaster from drying correctly, leading to problems down the line. Proper surface prep is key to a lasting plaster job.
Here’s a quick rundown of what good prep looks like:
Cleaning: Get rid of all dust, dirt, and grease.
Repairing: Fill any cracks or holes.
Drying: Make sure the surface is dry and free from loose bits.
Keying: Sometimes, the surface needs to be roughened up a bit so the new plaster has something to grip onto.
Consequences of Incorrect Timing or Products
Using the wrong materials or applying them at the wrong time can also cause plaster to fail. For instance, if you’re dealing with a wall that has salt contamination (often from old damp issues), you can’t just slap on any old plaster. You need a special system that can handle the salts, otherwise, the problem will just come back. Similarly, trying to plaster over a wall that’s still damp is a recipe for disaster. The moisture trapped behind the new plaster will eventually cause it to bubble and fail. It’s important to let the wall dry out completely and use products suited for the specific conditions. Rushing this process is a common reason why plaster patches fail again and again.
Degradation of Old or Tired Plaster Backgrounds
Older buildings have their own set of challenges. Over many years, plaster can just get tired. It might have had several layers of paint, numerous small repairs, or hairline cracks that have built up over time. Eventually, these older plaster backgrounds can start to lose their integrity. Sections might become weak, or previous repairs might start to fail. This isn’t always about a single big event; it can be a slow decline. When you see widespread cracking, it might be a sign that the underlying plaster is just worn out and needs more than just a quick fix. Understanding these underlying causes is key to addressing and repairing plaster cracks effectively.
Sometimes, plaster failure isn’t about a single, obvious cause. It can be a combination of factors, like a wall that’s seen better days and wasn’t prepped perfectly for a new coat. It’s about looking at the whole picture, not just the peeling paint.
Practical Steps for Repairing Blown Plaster
So, you’ve tapped the walls, seen the bulges, and maybe even found some powdery bits. Now what? Fixing blown plaster isn’t always a simple patch-up job, but with the right approach, you can get your walls back in shape. The key is to figure out the extent of the damage and, most importantly, if the moisture issue that likely caused it has been sorted.
Addressing Small, Localized Damage
If you’ve only got a small section that’s gone hollow or is flaking a bit, you can often tackle this yourself. First things first, you need to get rid of all the loose, crumbly plaster. Use a scraper or a putty knife to carefully chip away until you reach firm, solid plaster edges. Make sure the exposed background is clean – no dust, no old paint, nothing that will stop the new material from sticking. Sometimes, it’s a good idea to seal the background, especially if it’s very porous, to stop it from sucking all the moisture out of your repair compound too quickly. You can use a plaster’s bonding agent for this. Then, you’ll build up your repair in thin layers, letting each one dry a bit before adding the next. Sanding lightly between layers helps create a smooth finish. For minor cracks, you might find joint compound works well.
Managing Larger or Spreading Areas
When the problem is bigger – maybe a large bulge, or it seems to be spreading – you’re usually looking at removing more plaster. This is where you really need to be sure the original cause, like damp, has been fixed. If you replaster over a damp wall, you’re just setting yourself up for the same problem to pop up again. Scrape back to a solid substrate. If damp was the culprit, give the wall plenty of time to dry out completely. Rushing this step is a super common reason why plaster patches fail later on. For larger areas, you might need to replaster the whole section. It’s important that the surface you’re plastering onto is stable and ready for the new plaster. If you suspect salt contamination from old damp issues, you’ll need to remove all affected plaster and use a specific system that resists salts, rather than just skimming over it. This is a bit more involved, and sometimes it’s best to get advice.
Ensuring Proper Surface Preparation for New Plaster
No matter the size of the repair, preparation is everything. Think of it like building a house – a strong foundation is key. The surface needs to be sound, stable, and have a bit of ‘key’ for the new plaster to grip onto. This means removing any loose material, cleaning off dust and debris, and sometimes applying a specific primer or bonding agent. If you’re plastering over different materials, like old plaster onto brick, you might need a specific type of plaster or a bonding coat to make sure everything sticks together properly. Getting this prep right is the difference between a repair that lasts and one that fails again in a year or two. If you’re dealing with old, tired plaster, you might need to apply a bonding agent to cracks before filling them with plaster repair compound, making sure it’s worked in well and slightly overfilled for a smooth finish [f8ea].
When you’re patching up blown plaster, remember that the underlying cause needs to be addressed first. Simply covering up the problem won’t make it go away and will likely lead to more work down the line. Patience during the drying and preparation stages is your best friend here.
Preventative Measures for Long-Term Plaster Health
Keeping your plaster looking good and staying strong long-term really comes down to a couple of main things: controlling moisture and doing some basic upkeep. It’s not rocket science, but it does require a bit of attention.
Maintaining Exterior Water Management Systems
This is a big one. Think of your gutters, downpipes, and roof as the first line of defense against water getting into your walls. If your gutters are clogged with leaves and debris, water can overflow and run down the side of your house, seeping into the brickwork and eventually reaching your plaster. The same goes for leaky downpipes or damaged roof tiles. Regularly checking and cleaning these systems is a simple task that can prevent a whole lot of trouble down the road. It’s about stopping water before it even gets a chance to cause problems.
Clear gutters and downpipes at least twice a year.
Inspect roof tiles for damage or missing sections.
Check exterior pointing for cracks or gaps.
Ensure any external drainage systems are clear and functioning.
Improving Ventilation to Combat Condensation
Condensation is a sneaky culprit, especially in modern, well-sealed homes. When warm, moist air from cooking, showering, or even just breathing hits a cold wall or ceiling, it turns into water droplets. This moisture can then weaken plaster over time. Making sure your home has good airflow helps a lot. Simple things like opening windows after a shower, using extractor fans in kitchens and bathrooms, and even just airing out rooms regularly can make a significant difference. If you’ve got persistent condensation issues, you might even consider a ventilation system designed to bring in fresh air and remove stale, moist air.
Proper ventilation is key to managing internal moisture levels, preventing the conditions that lead to condensation and subsequent plaster damage.
Avoiding Sealant Traps for Moisture
Sometimes, in an effort to seal up drafts or cover up minor issues, people use the wrong kinds of sealants or paints. If you apply a coating that doesn’t allow the wall to breathe, and there’s moisture trapped behind it, you can actually make the problem worse. This is particularly true if you’re dealing with any underlying damp issues. Instead of sealing the moisture in, you want to allow the wall to dry out. Choosing breathable paints and finishes, especially on older properties, is often a better long-term strategy. If you’re unsure about the best products for your walls, it’s worth doing some research or asking for advice at a good building supply store.
Regular dusting with a microfiber cloth or soft brush can also help keep surfaces clean and free from dust that might hold moisture. For minor marks, a damp sponge with mild soap is usually sufficient; avoid anything too harsh that could damage the plaster finish [e1f5].
When to Seek Professional Assistance
Sometimes, the plaster issues you’re seeing are more than just a cosmetic problem or a simple DIY fix. It’s easy to get caught up trying to patch things yourself, but knowing when to call in the pros can save you a lot of time, money, and frustration down the line. If you’re noticing any of the following, it’s probably time to get an expert opinion.
Identifying Large or Spreading Failures
While small, isolated patches of blown plaster might be manageable with some careful work, larger areas are a different story. If you see that the problem is spreading, or if the affected area is quite extensive, it’s a strong signal that the underlying issue is significant. A hollow sound when tapping a wall indicates the plaster has detached and needs attention. This detachment can be widespread, and trying to patch over it without addressing the root cause will likely lead to repeat failures. For significant damage, it’s best to consult with a professional plasterer who can assess the full extent of the problem and recommend the most effective repair strategy, which might involve removing and replacing large sections of plaster. You can find professionals who offer thorough inspections.
Recognizing Structural Concerns
Plaster problems aren’t always just about the plaster itself. Sometimes, they’re a symptom of something bigger happening within the building’s structure. If you notice cracks that are widening rapidly, especially those that seem to run from corners or across large sections of the wall, it could indicate structural movement. Other signs might include doors or windows that start sticking, or visible sagging in ceilings or walls. These aren’t plaster issues; they’re structural ones. In these cases, it’s vital to get a qualified surveyor or structural engineer involved before you even think about plaster repairs. Fixing the plaster without fixing the underlying structural problem is like putting a bandage on a broken bone – it won’t solve the real issue.
Consulting Experts for Persistent Damp Problems
Damp is a common culprit behind plaster failure, but sometimes it’s a tricky one to pin down. If you’ve tried to fix damp patches before, only to see them reappear, or if you notice persistent salt deposits (efflorescence) on the surface, it suggests a deeper moisture problem. This could be rising damp, penetrating damp from external issues, or even a hidden plumbing leak. A general builder might not have the specialized knowledge to diagnose and fix these persistent damp issues effectively. Bringing in a damp specialist or a surveyor experienced in moisture problems can help identify the exact source of the water and advise on the necessary remedial work. This step is key to preventing future plaster damage and avoiding repeat repairs.
Here’s a quick checklist to help you decide:
Large or rapidly spreading plaster detachment.
Cracks that are widening, branching, or reappearing after filling.
Visible signs of structural movement (sticking doors, sagging walls).
Persistent damp patches that return after previous attempts to fix them.
Suspected water leaks from plumbing or external sources.
When in doubt, it’s always better to err on the side of caution. A professional assessment can provide peace of mind and prevent more costly repairs later on.
Wrapping Up
So, you’ve learned how to spot the signs that your plaster might be having a rough time – things like hollow sounds, weird cracks, or damp spots. Remember, these aren’t just little annoyances; they’re your walls telling you something needs attention. Ignoring them usually just makes the problem bigger and more expensive down the road. If you’re seeing these issues, especially if they keep coming back after you try to fix them, it’s probably time to get a professional to take a look. They can figure out if it’s a quick patch-up job or if a bigger repair is needed. It’s always better to deal with it now before it turns into a real headache.
Frequently Asked Questions
What are the main signs that my plaster is failing?
Watch out for cracks that are getting bigger or spreading, especially from corners. Also, listen for a hollow sound when you tap the wall, which means the plaster might be loose. Damp patches that keep coming back, or surfaces that feel crumbly and sandy to the touch, are also big red flags.
How can I tell if a crack in the plaster is serious?
Small, thin cracks that don’t change much might just be from the house settling. But if you see cracks that are wide, deep, branching out like tree roots, or keep showing up again after you’ve filled them, it’s a sign the plaster is losing its grip on the wall.
What does a hollow sound when tapping a wall mean?
When you tap a wall and hear a hollow sound, it means the plaster has pulled away from the surface behind it. It’s no longer firmly attached and is likely to crack or crumble soon. This is often called ‘blown’ plaster.
Can moisture cause plaster to fail?
Yes, moisture is a major culprit! Water getting into walls can weaken the bond between the plaster and what’s underneath. This can happen from rain leaking in, rising damp from the ground, or even too much condensation inside your home.
What should I do if I find blown plaster?
For small spots, you can carefully remove the loose plaster, clean the area, and then patch it up. If the problem is large or spreading, or if there’s a persistent moisture issue, it’s best to remove all the damaged plaster and replaster the area properly. Always try to find and fix the cause of the damage first.
When is it time to call a professional for plaster issues?
If the blown plaster covers a large area, seems to be spreading, or if you suspect there are bigger problems like structural movement or ongoing damp issues, it’s wise to get an expert opinion. They can properly diagnose the problem and ensure the repair is done right.