
So, you’ve noticed some weird bumps or bubbles on your plaster walls, huh? It’s a common thing, and honestly, it can be pretty annoying to look at. Whether it’s in your home or a business space, those little blisters aren’t just ugly; they can actually be a sign of bigger problems. This article is all about figuring out why plaster bubbling happens and what you can do about it, so you can get back to having nice, smooth walls without all the fuss.
Key Takeaways
Plaster bubbling, where raised areas form on walls, is often caused by moisture getting trapped behind the plaster layer.
Issues during plaster application, like poor surface prep or not letting layers dry enough, are common plaster bubbling causes.
Changes in temperature, especially rapid shifts, can make plaster expand and contract, leading to blisters.
Fixing plaster bubbles means finding and fixing the root cause, like leaks or high humidity, then removing damaged plaster and reapplying.
Preventing future plaster bubbling involves controlling moisture, using good materials, proper application, and good ventilation.
Understanding Plaster Blistering
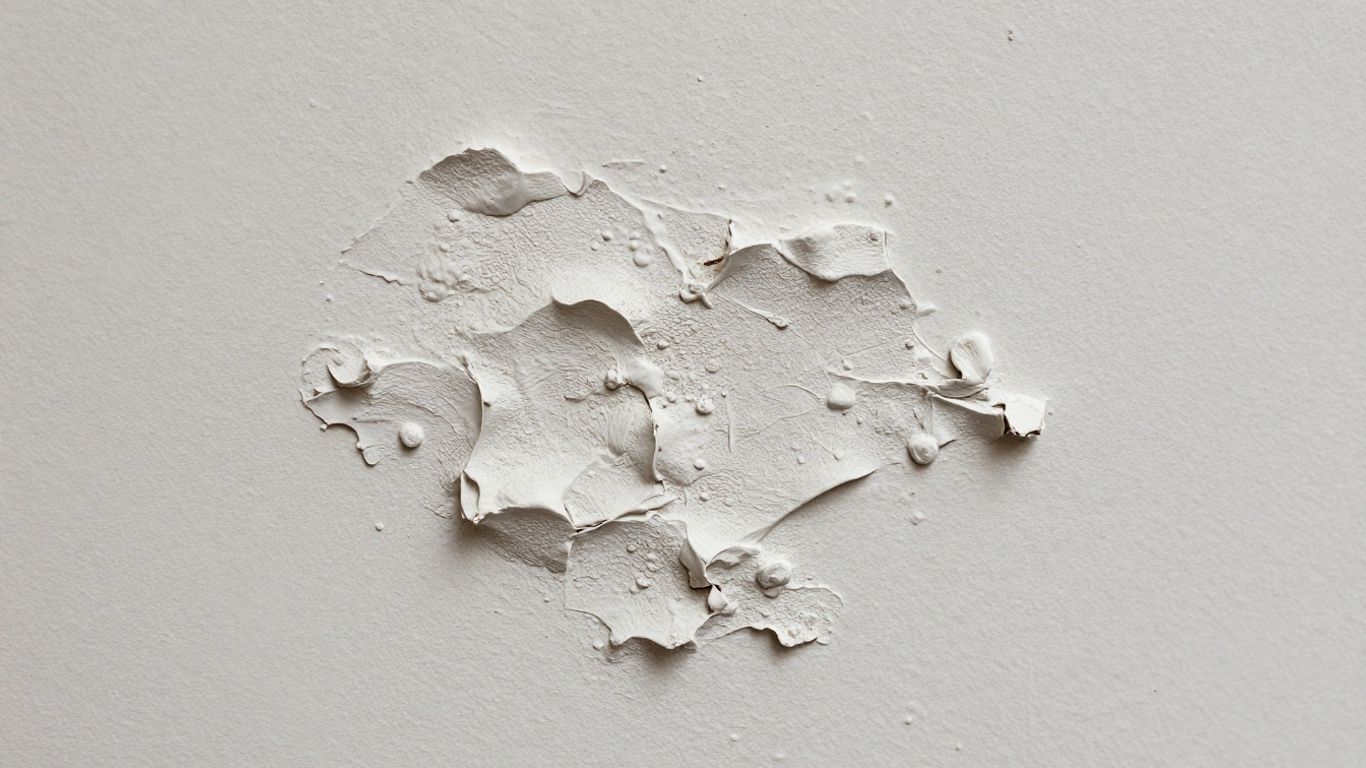
What Is Plaster Blistering?
Ever notice those little bumps or raised areas on your walls that look like they’re about to pop? That’s plaster blistering. It happens when a layer of plaster lifts away from the surface underneath, creating a bubble. These aren’t just an eyesore; they can be a sign that something’s not quite right with your walls. Blisters can appear on new plaster jobs or older walls that have been painted over. The main reason they form is that the plaster isn’t sticking properly to the base layer, and air or moisture gets trapped underneath.
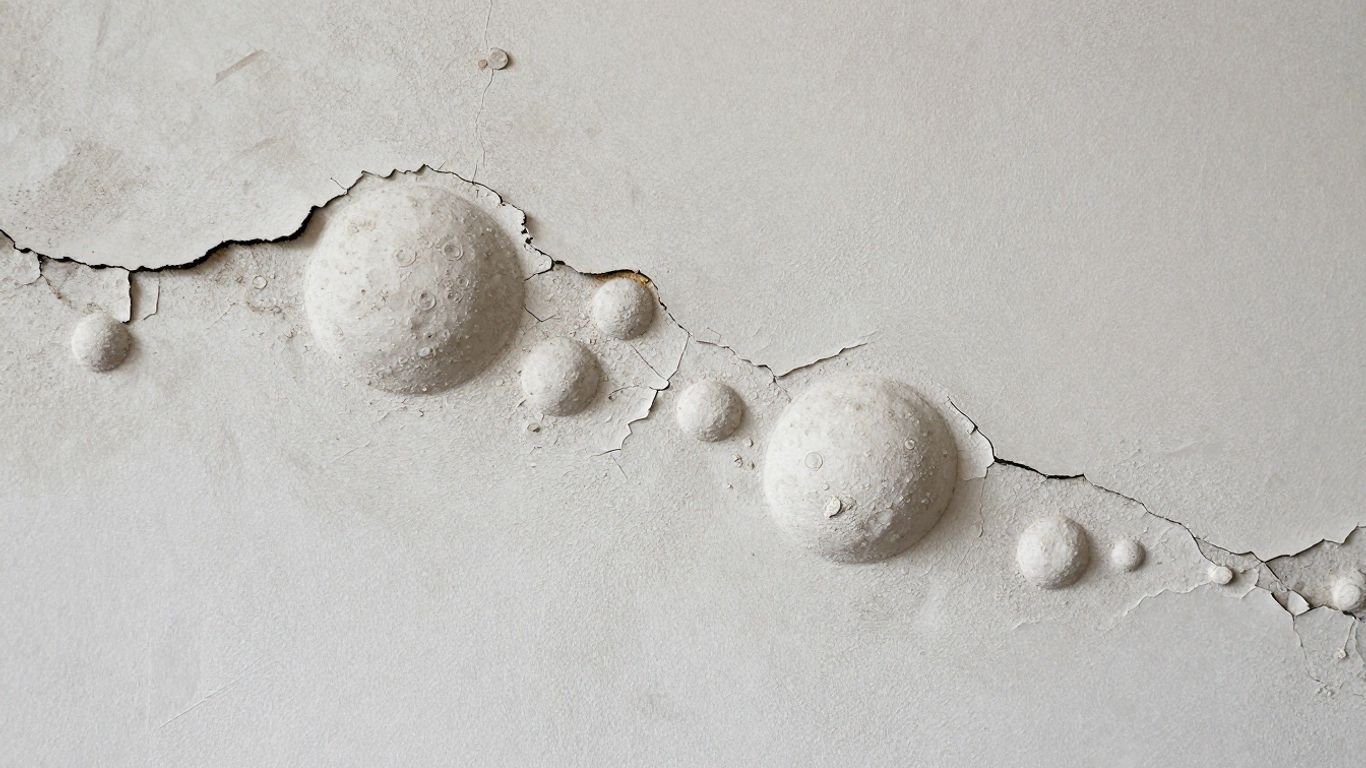
Why Plaster Bubbling Occurs
So, why does this happen? It usually comes down to a few key factors. Moisture is a big one, but so are issues with how the plaster was put on and even the environment it’s in. Think of it like baking a cake – if your ingredients are off, or you bake it at the wrong temperature, it’s not going to turn out right. Plaster is similar. When it doesn’t bond well, those trapped pockets of air or moisture push outwards, creating the blister.
The Impact of Ignoring Blisters
Leaving these little bubbles alone is usually not a good idea. They tend to get worse over time. What starts as a small bump can grow, and eventually, the plaster might crack or peel away completely. This not only looks bad but can also lead to more significant damage to your walls if the underlying cause isn’t fixed. It’s like ignoring a small leak in your roof – it’s better to deal with it before it causes major water damage.
It’s easy to dismiss a small blister as a minor cosmetic flaw, but it’s often a symptom of a deeper problem. Addressing it early can save you a lot of headaches and repair costs down the line. Think of it as a warning sign from your walls.
Moisture: A Primary Culprit
When plaster starts acting up, looking all bubbly and weird, moisture is usually the first thing to point a finger at. It’s like the silent saboteur of your walls. Think about it – plaster is porous, meaning it can soak up water. When that water gets trapped or can’t escape, it causes all sorts of problems, and bubbling is a big one.
How Humidity Affects Plaster
High humidity, especially if it hangs around for a while, can make plaster absorb moisture. This absorbed water causes the plaster to expand a bit. If this happens repeatedly, or if the plaster is already weak, it can start to lift away from the wall underneath. It’s not just about the air feeling damp; it’s about the plaster actually taking on that moisture and getting soft or unstable.
The Role of Water Leaks
This one’s a bit more obvious. If you’ve got a leaky pipe behind the wall, or maybe water is getting in from outside through a crack or a faulty gutter, that water has to go somewhere. When it hits the plaster, it gets absorbed. If the leak is constant, the plaster can become saturated, weakening its bond with the wall. As the moisture tries to escape, or as the plaster expands and contracts with the wetness, you get those tell-tale blisters.
Condensation and Trapped Moisture
Condensation is a sneaky one. It happens when warm, moist air meets a cooler surface, like your walls. Think about steamy bathrooms after a shower, or kitchens when you’re cooking. If there’s no good way for that moist air to get out, it settles on the walls. Over time, this constant moisture can seep into the plaster. It’s different from a leak because it’s coming from inside your home, but the result can be the same – damp plaster that starts to bubble.
Ventilation’s Influence on Moisture
Good ventilation is key to managing moisture. If your home doesn’t have enough airflow, moisture from everyday activities like showering, cooking, or even just breathing can get trapped. This trapped moisture has nowhere to go and will eventually find its way into your plaster. Poor ventilation basically creates a perfect environment for moisture to build up, leading to plaster problems. It’s like trying to dry clothes in a closed-up room – they just stay damp.
Here’s a quick rundown of how moisture causes issues:
Absorption: Plaster soaks up water from humidity, leaks, or condensation.
Expansion: Absorbed moisture causes the plaster to swell.
Weakening: The bond between the plaster and the wall breaks down.
Bubbling: Trapped moisture or air pushes the plaster away from the surface.
Ignoring moisture issues behind your plaster is a bad idea. It doesn’t just look ugly; it can lead to bigger problems down the line, like mold growth or structural damage. It’s always better to find the source of the damp and fix it before it gets worse.
Application and Curing Issues
Sometimes, the problems with plaster bubbling aren’t about the weather or leaks, but about how the plaster itself was put on and how it was allowed to dry. It’s like baking a cake – if you mess up the steps, the final product might not turn out right.
Improper Plaster Application Techniques
Putting plaster on isn’t just slapping it on the wall. There’s a right way to do it, and cutting corners can lead to trouble later. For instance, applying plaster over a surface that’s still wet or dirty is a big no-no. It stops the plaster from sticking properly. Also, using the wrong mix of plaster can make it too weak or too brittle. Think of it like trying to build a wall with weak cement; it’s just not going to hold up.
The Importance of Adequate Curing
Once the plaster is on, it needs time to do its thing – to dry and get strong. This is called curing. If you rush this part, you’re asking for problems. Maybe you put on a second coat too soon, or the environment was just too humid or too dry. This uneven drying stops the plaster from bonding right. Not letting plaster cure properly is a common reason for those annoying blisters. It needs the right conditions and enough time to set up.
Surface Preparation Mistakes
Before you even think about plaster, the surface underneath needs to be just right. If you skip cleaning the wall, or don’t fix any cracks or holes first, the plaster won’t have a good base to stick to. It’s like trying to paint a wall that’s covered in dust – the paint just won’t stick well. Making sure the surface is clean, dry, and smooth is a big part of the job that people sometimes overlook.
Rushing the plastering process, whether it’s in the application or the drying stages, often leads to a weak bond. This weak bond is the perfect setup for moisture or temperature changes to cause blisters later on.
Environmental Factors Contributing to Blistering
Sometimes, even if you do everything right with moisture control and application, the environment itself can throw a wrench in your plaster’s plans. It’s not just about what’s happening inside the walls; the world outside and the conditions inside your home play a big part.
Temperature Fluctuations and Plaster
Plaster doesn’t really like big swings in temperature. When it’s hot one minute and cold the next, the plaster can expand and contract. Think of it like a rubber band being stretched and then relaxed over and over – eventually, it can start to show signs of wear. For plaster, this can mean tiny cracks or, you guessed it, blisters forming as the material struggles to keep up with the changes. This is especially true if the plaster is still relatively new and hasn’t fully hardened.
External Environmental Influences
Where your house is located can also matter. If you live near the coast, for instance, the air might be more humid and carry salt particles. Over time, this can affect the plaster. Similarly, buildings that are constantly battered by wind or exposed to harsh sunlight without any protection can experience issues. The sun’s rays can dry out plaster too quickly, and wind can pull moisture away unevenly, both leading to problems. It’s a good idea to consider how your home’s location might be impacting your walls.
The Impact of High Temperatures on Drying
We touched on this a bit, but it’s worth repeating: high temperatures are a double-edged sword for plaster. While you want it to dry, drying too fast is bad news. Rapid drying, especially from direct sun or intense heat, can prevent the plaster from bonding properly to the underlying surface. It’s like trying to bake a cake at way too high a temperature – the outside burns before the inside is cooked. This incomplete bond is a prime setup for blisters to form later on. For fresh plaster, keeping it out of direct sunlight and strong winds is key to a good cure, which you can read more about in our guide to plastering techniques.
When plaster dries too quickly, the outer layer hardens before the inner moisture can escape. This trapped moisture then pushes outwards, creating bubbles or blisters as it tries to find a way out. The result is a weakened plaster surface that is prone to damage.
Addressing Existing Plaster Bubbles
So, you’ve spotted some bubbly or blistered patches on your plaster walls. It’s a common sight, and honestly, a bit of a headache. But don’t worry, it’s usually fixable. The first thing to remember is that just slapping on some new plaster over the top won’t solve the real problem. You’ve got to figure out why it’s happening before you can really fix it. Think of it like trying to patch a leaky boat without finding the hole first – you’ll just be patching over and over.
Identifying and Fixing Moisture Sources
This is the big one. Bubbling plaster almost always points to moisture getting trapped somewhere. You need to play detective here. Are there any leaky pipes hidden in the walls? Is your roof doing its job, or is rain finding its way in? Sometimes, it’s simpler, like condensation building up in a bathroom or kitchen that doesn’t get enough air.
Check for leaks: Look for any signs of water damage around windows, doors, or where pipes enter the wall. Feel the wall – is it damp or cold?
Assess ventilation: Are your bathrooms and kitchen properly vented? If not, condensation is a likely culprit.
Consider external factors: Is there a drainage issue outside that might be pushing water towards your foundation and walls?
You absolutely must sort out the moisture problem first. If you don’t, any repair you do will just bubble up again later.
Removing Damaged Plaster
Once you’re confident the moisture source is dealt with, it’s time to get rid of the bad plaster. You don’t want to leave any loose or damaged bits behind. Grab a stiff putty knife or a scraper. Gently work it under the edges of the blistered areas. You want to peel away all the plaster that’s loose or sounds hollow when you tap it. Be careful not to dig too deep and damage the underlying wall material, whether it’s drywall or masonry. If the wall behind the plaster feels damp, let it dry out completely before moving on. This might take a day or two, or even longer depending on how wet it got.
Preparing the Surface for Repair
After you’ve scraped away all the damaged plaster, you’ll have an uneven patch. You need to make this area smooth and ready for new plaster. First, give the area a good clean. Brush away any dust or debris left from scraping. If the underlying wall is porous (like bare plaster or masonry), it’s a good idea to apply a primer. This seals the surface, stops the new plaster from drying out too quickly, and helps it stick better. Make sure you use a primer suitable for plaster or masonry. Let the primer dry completely according to the manufacturer’s instructions.
Reapplying Plaster for a Smooth Finish
Now for the actual repair. Mix up a small batch of plaster according to the product’s instructions. You want a consistency that’s easy to spread but not too runny. Using a plastering trowel or a wide putty knife, apply the plaster to the damaged area. Start by filling the low spots, pressing the plaster in firmly. Apply it in thin, even layers. It’s usually better to do two thin coats than one thick one. Let the first coat dry until it’s firm but not bone dry. Then, apply the second coat, smoothing it out as best you can to match the level of the surrounding wall. Once the final coat is dry, you might need to do a little light sanding with fine-grit sandpaper to get it perfectly smooth. Then, you can prime and paint the area to match the rest of your wall.
Preventing Future Plaster Bubbling
So, you’ve dealt with those annoying plaster bubbles and want to make sure they don’t come back. That’s smart thinking! It’s way easier to keep things looking good than to fix them later. The good news is, preventing this issue usually comes down to a few key practices that keep your walls happy and healthy.
Maintaining Moisture Control
This is probably the biggest one. If moisture is the main reason your plaster bubbled in the first place, then keeping it out is your top priority. That means fixing any leaks you find, whether it’s a leaky pipe in the wall or a problem with your roof. Don’t let those small drips turn into big problems. In areas like bathrooms or kitchens where humidity can get high, think about using a dehumidifier or just being more mindful of how much steam you’re creating. Keeping moisture levels in check is the most effective way to prevent plaster issues.
Ensuring Proper Application Practices
When it comes to applying plaster, how it’s done really matters. Make sure the surface you’re plastering is clean and dry before you start. Any dirt or old paint can mess with how well the new plaster sticks. Also, follow the instructions for mixing the plaster correctly – too much water or not enough can cause problems down the line. If you’re not sure about this, it might be worth looking into professional plastering services or at least doing some solid research.
Improving Ventilation in Problem Areas
Good airflow is your friend when it comes to preventing moisture buildup. Rooms that tend to get steamy, like bathrooms and laundry rooms, really need decent ventilation. This could mean making sure your exhaust fans are working properly and using them whenever you’re creating steam. Sometimes, just opening a window for a bit can make a big difference. Proper ventilation helps dry out the air and stops condensation from forming on your walls, which is a major cause of plaster problems.
Using Quality Plastering Materials
Don’t skimp on the materials you use. Investing in good quality plaster, primers, and paints can save you a lot of headaches later on. Cheaper materials might seem like a good deal at first, but they often don’t hold up as well over time, especially in challenging conditions. A good primer, for instance, can create a better bond and seal the surface, giving your plaster a more stable base to adhere to. It’s about building a wall that’s meant to last.
Wrapping Up: Keeping Your Plaster Smooth
So, we’ve talked about why plaster might decide to bubble up, and it usually comes down to moisture, how it was put on, or even just the weather. It’s not the end of the world, though. By figuring out what’s causing the problem – like fixing a leaky pipe or making sure there’s good airflow – you can usually sort it out. Remember, a little bit of prep work and paying attention to the conditions when you’re plastering or painting can save you a lot of hassle down the road. Keeping an eye on your walls and tackling issues early will help keep them looking good for a long time.
Frequently Asked Questions
What exactly is plaster bubbling or blistering?
Plaster bubbling, also called blistering, happens when small pockets of air or moisture get trapped under the plaster. This causes the plaster to lift away from the wall, creating a raised bubble or blister. It makes walls look bumpy and can eventually lead to the plaster peeling or cracking if not fixed.
What’s the main reason plaster starts to bubble?
The most common cause is moisture. When water gets behind the plaster, it weakens the bond between the plaster and the wall. This moisture can come from leaks in pipes, roofs, or even just high humidity in the air. As the moisture tries to escape, it pushes the plaster up, forming bubbles.
Can painting over old plaster cause this problem?
Yes, it can. If the original plaster has moisture issues or wasn’t prepared correctly before painting, applying new paint can trap that moisture. Also, painting certain types of paint (like oil-based over latex) without the right primer can cause adhesion problems that lead to blistering.
How do temperature changes affect plaster?
Big swings in temperature can make plaster expand and contract. This constant movement can stress the plaster, causing it to separate from the wall and form blisters, especially if it’s also dealing with moisture.
What should I do if I find bubbling plaster on my wall?
First, you need to find out why it’s bubbling. Look for any signs of leaks or dampness. Once you’ve found and fixed the source of the moisture, you can carefully scrape off the bubbled plaster, let the wall dry completely, apply a primer, and then reapply new plaster to create a smooth finish.
How can I stop my plaster from bubbling in the future?
The best way to prevent bubbling is to control moisture. Fix any leaks right away, make sure your home is well-ventilated (especially in bathrooms and kitchens), and ensure plaster is applied correctly to a clean, dry surface. Using good quality materials also helps a lot.