
So, you’re thinking about slapping some plaster right over that old wallpaper? It’s a question a lot of us homeowners wonder about, especially when we’re looking to save a bit of time or avoid the mess of stripping. While the idea of plaster over wallpaper might sound like a shortcut to smooth walls, the reality is a bit more complicated. Most pros will tell you to steer clear, and for good reason. Let’s break down why, and what you should really consider before you pick up that trowel.
Key Takeaways
Plastering directly over wallpaper is generally not recommended by professionals due to potential adhesion problems and a higher risk of future issues like bubbling or cracking.
While tempting for speed, plastering over wallpaper can lead to a poor finish because the wallpaper’s texture might show through, and moisture can cause it to detach.
In specific cases, like historical homes or when wallpaper is extremely difficult to remove, plastering over might be considered, but only with very careful preparation.
If you decide to plaster over wallpaper, thorough cleaning, sanding for grip, and applying a bonding agent are absolutely vital steps to improve adhesion.
The best practice for a durable and smooth wall finish is always to remove wallpaper completely before plastering, ensuring the plaster bonds directly to the wall surface.
Understanding the Risks of Plastering Over Wallpaper
Why Professionals Advise Against It
Most pros will tell you straight up: plastering over wallpaper isn’t the best idea. It’s not just a preference; there are real technical reasons behind it. The main issue is adhesion. Wallpaper acts like a barrier, a slick surface that plaster just doesn’t want to stick to well. Think of trying to glue something to a plastic bag versus gluing it to bare wood. The wallpaper’s surface, even if it feels a bit rough, isn’t designed to bond with plaster. This lack of a solid connection is where most problems start.
Potential for Adhesion and Finish Issues
Because the plaster isn’t bonding directly to the wall, it’s essentially just sitting on top of the wallpaper. Over time, this can lead to all sorts of headaches. The plaster might start to peel away from the wall, especially in areas where the wallpaper is already loose or has seams. You might also notice that the texture of the wallpaper, like any patterns or raised designs, starts to show through the new plaster. This means you won’t get that smooth, clean finish you’re probably hoping for. It’s a real pain to fix later on.
Moisture and Bubbling Concerns
Plaster needs to dry, and that process involves moisture. When you apply wet plaster over wallpaper, that moisture has to go somewhere. It can get trapped between the plaster and the wallpaper, or worse, soak into the wallpaper itself. This moisture can cause the wallpaper to expand and then contract as it dries, leading to bubbles and blisters forming under the plaster. These bubbles are a clear sign that the plaster isn’t properly adhered and is likely to fail. It’s a common problem that often means you have to start all over again, removing both the wallpaper and the failed plaster.
When Plastering Over Wallpaper Might Be Considered
Look, most of the time, you’ll want to get that old wallpaper off before you even think about plastering. It’s just the better way to go, really. But sometimes, you’re in a bit of a bind, and you might consider plastering over it. It’s not ideal, but let’s talk about when it might make sense.
Historical Property Considerations
If you’re dealing with an older home, especially one that’s listed or has some historical significance, you might run into trouble trying to strip the wallpaper. Sometimes, the original plaster underneath is really delicate, or maybe it’s even a lime plaster that could be damaged by the stripping process. In these cases, if the wallpaper is stuck on there good and tight, and you’re worried about causing more harm than good by removing it, plastering over it could be a way to go. You’ve got to be super careful, though, and make sure whatever you’re putting on top is compatible.
Extremely Difficult Wallpaper Removal Scenarios
We’ve all been there, right? You start peeling off wallpaper, and it comes off in tiny little shreds, leaving half the paper and a ton of paste behind. Sometimes, you’ve got multiple layers of old wallpaper, or it’s been on there for ages with some super-strong adhesive. If you’ve tried everything – scoring, steaming, soaking – and it’s just not budging without taking chunks of the wall with it, you might have to consider plastering over it. It’s a last resort, for sure, but sometimes it’s the only practical option if you can’t get the wall clean.
Time-Sensitive Project Constraints
Projects can get tight on deadlines, and sometimes you just don’t have the luxury of spending days or even weeks scraping off wallpaper. If you’re on a strict schedule, maybe for a rental property turnover or a specific event, and the wallpaper is in decent condition (no major peeling or bubbling), you might decide to plaster over it to save time. This is a decision that carries risks, so you need to weigh the time saved against potential future problems. It’s a gamble, and you’re hoping the wallpaper holds up under the new plaster.
Critical Preparation Steps If You Must Plaster Over Wallpaper
Look, sometimes you just gotta do what you gotta do, right? Maybe you’re in a real time crunch, or the wallpaper is just so old and stuck on that removing it feels like a Herculean task. If you’ve decided that plastering over wallpaper is your only option, then you absolutely must get the prep work spot on. Skipping steps here is a recipe for disaster, and trust me, you don’t want to see your new plaster job start peeling off in a few months.
Thorough Surface Inspection and Cleaning
First things first, give that wallpaper a good once-over. You’re looking for any loose bits, any areas that are already peeling or bubbling. Any compromised section of wallpaper is a weak point where plaster can fail. If you find any loose bits, try to secure them as best you can with a suitable adhesive, or even cut them out and fill the tiny gap if it’s small enough. Then, you need to clean the surface. Use a mild detergent solution and a sponge to wipe down the entire wall. You want to get rid of any dust, grime, or grease that might be sitting on the wallpaper. Rinse it off with clean water and let it dry completely. You can’t plaster over a dirty surface, wallpaper or not.
Sanding for Improved Adhesion
This is a big one. Wallpaper is often smooth and non-porous, which plaster doesn’t like to stick to. You need to create a bit of a ‘key’ for the plaster to grip onto. Grab some medium-grit sandpaper – nothing too aggressive that you rip the wallpaper, but enough to scuff up the surface. Go over the entire wall, paying attention to any shiny areas. The goal is to dull the surface and create tiny scratches that the plaster can grab onto. After sanding, wipe down the wall again with a damp cloth to remove all the dust. This step is super important for getting the plaster to actually stick.
Applying Bonding Agents and Securing Edges
Now for the real insurance policy: a bonding agent. You’ll want a specific bonding agent designed for non-porous surfaces. Think of it like a super-strong primer. Apply it evenly over the sanded wallpaper according to the manufacturer’s instructions. This stuff is usually a bit sticky and will give the plaster a much better surface to adhere to. While the bonding agent is still tacky (or as directed), pay extra attention to the edges and seams of the wallpaper. You might want to use a bit of scrim tape along the main seams and corners to give them extra reinforcement. Cut out any internal corners neatly and tape them too. This helps prevent the plaster from cracking later on.
Remember, even with all these prep steps, plastering over wallpaper is still a gamble. The wallpaper itself is a layer that wasn’t designed to hold plaster. It’s always best practice to remove the wallpaper entirely before plastering. If you’re in a bind and have to plaster over it, be aware that the finish might not be as durable or long-lasting as a properly prepared wall. Consider this a temporary fix or a solution for a situation where removal is genuinely impossible.
It’s also a good idea to do a small test patch in an inconspicuous area first. Let it dry completely and then give it a good tug to see how well the plaster is sticking. If it peels off easily, you know you’ve got more work to do on your preparation, or you might need to reconsider plastering over it altogether. For more on preparing walls for plastering, check out tips for successful application.
The Professional Approach: Wallpaper Removal Best Practices
Okay, so you’re thinking about plastering over wallpaper. While it might seem like a shortcut, most pros will tell you it’s usually not the best idea. The real deal, the way the experienced folks do it, is to get that wallpaper off first. It just sets you up for a much better, longer-lasting finish.
Scoring and Stripping Techniques
This is where you start breaking down the wallpaper’s defenses. You’ll want to grab a scoring tool – it looks a bit like a tiny pizza cutter with little spikes. This tool makes tiny holes all over the wallpaper. Why? So the stripper solution can actually get under the paper and do its job. After scoring, you’ll apply a good quality wallpaper stripper solution. Don’t skimp here; a cheap one might not cut it. You’ve got to let it soak in, usually about 10 to 15 minutes, maybe a bit longer if it’s stubborn. This is the part where patience really pays off.
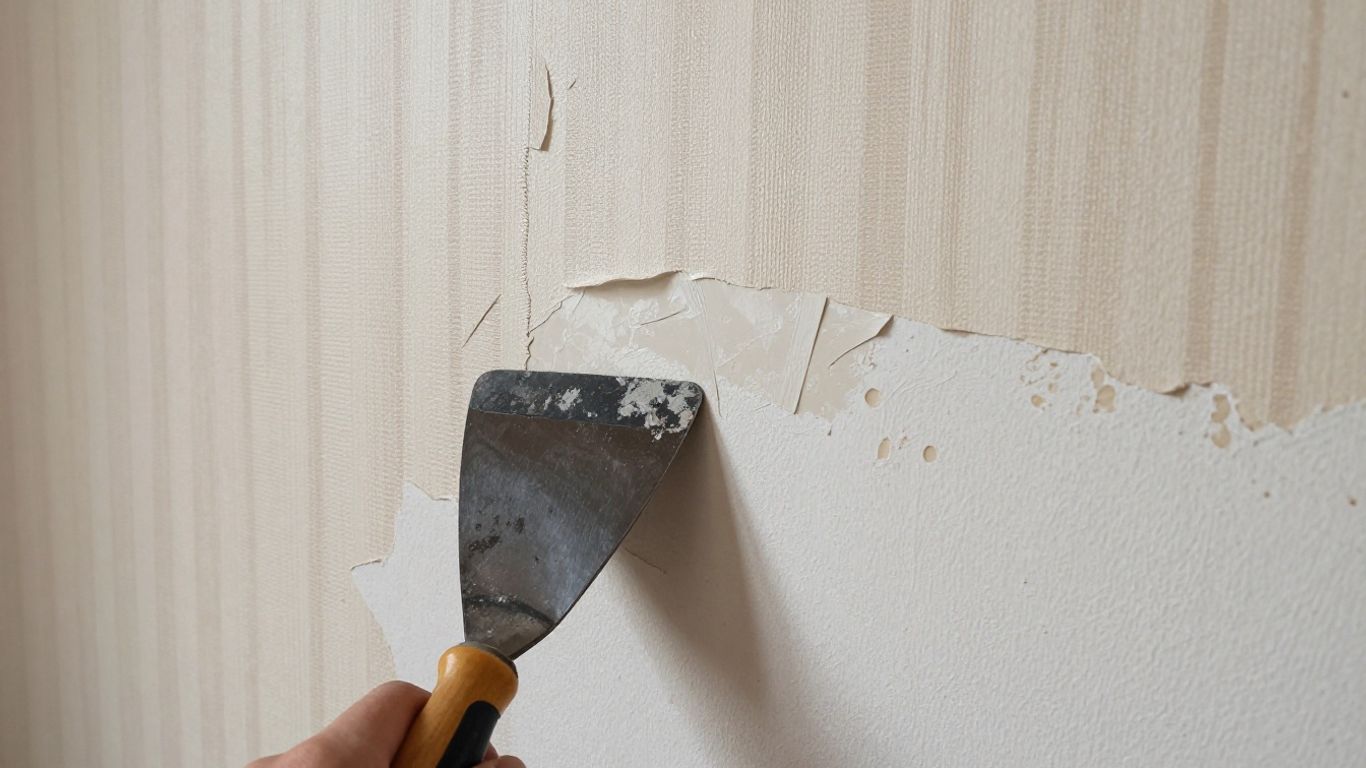
Scraping and Cleaning the Wall Surface
Once the stripper has done its work, it’s time for the scraping. You’ll need a good set of scrapers – different sizes can be helpful. Start gently, working from the edges or any loose bits. The goal is to lift the wallpaper off without gouging the drywall underneath. It can be a bit of a workout, and you’ll likely end up with a mess of soggy paper and paste. Keep a bin handy for the debris. After you’ve got all the main wallpaper off, you’ll need to wash the wall down. Use a sponge and some clean water to get rid of any leftover paste residue. This step is super important because old paste can cause all sorts of problems later on.
Priming for Optimal Plaster Adhesion
After the wall is clean and dry, it’s time for a primer. This isn’t just any old paint primer. You’ll want a specific bonding agent, often a PVA solution, that’s designed to help new plaster stick to the prepared surface. It acts like a bridge between the wall and the plaster. You just roll or brush it on, making sure to cover the entire area. Some people like to test a small spot first, just to be sure everything is going to stick well. This prep work might seem like a lot, but it’s what separates a job that looks good for a year from one that looks good for a decade. It’s really about setting the stage for a solid plaster finish, and you can find good wallpaper removal supplies to help with this.
Essential Tools and Materials for Plastering Success
Alright, so you’ve decided to plaster over that old wallpaper, or maybe you’re just getting ready for a proper plastering job. Either way, having the right gear makes a world of difference. It’s not just about slapping some plaster on; it’s about having the right tools to do the job well and the materials that will actually stick and last.
Gathering Your Plastering Tools
First off, you’ll need some basic tools. A plasterer’s hawk is pretty handy for holding a bit of plaster while you work, and you’ll definitely need a trowel for spreading it. Don’t skimp on the trowel; a good one makes application much smoother. You’ll also want a sturdy bucket for mixing your plaster – maybe even two, so you can have one for mixing and one for water.
Here’s a quick rundown of what you should probably have:
Plasterer’s Hawk: For holding plaster as you work.
Trowels: Various sizes can be helpful, but a good medium-sized one is a must.
Mixing Bucket: A strong, clean bucket for mixing plaster.
Sanding Tools: Sandpaper (various grits) and a sanding block for smoothing.
Utility Knife: Useful for trimming and other small tasks.
Measuring Tools: For getting your mix ratios right.
Selecting the Right Plastering Materials
Choosing the right materials is just as important as the tools. For most interior jobs, a gypsum-based plaster is common and works well. You’ll also need a good quality PVA adhesive or a specific plaster bonding agent. This is what helps the plaster grip onto the surface, especially if you’re plastering over something tricky.
When you’re mixing plaster, pay close attention to the manufacturer’s instructions. Getting the consistency wrong is a super common mistake that leads to all sorts of problems down the line, like cracking or poor adhesion. Aim for something like thick cream – smooth and workable, not too runny and not too stiff.
For protecting your space, you’ll need dust sheets. Don’t just use old bedsheets; get some proper plastic ones that won’t let the fine plaster dust through. You’ll also want tape to secure them and maybe some bin bags for waste.
Protective Gear and Workspace Preparation
Safety first, right? Plastering can get messy and dusty. You’ll want some safety glasses to protect your eyes from dust and splashes. Gloves are a good idea too, to keep your hands from getting dried out by the plaster. If you’re working in a poorly ventilated area, a dust mask is a smart move.
Before you even open a bag of plaster, get your workspace ready. Move furniture out of the way or cover it completely with those dust sheets. Cover the floor too – plaster dust gets everywhere. If you’re working near electrical outlets, it’s best to turn off the power at the breaker and cover the outlets securely with tape and plastic bags. It’s better to be safe than sorry when it comes to electricity and wet plaster.
Common Pitfalls When Plastering Over Wallpaper
So, you’re thinking about plastering over wallpaper? It sounds like a shortcut, right? But let me tell you, it’s a path often littered with problems. Many homeowners jump into this thinking it’ll save time and effort, only to end up with a bigger mess than they started with. It’s not just about slapping plaster on; there are real issues that can pop up.
Insufficient Surface Preparation
This is probably the biggest culprit. If you don’t prep the wallpapered surface properly, the plaster just won’t stick right. Think of it like trying to glue something to a really smooth, waxy surface – it just slides off. The wallpaper itself acts as a barrier, and even if it seems stuck fast, the plaster might not bond well to it. This can lead to all sorts of headaches down the line.
Wallpaper Bubbling Under Plaster
This one’s a classic. When you apply wet plaster, it introduces moisture. This moisture can get trapped between the wallpaper and the wall, causing the wallpaper to expand and bubble. As it dries, these bubbles can become permanent, or worse, they might collapse later, taking the plaster with them. It’s like having a weak foundation; the whole thing can fail.
Uneven Finishes and Cracking Issues
Wallpaper, even if it looks smooth, often has a texture. This texture can show through the plaster, especially if you’re only applying a thin skim coat. You might end up with a bumpy or uneven finish that’s really hard to fix without starting over. Plus, the seams and edges of the wallpaper can become weak points. As the plaster dries and shrinks, it can pull on these areas, leading to cracks that spiderweb across your wall. It’s a real pain to deal with, and honestly, most of the time, it’s just not worth the risk. If you’re looking for a solid finish, removing the wallpaper first is usually the way to go. You can find some good advice on proper wall preparation if you decide to go that route.
Alternative Solutions to Plastering Over Wallpaper
Look, sometimes plastering over wallpaper just isn’t the best idea, and that’s okay. Professionals will tell you it’s a gamble, and honestly, they’re usually right. But if you’re in a bind or just want to explore your options, there are a few other ways to get a good finish without the headache of trying to plaster over that old paper.
Complete Wallpaper Removal and Re-Plastering
This is the gold standard, the way most pros would do it if they had the time and you had the budget. It involves getting every last bit of wallpaper off the wall. You score it, soak it, scrape it, and then clean the wall down until it’s bare. After that, you might need to do a bit of patching and then apply a PVA bonding agent to give the new plaster something solid to stick to. It takes longer, sure, but you know you’re starting with a clean slate. This method usually gives the best, most durable finish.
Utilizing Drylining with Plasterboard
Drylining, or plasterboarding, is a pretty neat alternative. Instead of plastering directly onto the existing wall (especially if it’s uneven or you’re worried about the wallpaper), you fix new plasterboard sheets directly over the old wall. You can screw or glue them on. Then, you tape the joints between the boards and skim over the whole lot with plaster. This creates a brand new, perfectly flat surface to plaster onto. It’s often quicker than removing multiple layers of stubborn wallpaper and can even add a bit of insulation.
Applying Specialist Wall Liners
There are these things called wall liners, sometimes called ‘heavy-duty lining paper’ or ‘mural paper’. They’re thicker and tougher than regular wallpaper. You hang these directly over your existing wallpaper. They’re designed to cover minor imperfections and provide a stable, smooth surface for you to then paint or even apply a skim coat of plaster over. It’s a bit like putting a fresh, strong skin on your wall. It’s not a perfect solution for every situation, but it can work wonders for hiding less-than-ideal wall conditions without full removal.
When considering alternatives, always think about the long-term. A bit more effort now can save you a lot of trouble down the road with peeling plaster or uneven finishes. It’s about getting it right the first time, even if it means taking a slightly different path than you initially planned.
So, Can You Plaster Over Wallpaper?
Alright, so we’ve gone over the whole deal with plastering over wallpaper. The short answer is, yeah, you can, but most pros will tell you it’s usually not the best idea. It’s a bit of a gamble, honestly. You might get away with it, especially if you do some serious prep work, but there’s always that nagging worry about it not sticking right or bubbling up later. If you’re aiming for a really smooth, long-lasting finish, taking the time to strip the old wallpaper off first is almost always the way to go. It’s more work upfront, for sure, but it saves you a headache down the road. Think about your walls, your budget, and how long you want the new plaster to look good. Sometimes, the extra effort is totally worth it.
Frequently Asked Questions
Can I really plaster directly over wallpaper?
While it’s technically possible to plaster over wallpaper, most pros strongly advise against it. Think of wallpaper as a barrier. It can prevent the plaster from sticking well to the actual wall. This often leads to problems down the road, like cracks or the plaster peeling off.
What happens if I plaster over wallpaper?
You might run into a few issues. The biggest concern is that the plaster won’t stick properly, leading to cracks or the whole thing falling off. Also, moisture from the plaster can make the wallpaper bubble up, ruining the finish. The texture of the wallpaper might even show through the new plaster, making it look bumpy.
When might it be okay to plaster over wallpaper?
In some rare cases, like in very old homes where removing wallpaper could damage historic walls, or if the wallpaper is incredibly stuck and removal would cause more harm than good, plastering over it might be considered. Also, if you’re super rushed for time, but this is risky.
What’s the best way to prepare if I have to plaster over wallpaper?
First, you absolutely must clean the wallpaper well. Then, you need to scuff it up by sanding it so the plaster has something to grip onto. Applying a special bonding agent is also a must. It’s wise to test a small, hidden spot first to see if it sticks before doing the whole wall.
What’s the professional way to handle wallpaper before plastering?
Professionals always recommend removing all the wallpaper first. They usually score the paper to let a special solution soak in, then scrape it all off. After that, they clean the wall thoroughly and might apply a bonding agent before plastering to make sure everything sticks perfectly.
Are there alternatives to plastering over wallpaper?
Yes! The best alternative is to remove all the wallpaper and then plaster. You could also cover the wallpaper with new plasterboard (drylining) or use special wall liner paper designed to go over existing surfaces before you paint or plaster.