
Thinking about plastering over concrete walls and ceilings in Bristol? It’s a common job, but getting it right makes a big difference. Whether you’re dealing with a damp patch or just want a smoother look, understanding the process is key. We’ll cover what you need to know, from prepping the surface to getting that professional finish, and even when to call in the local Bristol experts for plastering over concrete.
Key Takeaways
-
Proper preparation is vital when plastering over concrete. This includes fixing any damage and applying a keying solution for good adhesion.
-
Mixing plaster to the right consistency is crucial; too wet is hard to handle, too stiff is difficult to spread.
-
Skimming is a faster, often cheaper option for minor surface imperfections, while full plastering is better for more significant damage or unevenness.
-
Always get a few quotes when hiring local plasterers in Bristol to compare prices and services.
-
Be aware of common issues like plaster suction, cracking, and uneven surfaces, and know how to address them for a lasting finish.
Preparing Concrete Walls For Plastering
Before you even think about mixing up a batch of plaster, you’ve got to get those concrete walls and ceilings ready. It’s like prepping a canvas before painting – you wouldn’t just slap paint on a dirty, uneven surface, right? Doing this prep work properly is the difference between a plaster job that looks great for years and one that starts showing cracks or peeling off way too soon. Don’t skip these steps, seriously.
Assessing Wall Condition Before Plastering
First things first, take a good, hard look at the concrete. Is it dusty? Greasy? Are there any loose bits of render or old paint flaking off? You need to get rid of all that. Give the walls a good scrub down, maybe even a wash if they’re really grimy. Any dust or dirt left behind will stop the plaster from sticking properly. Also, check for any damp patches. If you’ve got a moisture problem, plastering over it won’t fix the root cause and will likely lead to bigger issues down the line. You might need to sort out any leaks or condensation problems first.
Repairing Cracks and Imperfections
Concrete surfaces aren’t always perfectly smooth. You’ll probably find some cracks, holes, or chipped areas. Small hairline cracks can often be filled with a suitable filler, but larger ones might need a bit more attention. If you’ve got deep holes or crumbling bits, you’ll want to chip away any loose material and then fill them in with a concrete repair compound or a sand and cement mix. The goal here is to get the surface as level and sound as possible before you apply any plaster. Think of it as patching up potholes before you pave the road.
Applying Keying Solutions for Adhesion
Concrete is a non-porous surface, meaning it doesn’t naturally absorb moisture or provide much ‘grip’ for plaster. This is where a keying solution comes in. You’ve got a couple of main options here. For a really smooth, dense concrete surface, you’ll likely need to apply a bonding agent or a specific plastering primer. These products create a slightly rougher, more receptive surface for the plaster to adhere to. Sometimes, a product called ‘PVA’ is used, but it’s important to use the right type and dilute it correctly, as it can sometimes cause problems if not applied properly. For older, more porous concrete, or if you’re plastering over existing render, a ‘render key’ or ‘grip coat’ might be more appropriate. These are often cement-based and give the plaster something solid to grab onto. Whichever you choose, make sure you let it dry completely according to the manufacturer’s instructions before you start plastering. This step is absolutely vital for a long-lasting finish.
The Plastering Process for Concrete Surfaces
Alright, so you’ve got your concrete walls and ceilings prepped and ready. Now comes the part where we actually get that smooth finish. It’s not just about slapping plaster on; there’s a bit of a rhythm to it, especially with concrete, which can be a bit tricky.
Mixing Plaster to the Correct Consistency
This is where a lot of people stumble. Get the mix wrong, and you’re in for a tough time. Too wet, and it’s like trying to spread soup on the wall – it just slides off. Too stiff, and you’ll be wrestling with it, leaving big ridges and making your arms ache. The sweet spot is usually like thick cream. You want it workable, but not so wet that it loses its shape. Most plasterers use an electric mixer for this, as it gets the consistency right without overworking it. Different backgrounds might need slightly different mixes, too. For rougher concrete, a slightly thicker mix can help fill those imperfections better.
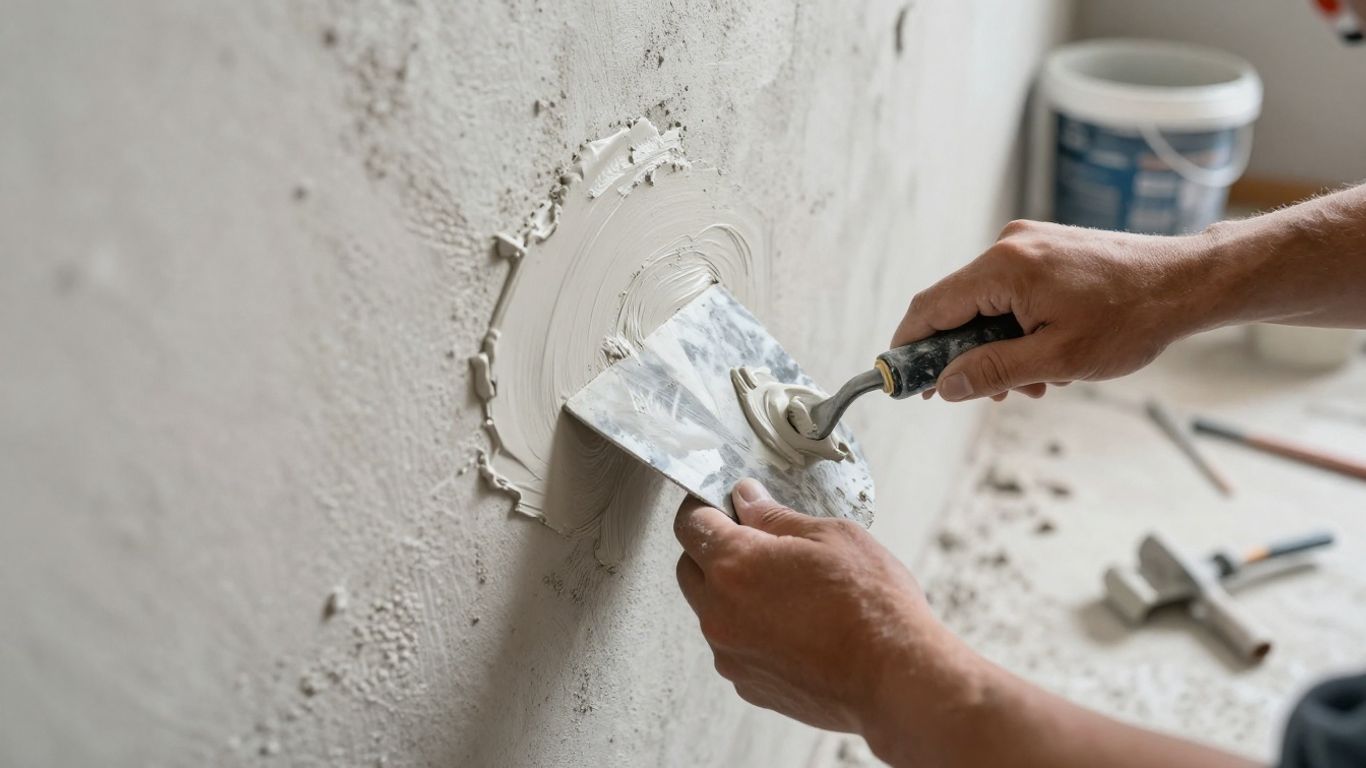
Applying the First Coat of Plaster
Once your plaster is mixed, it’s time for the first coat, often called the ‘scratch coat’ or ‘base coat’. You’ll apply this fairly generously using a trowel. Don’t worry about making it perfectly smooth at this stage. The main goal here is to get good coverage and create a surface for the next coat to stick to. After you’ve applied it, give it a quick ‘flatten’ with your trowel. This just means running the trowel over it to knock down any big ridges or high spots. Don’t get too hung up on perfection yet; this coat is all about building the foundation.
Applying the Second Coat for a Smooth Finish
After the first coat has had a bit of time to set up (you don’t want it bone dry, but not wet either), you’ll mix up another batch for the second coat. This is where you start to really shape the wall or ceiling. Apply this coat a bit more carefully, aiming to fill in the low spots and smooth out the surface. Again, give it a flatten with the trowel. As the plaster starts to firm up – you’ll see it ‘pulling in’ – you can work it more. Some people flick a little water on with a brush at this point, which helps you to smooth and finish the surface. This is also the time to really pay attention to the edges and corners, making sure you’re getting nice, clean lines. Keep your trowel clean as you go; dragging lumps of plaster around will just mess up your finish.
Achieving a Professional Finish
So, you’ve got your plaster mixed and the first coat is on. Now comes the part where you really start to shape things. It’s not just about slapping it on; it’s about working with the plaster as it starts to firm up.
Flattening and Filling Imperfections
After you’ve applied that first coat, you’ll want to give it a quick flatten. Don’t go crazy here, just use your trowel to knock down any big ridges or high spots. Think of it as a rough leveling. The goal isn’t perfection yet, just to get rid of the most obvious lumps. This step helps prepare the surface for the next layer and makes the whole process smoother.
Working the Plaster as It Firms
Once the second coat is on, you’ll notice the plaster starting to change. It begins to pull in, or firm up. This is your window to really start refining the surface. You can work it more with your trowel now, smoothing out those imperfections you noticed earlier. Some folks flick a little water from a brush onto the surface at this stage; this can help the plaster stay workable just long enough for you to get that smooth finish you’re after. Keeping your trowel clean is super important during this phase to avoid dragging any debris through the wet plaster.
Ensuring Sharp Edges and Clean Lines
Don’t forget the edges! Whether it’s where the wall meets the ceiling, or around door frames and skirting boards, these areas need attention. Make sure all gaps are filled and that the plaster isn’t drying out too fast in these spots. If you’ve used any beading or corner protectors, now’s the time to clean them off with the edge of your trowel. This gives you a nice, sharp line that looks really professional. It’s these little details that make a big difference in the final look.
Skimming vs. Full Plastering Concrete
When you’re dealing with concrete walls and ceilings, you’ve got a couple of main options for getting that smooth finish you want: full plastering or skimming. They sound similar, but they’re actually quite different in what they do and when you’d use them. It’s not just about slapping some plaster on; it’s about choosing the right method for the job.
When to Choose Skimming Over Plastering
Skimming is basically a thin coat of plaster applied over an existing surface. Think of it like a cosmetic touch-up. If your concrete walls are already in decent shape – maybe they’re just a bit uneven or have minor imperfections – skimming is probably your best bet. It’s ideal for creating a smooth, uniform surface that’s ready for paint or wallpaper. It’s not meant to fix major structural issues or build up a thick base. You’re essentially refining what’s already there. This is a great option if you’re looking for a quick refresh without the cost and time of a full plaster job. It’s also a good choice if you’re just trying to get a nice finish for selling your house, as it makes the place look much more cared for makes a house look well-maintained.
Benefits of Skimming for Concrete Walls
So, why skim? Well, for starters, it’s usually quicker and less expensive than a full plaster job. Since you’re only applying a thin layer (typically 2-3mm), it dries faster and uses less material. This means less mess and less disruption to your home. It’s also fantastic for achieving that super-smooth, modern look that’s perfect for painting. If you want a flawless finish without the roughness that sometimes comes with thicker plaster, skimming is the way to go. It really makes a difference in how the final paint job looks.
Understanding Full Plastering for Concrete
Full plastering, on the other hand, is a more substantial process. This is what you do when you need to build up a surface, cover significant damage, or create a solid base from scratch. It involves applying thicker layers of plaster, often 10-15mm or more. This method is great for leveling out really uneven concrete, filling large holes, or adding a bit of insulation. It’s a more robust solution that provides a durable, strong finish. You’d go for full plastering if the concrete surface is in rough shape or if you need to create a completely new, smooth wall.
Here’s a quick rundown:
-
Skimming: Thin coat, cosmetic finish, ideal for minor imperfections, faster, less material.
-
Full Plastering: Thicker coats, structural base, fixes major issues, levels uneven surfaces, more time and material.
Choosing between skimming and full plastering really comes down to the condition of your concrete walls and what you want the end result to be. Don’t try to skim over a wall that needs a full plaster job; it just won’t hold up.
If your concrete walls have significant damage, like deep cracks or crumbling sections, you’ll definitely need to consider full plastering. Skimming over these kinds of problems is like putting a band-aid on a broken bone – it won’t solve the underlying issue and will likely fail. You need that thicker application to build a stable foundation first. For minor cosmetic issues, though, skimming is a fantastic, cost-effective solution.
Hiring Local Plastering Experts in Bristol
When it comes to plastering concrete walls and ceilings, especially here in Bristol, you’ve got a few options. You could try to tackle it yourself, but let’s be honest, getting that smooth, professional finish on concrete is tricky business. That’s where bringing in the pros really shines. Finding good local plasterers means you’re getting someone who knows the area and likely has a solid reputation to uphold.
Getting Accurate Plastering Quotes in Bristol
Getting a quote might seem straightforward, but there’s a bit more to it than just asking for a price. You want to make sure you’re comparing apples to apples. Always get at least three written quotes from different plasterers. This helps you see the range of pricing and what’s included.
Here’s a quick rundown of what influences the cost:
-
Area Size: Obviously, bigger walls and ceilings cost more.
-
Wall Condition: Is the concrete rough, damaged, or just needs a light skim? More prep work means more time and money.
-
Type of Work: Are you looking for a full plaster job or just a skim coat? Skimming is usually less expensive.
-
Materials: The type of plaster and any necessary bonding agents or additives can affect the price.
Don’t just go for the cheapest option. Sometimes, a low quote can mean corners are being cut, which might cost you more in the long run. Look for detailed quotes that break down the costs, so you know exactly what you’re paying for. You can find trusted, local plasterers in Bristol who can provide these detailed estimates.
What to Expect from Bristol Plasterers
When a plasterer comes to your home, they’ll usually follow a pretty standard process. First, they’ll prep the area. This means protecting your floors and furniture with dust sheets and maybe masking tape around windows and doors. They’ll then assess the concrete surface. For concrete, they might need to apply a special bonding agent or ‘keying’ solution to help the plaster stick properly. This is a really important step for concrete surfaces.
After prep, they’ll apply the plaster. This often involves a couple of coats. The first coat, sometimes called a ‘scratch coat’ or ‘base coat’, goes on thick and is often scratched to give the next coat something to grip onto. Then comes the second coat, which is applied more smoothly. Finally, they’ll ‘flatten’ the plaster, using tools like a darby or a float, to get it as level as possible before it starts to set. The final finishing touches are done as the plaster firms up, aiming for that smooth, even surface you want.
The whole process can take a few days, depending on the size of the job and how long each coat needs to dry. It’s not a quick fix, but the end result is usually worth the wait.
Choosing the Right Plastering Service
When you’re looking for a plasterer, think about their experience, especially with concrete surfaces. Ask for references or look at photos of their previous work. A good plasterer will be happy to show you examples. It’s also wise to check if they are insured, just in case anything unexpected happens on the job. Remember, a professional job means a better finish and a more durable result for your walls and ceilings. Don’t hesitate to ask questions about their process, materials, and timelines. This helps build confidence and ensures you’re both on the same page before any work begins.
Common Issues When Plastering Concrete
Even with the best intentions, plastering concrete walls and ceilings can throw up a few curveballs. It’s not always a smooth ride, and knowing what might go wrong can save you a lot of hassle.
Addressing Suction and Key Issues
Concrete surfaces can be tricky because they don’t always absorb moisture (suction) evenly, and they might not have a good ‘key’ for the plaster to grip onto. If the concrete is too smooth or non-porous, the plaster might just slide off or, worse, peel away later. On the flip side, if the concrete is super absorbent, it can suck the water right out of the plaster mix too quickly, making it hard to work with and prone to cracking.
-
Too much suction: The plaster dries out too fast, leading to a weak bond and potential cracking.
-
Too little suction (or smooth surface): The plaster struggles to adhere, risking delamination.
-
Lack of key: The plaster has nothing to grip, making it unstable.
To sort this out, you’ll often need to apply a bonding agent or a specific ‘keying’ solution. These create a surface that the plaster can grab onto, whether it’s a rougher texture or a slightly tacky finish. It’s a bit like putting down a non-slip mat before you start tiling – it just makes everything stick better.
Preventing Cracking in Plaster
Cracking is probably the most common headache when plastering concrete. It can happen for a few reasons, often related to the issues above, but also due to movement or improper drying.
Here are some common culprits:
-
Drying too quickly: As mentioned, high suction or warm, dry conditions can pull moisture out of the plaster too fast, causing it to shrink and crack.
-
Movement: Concrete itself can expand and contract with temperature changes. If the plaster isn’t flexible enough or the base isn’t stable, cracks can appear.
-
Poor mixing: Plaster that’s too wet or too stiff can be more prone to cracking.
-
Insufficient coats: Trying to get a perfect finish with just one thick coat instead of building it up in layers can lead to stress and cracks.
Using scrim tape over any existing cracks or joints before plastering can help bridge these areas and prevent them from showing through later. Also, controlling the drying environment – avoiding direct sunlight or drafts – is key.
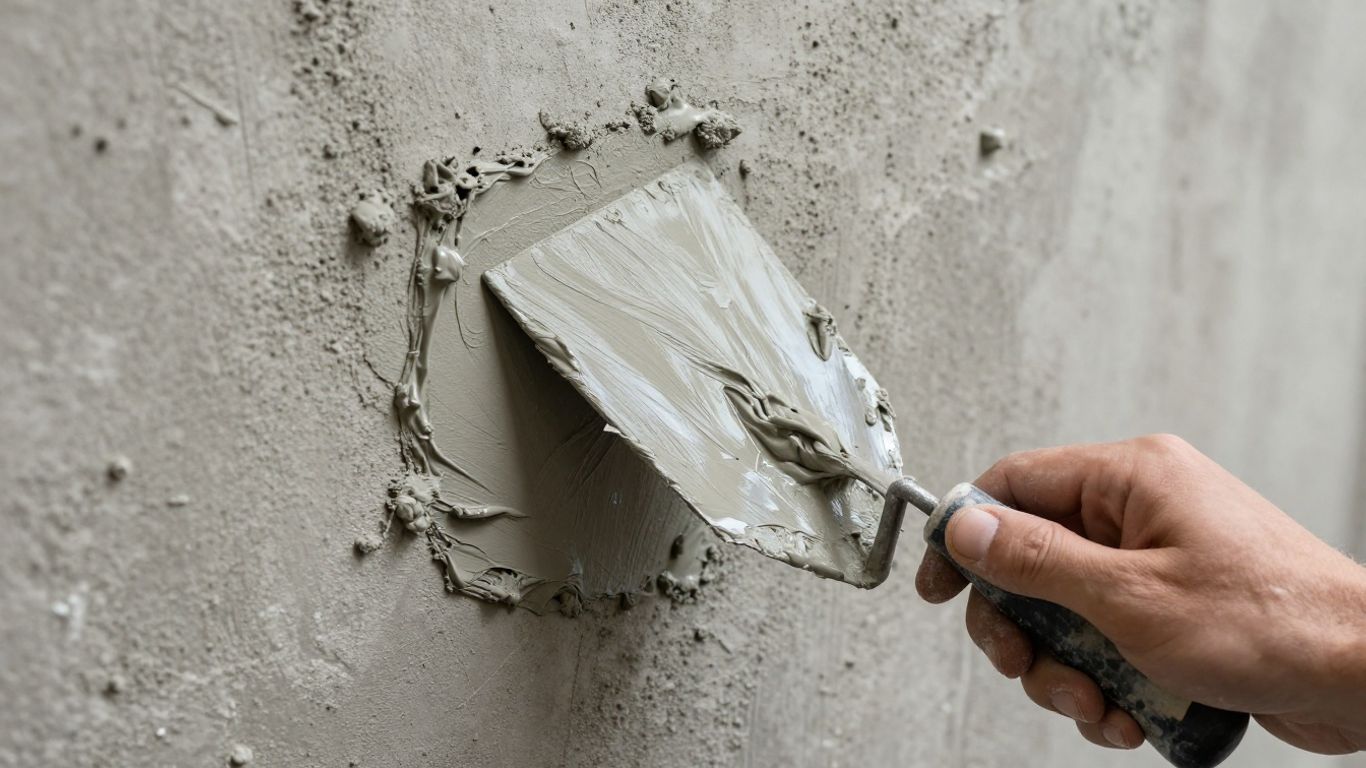
Dealing with Uneven Concrete Surfaces
Concrete walls and ceilings aren’t always perfectly flat. You might find bumps, dips, or general unevenness that makes getting a smooth plaster finish a real challenge. Trying to force the plaster to fill large voids in one go can lead to sagging or cracking.
When faced with significant unevenness, it’s often better to build up the plaster in thinner layers rather than trying to fill a deep hole with one massive application. Each layer needs a chance to set slightly before the next is applied. This approach takes more time but results in a much more stable and even finish.
For very uneven surfaces, a rougher plaster mix might be more forgiving, allowing you to build up the profile more easily. You might also consider using a render first to level out major imperfections before applying a final plaster coat. It’s all about preparing the surface properly so the plaster has a good foundation to work with.
Wrapping Up Your Plastering Project
So, there you have it. Plastering concrete walls and ceilings in Bristol, or anywhere really, takes a bit of know-how. We’ve covered getting the surface ready, mixing the plaster just right, and applying it smoothly. Remember, patience is key, especially with those drying times. Whether you’re doing a small patch-up or a whole room, taking your time and following these steps will get you a much better result. Don’t be afraid to get your hands dirty, but if it all feels a bit much, there are always local Bristol pros ready to help you get that perfect finish.
Frequently Asked Questions
What’s the main difference between plastering and skimming concrete walls?
Think of plastering as building up a whole new surface, especially if the concrete is rough or has damage. It involves applying thicker layers of plaster. Skimming, on the other hand, is like putting on a thin, smooth coat of makeup over an already decent surface. It’s mainly for fixing minor flaws and making things look perfect, using way less plaster and taking less time.
Do I really need to prep my concrete walls before plastering?
Absolutely! Concrete can be tricky because it’s so smooth. You need to make sure the plaster can stick well. This usually means cleaning the wall thoroughly and then applying a special ‘keying’ solution, like a primer or a rough-textured coat, to give the plaster something to grip onto. Skipping this step is a recipe for disaster, as the plaster might just peel off later.
How do I mix the plaster correctly for concrete walls?
Getting the mix right is key! You want it to be like thick cream – not too runny and not too stiff. If it’s too wet, it’ll be messy and hard to control. Too dry, and you won’t be able to spread it smoothly. It’s best to mix it gradually with water using an electric mixer until you get that perfect consistency. Different plaster types might need slightly different mixes, so always read the instructions.
What are common problems when plastering concrete, and how can I avoid them?
One big issue is ‘suction’ – if the concrete is too porous, it sucks the water out of the plaster too fast, making it hard to work with and prone to cracking. Using a good keying solution helps with this. Another problem is cracks, which can happen if the plaster dries too quickly or if there are underlying issues with the wall. Making sure the surface is well-prepped and the plaster dries evenly is super important.
How can I tell if my concrete walls need full plastering or just skimming?
Look closely at your walls. If there are big cracks, crumbling bits, or the surface is really uneven, you’ll probably need full plastering to build up a solid base. If the concrete is mostly sound but just has minor scuffs, dents, or an unpleasant texture, skimming is likely your best bet. It’s a quicker fix for surfaces that are already in pretty good shape.
Should I hire a professional plasterer in Bristol, and what should I look for?
Hiring a pro is often a good idea, especially for concrete, as it requires specific techniques. In Bristol, look for plasterers with good reviews and experience working with concrete. Always get a few quotes to compare prices and what’s included. Ask them about their preparation process and what kind of finish they guarantee. A good plasterer will be happy to explain everything and provide a clear estimate.